 Web Hosting
 Windows HostingBuilt for Windows apps and websites – stability, speed and flexibility
 Reseller HostingLaunch a hosting business without technical skills or expensive infrastructure
 Affiliate ProgramRefer customers and earn commissions from sales across our platform
 Domain SearchFind and secure a domain name in seconds with our quick lookup tool
 CO ZA Domains
 All DomainsExplore domain names from over 324 TLDs globally – all in one place
 Free Whois Lookup Tool South Africa
 VPS
VPS Website Builder
 Online ShopSet up a sleek eCommerce store with zero coding knowledge
 SSLs
SSLs SupportAccess help articles, how-tos, and everything about our services
 Blog
Blog Contact UsReach our team instantly via live chat or drop us an email
Your VPS just finished booting. The terminal sits blank, waiting for the first real command.
Docker turns that blank server into a place where containers run cleanly, side by side. Compose adds the ability to manage several containers with one file.
This guide walks through the full install, from a compatibility check to a working setup with permissions fixed. Follow each step in order, and you will end with a tested, working install.
Table of Contents
Before You Start: Check VPS Compatibility
Not every VPS can run Docker out of the box. Docker needs a real Linux kernel with namespace and cgroup support.
KVM-based VPS plans give you that kernel access. OpenVZ-based plans share a kernel across many users, so Docker will not run there.
Check these points before you install anything:
- Your VPS uses KVM virtualization, not OpenVZ
- At least 2GB of RAM and 1 vCPU, more if you plan to run a database alongside containers
- Ubuntu 22.04, 24.04, or Debian 11/12
SSHaccess with auserwhothassudorights
Quick Command to Confirm KVM vs OpenVZ
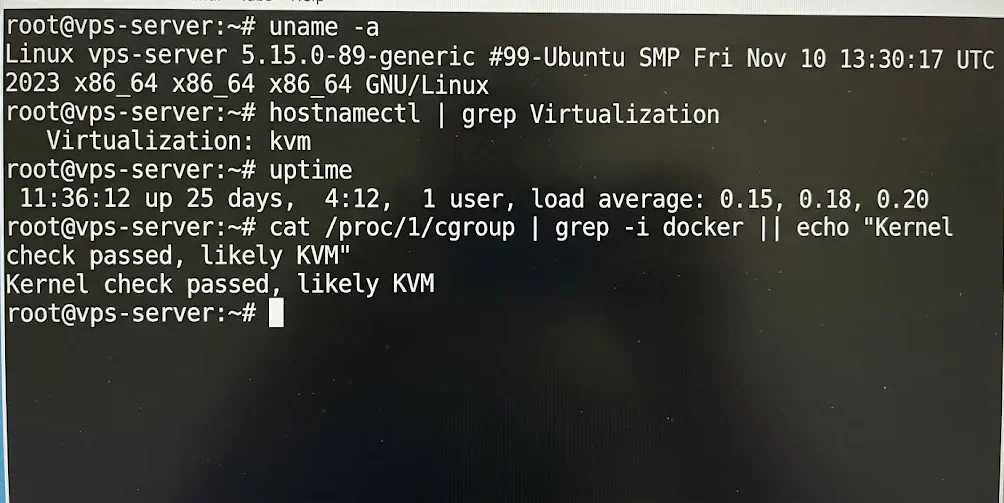
Run this command over SSH:
cat /proc/1/cgroup | grep -i docker || echo "Kernel check passed, likely KVM"If your host confirms OpenVZ or shows no kernel namespace support, contact your provider before going further.
A Truehost KVM VPS ships with the kernel access Docker needs, so this check takes seconds.
Step 1: Update the VPS and Remove Old Docker Packages
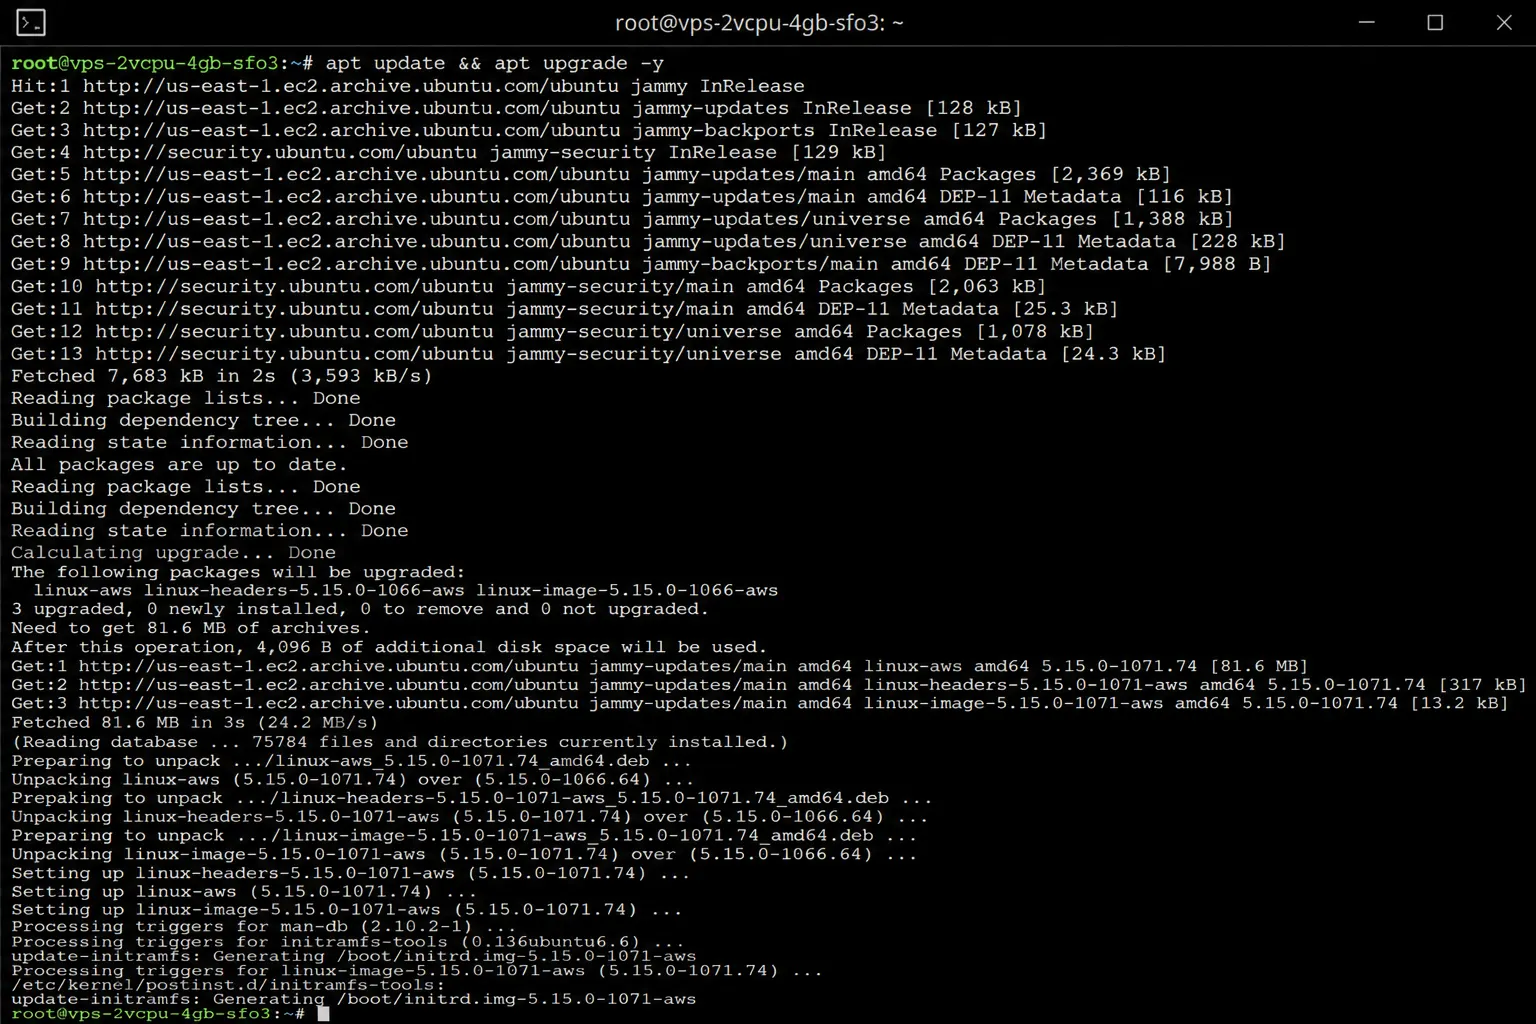
Start clean. Update your package list first, then remove any Docker packages the distro shipped by default. Those default packages lag behind the official releases and cause conflicts later.
sudo apt update && sudo apt upgrade -ysudo apt remove -y docker docker-engine docker.io containerd runc docker-compose 2>/dev/nullSome of those packages might not exist on a fresh server. That is normal. The command still runs, and apt simply skips what it cannot find.
Step 2: Install Docker Engine from the Official Repository
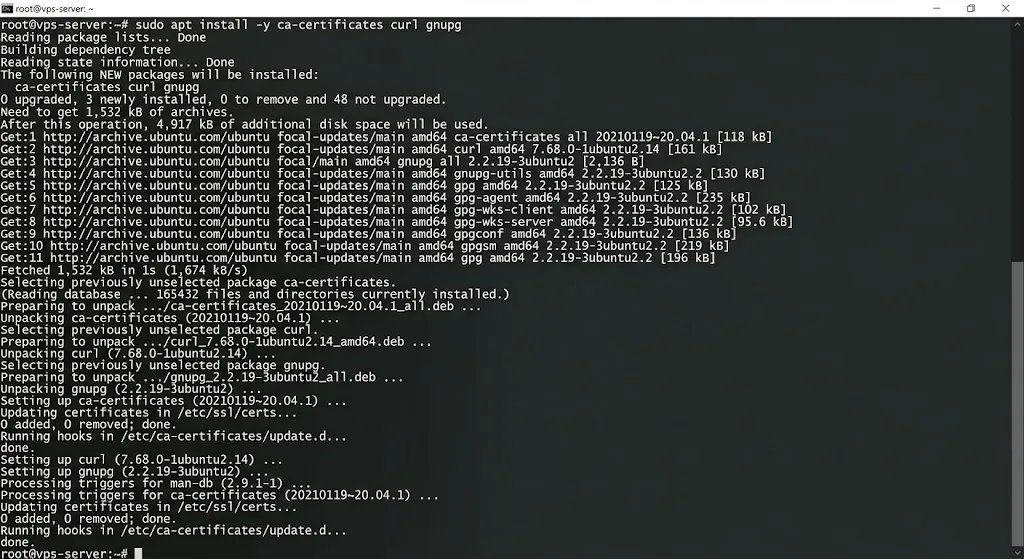
Docker’s own repository stays current, unlike the version bundled with Ubuntu or Debian. Add it in four short steps.
First, install the packages Docker needs to add a signed repository:
sudo apt install -y ca-certificates curl gnupgNext, add Docker’s GPG key so apt can verify the packages:
sudo install -m 0755 -d /etc/apt/keyringscurl -fsSL https://download.docker.com/linux/ubuntu/gpg | sudo gpg --dearmor -o /etc/apt/keyrings/docker.gpgsudo chmod a+r /etc/apt/keyrings/docker.gpgThen add the repository itself:
echo \

  "deb [arch=$(dpkg --print-architecture) signed-by=/etc/apt/keyrings/docker.gpg] \

  https://download.docker.com/linux/ubuntu \

  $(. /etc/os-release && echo "$VERSION_CODENAME") stable" | \

  sudo tee /etc/apt/sources.list.d/docker.list > /dev/null
Finally, install Docker Engine:
sudo apt updatesudo apt install -y docker-ce docker-ce-cli containerd.io docker-buildx-pluginSwap ubuntu for debian in the URLs above if your VPS runs Debian.
Step 3: Install Docker Compose the Right Way
Older guides tell you to download a standalone docker-compose binary. Skip that route. Docker now ships Compose as a plugin, installed alongside the engine.
sudo apt install -y docker-compose-pluginThe command changes slightly from the old binary. You now type docker compose with a space, not docker-compose with a dash.
Your existing compose.yml or docker-compose.yml files still work with the new command. Nothing about your project files needs to change.
Step 4: Fix Docker Permissions (Run Docker Without Sudo)
Right after install, every Docker command needs sudo in front of it. Fix that by adding your user to the docker group.
sudo usermod -aG docker $USER

newgrp docker
The newgrp command applies the change without a full logout. If it does not take effect right away, log out and back in over SSH.
One warning worth repeating: docker group membership gives a user root-level control over the host. Add trusted accounts only, and skip this step on shared or client-facing servers.
Step 5: Verify the Installation
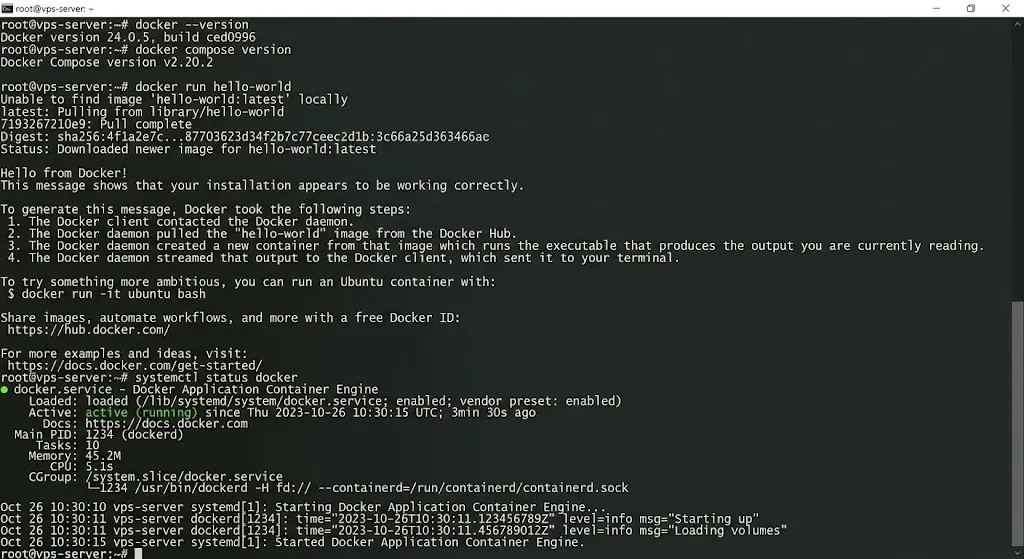
Confirm the install worked before you build anything on top of it.
docker --version

docker compose version

docker run hello-world

systemctl status docker
The hello-world container should pull, run, and print a short confirmation message. If it does, Docker and Compose are both working, and the daemon starts automatically on reboot.
Troubleshooting Common Install Errors
Even a clean install can hit a snag. These four errors show up most often, along with a fix for each.
1) Fixing GPG Key Errors (NO_PUBKEY) During Repository Setup
A NO_PUBKEY error means apt cannot verify the Docker repository’s signature. Remove the old key and repo file, then redo Step 2’s key and repository commands.
sudo rm -f /etc/apt/sources.list.d/docker.list

sudo rm -f /etc/apt/keyrings/docker.gpg
This usually happens when a previous install attempt left a stale or partial key file behind.
2) “Cannot Connect to the Docker Daemon” (Service Down or Wrong DOCKER_HOST)
This error means the Docker CLI cannot reach the daemon. Start with the simplest fix:
sudo systemctl start docker

sudo systemctl enable docker
If the daemon runs fine and the error persists, check for a stray DOCKER_HOST variable:
echo $DOCKER_HOST

unset DOCKER_HOST
An empty result means Docker looks for the local socket, which is what you want on a single VPS.
3) “No Space Left on Device” on Small VPS Plans
Smaller VPS plans fill up quickly once old images and stopped containers pile up. Clear them out with one command:
docker system prune -a --volumesCheck available disk space before and after with df -h to confirm the cleanup freed room. Run this command often on smaller plans, not just when you hit an error.
4) Recovering from an Interrupted apt/dpkg Install
A dropped SSH session or a memory shortage can interrupt apt mid-install and leave the package manager stuck.
sudo dpkg --configure -a

sudo apt --fix-broken install
Run those two commands in order, then retry the Docker install step that failed.
5) Configure the Firewall for Docker
Docker edits iptables rules directly when it starts, which can quietly bypass UFW settings. Handle firewall rules with that behavior in mind.
- Open only the ports your containers actually need, nothing broader
- Never expose the Docker daemon’s TCP socket without
TLS, since an open socket allows remote control - If you use
UFW, add explicit rules for Docker’s published ports rather than relying onUFWalone to block traffic
A misconfigured firewall on a Docker host is a common way small VPS setups get compromised. A few minutes spent here saves a lot of cleanup later.
What to Deploy First
With Docker and Compose both working, pick a small first project instead of a complex stack.
- Nginx or Traefik as a reverse proxy, with a free SSL certificate through Let’s Encrypt
- A single database container is paired with a memory limit flag, so it cannot consume the whole VPS
- A self-hosted tool such as n8n, which runs cleanly as one Compose file and gives quick, visible results
Each of these builds directly on the install you just finished, without adding much extra complexity.
FAQs
Do I need to install Docker Compose separately from Docker Engine?
Yes, on most distros. Docker Engine and the Compose plugin come from separate packages. The docker-compose-plugin package covers Compose and installs in one command, right after the engine.
How much RAM does my VPS actually need to run Docker?
2GB covers Docker Engine and a handful of lightweight containers. Add more RAM for databases or anything that caches heavily, since those containers use memory quickly.
How do I update Docker once it’s installed?
Run sudo apt update && sudo apt upgrade -y. Docker’s official repository, added in Step 2, keeps your install current with each system update.
Are Docker containers the same thing as a VPS virtual machine?
No. A virtual machine runs a full guest operating system on top of a hypervisor. A container shares the host’s kernel and only packages the app and its dependencies. It starts quicker and uses less memory.
Set Up Docker on Vps
A working Docker and Compose install comes down to five steps in order, plus a firewall check most guides skip. Compatibility first, clean packages second, correct permissions always.
From here, the next move is deploying something real on top of it. That could be a reverse proxy, a database, or a self-hosted tool.
Patching, monitoring, and security updates take real time. If you’d rather skip that work, Truehost’s managed VPS plans ship Docker-ready. You go from purchase to docker compose up in minutes.