 Web Hosting
 Windows HostingBuilt for Windows apps and websites – stability, speed and flexibility
 Reseller HostingLaunch a hosting business without technical skills or expensive infrastructure
 Affiliate ProgramRefer customers and earn commissions from sales across our platform
 Domain SearchFind and secure a domain name in seconds with our quick lookup tool
 CO ZA Domains
 All DomainsExplore domain names from over 324 TLDs globally – all in one place
 Free Whois Lookup Tool South Africa
 VPS
VPS Website Builder
 Online ShopSet up a sleek eCommerce store with zero coding knowledge
 SSLs
SSLs SupportAccess help articles, how-tos, and everything about our services
 Blog
Blog Contact UsReach our team instantly via live chat or drop us an email
You just got root access to a dedicated server. The login prompt sits there, blinking, and your domain still points nowhere.
That gap between “I have a server” and “my site is live” is where most first-timers stall.
This guide closes that gap, step by step, with no filler and no sales pitch attached.
Whether you’re setting this up for a South African e-commerce store or a growing agency portfolio, the process below works the same way.
Grab your server credentials and your domain login, and let’s get into it.
Table of Contents
What You Need Before You Start
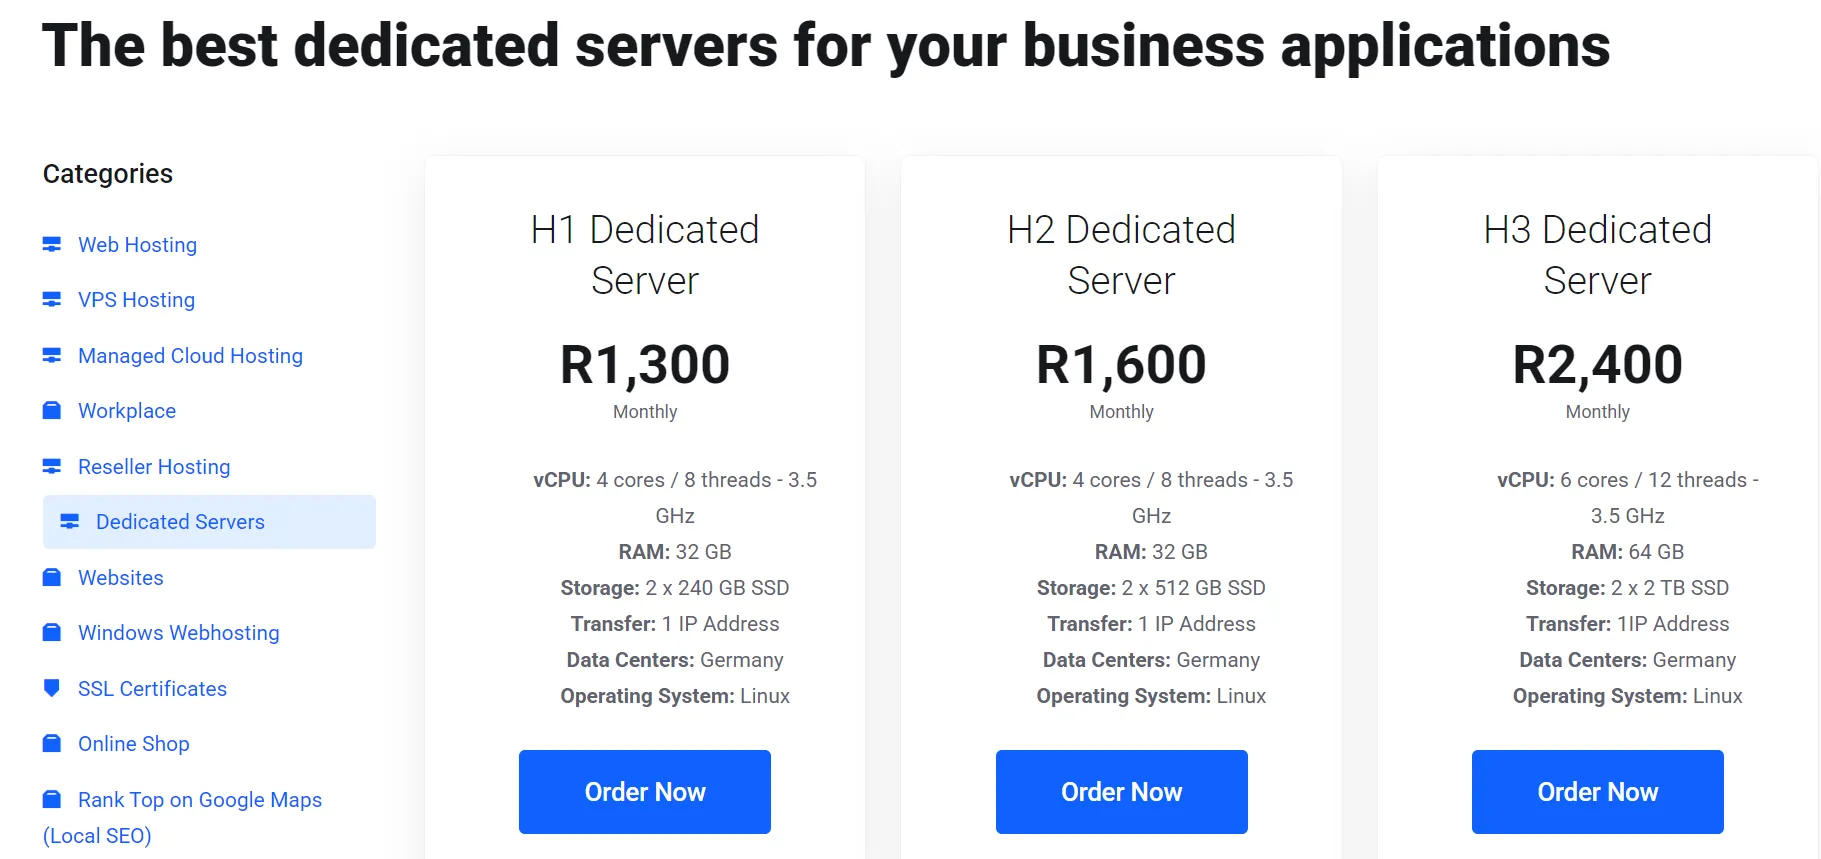
Before you touch the terminal, gather a few things. Missing any of these will slow you down halfway through.
- Server specs that match your workload: check CPU cores, RAM, and SSD storage against expected traffic
- A domain name already registered, with .co.za domains routed through a ZADNA-accredited registrar.
- An SSH client on your machine, such as Terminal on Mac or PuTTY on Windows
- A decision on managed versus unmanaged hosting, made before you start, not halfway through
- Your server credentials from your provider: root login, static IP address, and data center location
Once you have all five, you’re ready to log in.
Step 1: Choose Your Operating System and Access the Server
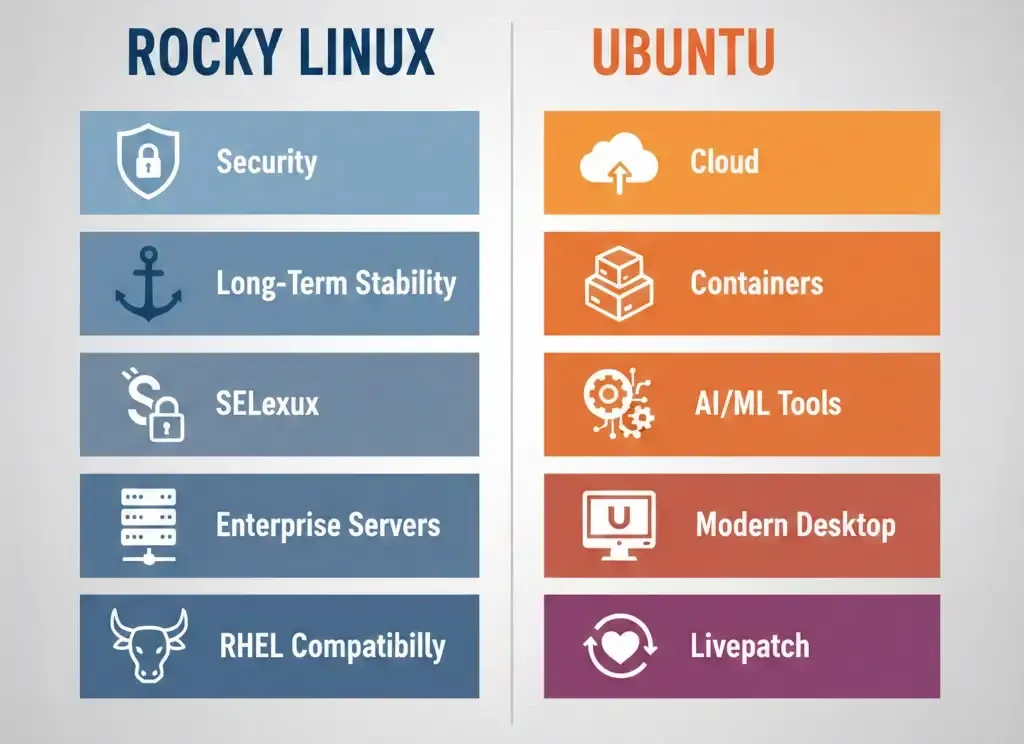
Your first real decision is the operating system. Most website workloads run best on Linux, so Ubuntu or AlmaLinux are solid picks.
Windows Server only makes sense if your application specifically needs it.
Log in to the server through SSH using the static IP your provider gave you. Once you’re in, run a full system update right away. On Ubuntu, that means:
apt update && apt upgrade -yOn AlmaLinux, the equivalent is:
dnf update -yThis step patches known vulnerabilities before you install anything else. Skipping it leaves the server exposed from the first minute it’s live.
Step 2: Point Your Domain to the Server
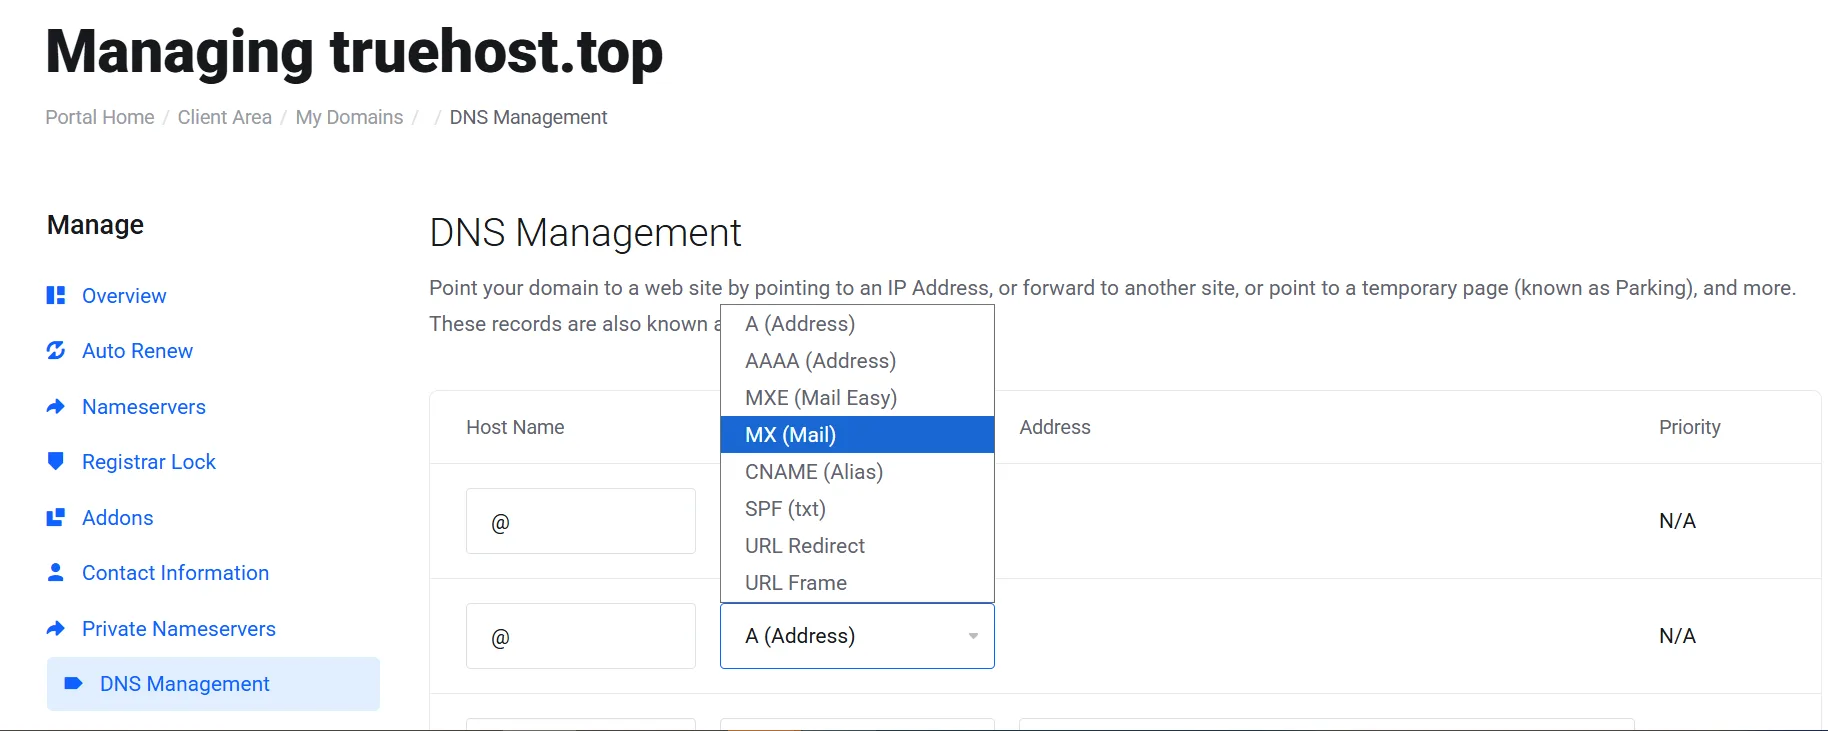
Your server is running, but the internet doesn’t know it exists yet. That’s what DNS handles next.
- Log in to your domain registrar and update the A record so it matches your server’s static IP address.
- Add a second A record, or a CNAME, for the www version of your domain
- If your .co.za domain sits with a different registrar, update the nameservers there first before touching the A record
- Check propagation with a quick command like
digyourdomain.co.za ornslookupyourdomain.co.za - Set up a reverse DNS (PTR) record through your provider, since this affects email deliverability later
Propagation across South African ISPs usually finishes within a few hours, though it can stretch to 24 hours in some cases. Patience helps here.
Step 3: Secure the Server Before Installing Anything
A freshly provisioned server is an open door until you lock it down. Do this before installing your web stack, not after.
- Create a non-root user and grant it
sudoprivileges, so you stop logging in as root. - Disable direct
root loginoverSSHand switch to key-based authentication instead. - Set up a firewall, either UFW on Ubuntu or firewalld on AlmaLinux, and open only the ports you actually need
- Install fail2ban so repeated failed login attempts get blocked automatically.
- Turn on automatic security updates for the operating system.
These five steps take under an hour, and they cut off most of the common attack paths hitting new servers.
Step 4: Install Your Web Server Stack
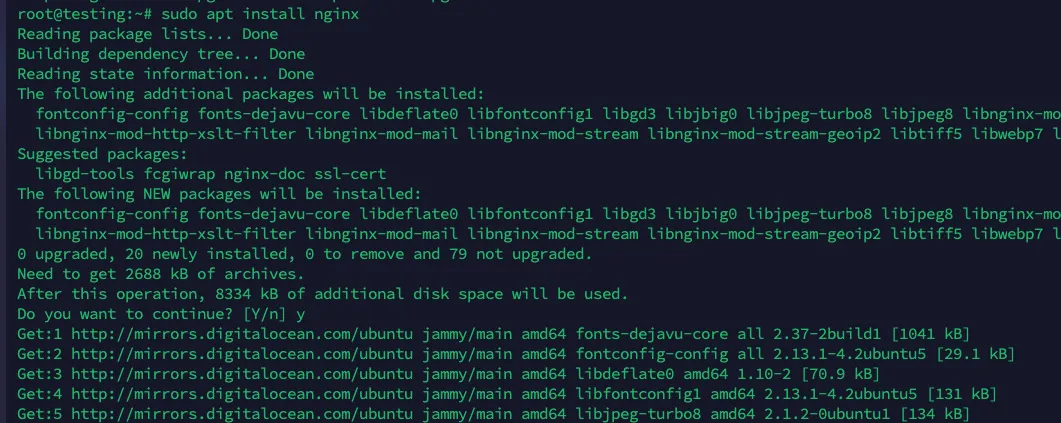
Now you install the software that actually serves your site. You have two routes here.
The first is a manual LAMP or LEMP stack. That means Apache or Nginx for the web server, MariaDB or MySQL for the database, and PHP for processing. This route gives you full control over every setting.
The second route is cPanel with WHM. It costs more in licensing, but it wraps server management in a graphical interface, which suits teams without a dedicated sysadmin.
- Install your chosen web server: Nginx or Apache, depending on your preference.
- Install MariaDB or MySQL and set a secure root password during setup
- Install PHP along with the extensions your site or CMS needs
- Confirm each service is active with a status check before moving to the next step
- If you’re going the cPanel route instead, run the official installer script from WHM’s documentation
Pick the stack that matches your comfort level. There’s no wrong answer here, only trade-offs between cost and control.
Step 5: Configure Your Site and Go Live
With the stack installed, your next job is connecting it to your actual website.
- Create a virtual host, either an Nginx server block or an Apache VirtualHost, tied to your domain.
- Upload your site files through SFTP and set the correct file and folder permissions afterward.
- Install a free SSL certificate through Let’s Encrypt and force all traffic to HTTPS.
- Load your domain in a browser, not just the server’s IP address, to confirm that DNS and SSL both work.
If the site loads with the padlock icon showing, you’ve cleared the biggest milestone in this guide.
Step 6: Monitor, Back Up, and Protect
Getting a site live is one thing. Keeping it live is a separate job that starts now.
- Set up automated daily backups and store them somewhere off the server itself.
- Add basic uptime and resource monitoring so you catch problems early, not after a customer complains.
- Put a CDN and DDoS layer like Cloudflare in front of the server for extra protection.
- Set a recurring schedule for patching both the operating system and any installed software.
Treat this section as ongoing work, not a box you tick once and forget.
Troubleshooting Common Setup Issues
Even a careful setup runs into snags along the way. Here are the problems that show up most, and how to clear them fast.
I) The site doesn’t load after pointing the domain.
Check whether the domain resolves at all with dig yourdomain.co.za. If it resolves in some regions but not others, you’re still mid-propagation, so give it more time.
If it doesn’t resolve anywhere, log back into your registrar and confirm the A record matches your server’s IP exactly.
II) 502 Bad Gateway error
This error usually traces back to one of three causes: a DNS mismatch, a stopped service, or a firewall blocking traffic.
Run systemctl status nginx or systemctl status apache2 to confirm the web server is running. Then check MySQL or MariaDB too, since a stopped database often triggers this exact error.
III) Locked out of SSH after a firewall change
This is the mistake almost every first-timer makes once. Before closing your current SSH session, open a second terminal window and test the new firewall rule there.
If the second session connects fine, it’s safe to close the first if it doesn’t; fix the rule from the session still open, instead of losing access completely.
IV) The SSL certificate won’t be issued
Let’s Encrypt needs port 80 open and reachable to finish its validation check. Confirm the port is open with ufw status or firewall-cmd --list-all.
If traffic runs through Cloudflare, pause the proxy until the certificate issues, then turn it back on.
V) Permission denied after uploading files
Wrong file ownership is the usual cause here. Run chown -R yourusername:yourusername /path/to/site to fix it, then set folder permissions to 755 and file permissions to 644.
Keep your server logs open in a second window while you work through any of these. They usually name the exact service or port causing the problem, which saves you from guessing.
Managed vs Unmanaged: Which One Fits Your Setup
By now, you’ve seen everything an unmanaged dedicated server asks of you. Some readers will look at that list and feel confident. Others will want a provider to carry it instead.
An unmanaged server suits teams who are comfortable running every command above themselves, on a recurring basis.
A managed server shifts patching, monitoring, and firewall upkeep onto your provider’s support team.
In the South African market, that shift usually comes at a higher monthly cost, but it removes the sysadmin workload entirely.
Neither option is wrong. The right pick depends on whether you have the time and skill in-house or would rather pay someone else to carry that load.
FAQs
Do I need cPanel to set up a dedicated server?
No. cPanel makes server management easier through a graphical interface, but it’s a paid add-on, not a requirement. A manual LAMP or LEMP stack works fine without it.
Can I host multiple websites on one dedicated server?
Yes. Set up a separate virtual host for each domain, and the server will route traffic to the right site based on the domain requested.
How long does a dedicated server setup take from scratch?
For a single site with a manual stack, plan on two to four hours if you follow each step in order. Adding cPanel or multiple sites extends that timeline.
Do I need advanced technical skills to set this up myself?
Basic comfort with the command line goes a long way. If terminal commands feel unfamiliar, a managed dedicated server removes that requirement entirely.
Set Up Your Dedicated Web Server Today
Getting your site live on a dedicated server is only half the work. Keeping it patched, backed up, and monitored is the part that protects everything you just built.
If running that maintenance yourself sounds like more than you want on your plate, Truehost’s managed dedicated server plans hand off steps three, four, and six to a local support team.
Hence, you get the control of a dedicated server without carrying the full workload alone. Check current dedicated server plans on Truehost to see which tier fits your traffic.