 Web Hosting
 Windows HostingBuilt for Windows apps and websites – stability, speed and flexibility
 Reseller HostingLaunch a hosting business without technical skills or expensive infrastructure
 Affiliate ProgramRefer customers and earn commissions from sales across our platform
 Domain SearchFind and secure a domain name in seconds with our quick lookup tool
 CO ZA Domains
 All DomainsExplore domain names from over 324 TLDs globally – all in one place
 Free Whois Lookup Tool South Africa
 VPS
VPS Website Builder
 Online ShopSet up a sleek eCommerce store with zero coding knowledge
 SSLs
SSLs SupportAccess help articles, how-tos, and everything about our services
 Blog
Blog Contact UsReach our team instantly via live chat or drop us an email
You update the DNS record and refresh your site. The page loads, so you relax. Then a customer emails you. She still sees the old version, and her checkout fails.
That moment is the one this guide removes. Most migrations break at the DNS switch, not during the file copy. The fix is in sequence. You prepare, build the VPS, copy your site, test it in private, cut over, and monitor.
Follow that order, and you can expect one to three days to pass. Your hands-on work takes one to three hours. Visitors should see little or no downtime.
This guide is for site owners who are moving from shared hosting to a new VPS with SSH access. You will install the full server stack yourself, so every step is here.
Table of Contents
Prepare Before You Migrate WordPress to Your VPS
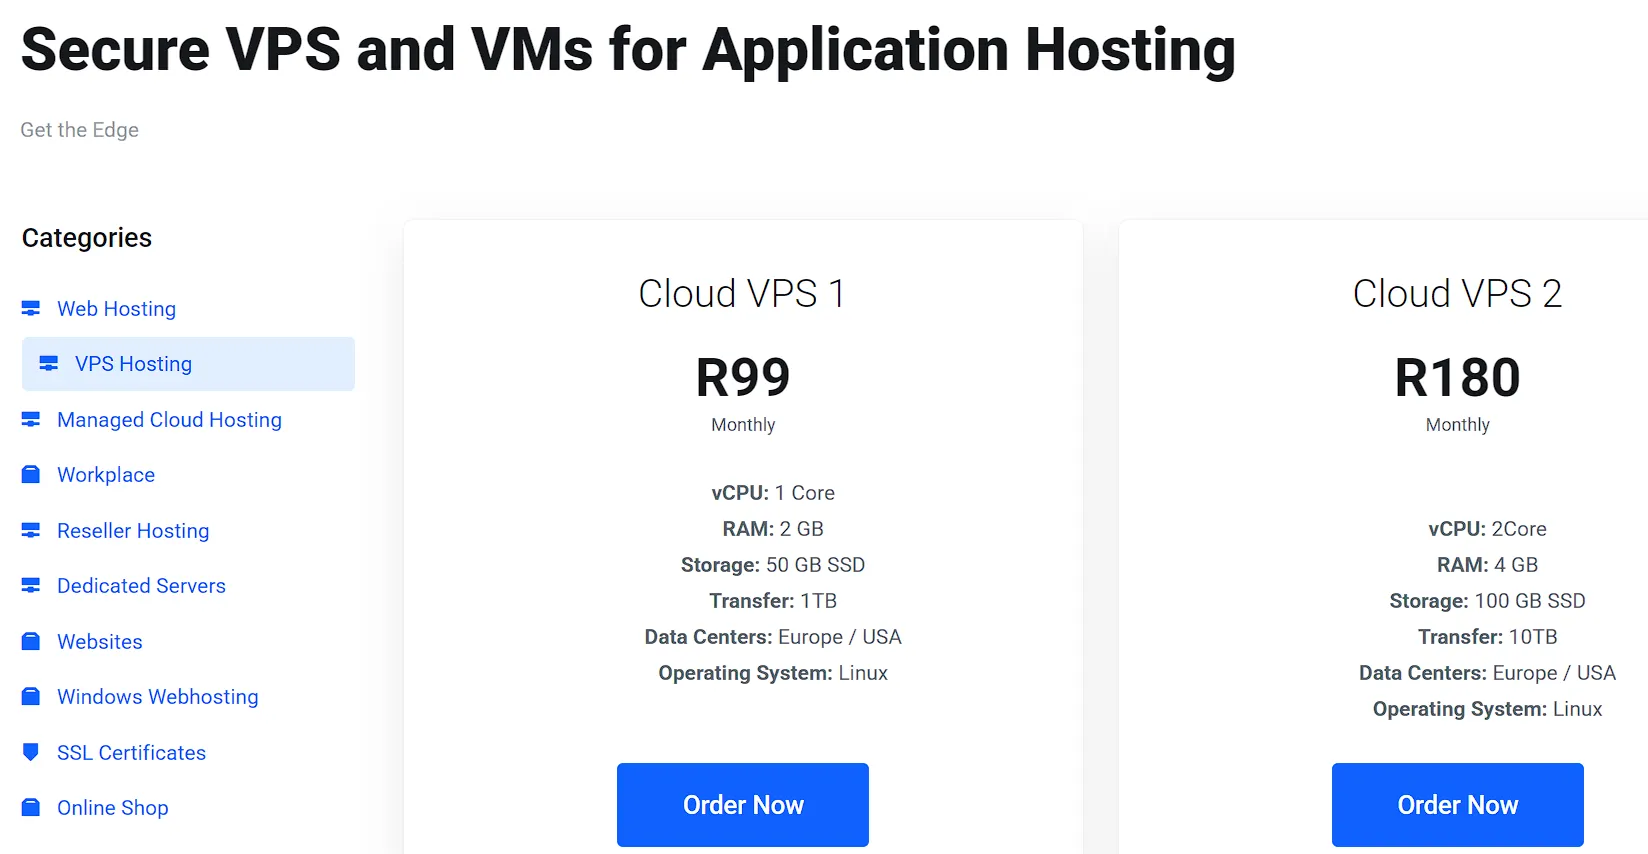
Preparation takes an hour or two. It also prevents most of the errors you will meet later. Skip it, and you will pay for it on cutover day.
- Inventory your current stack
Start by writing down what your old server runs. You need these details to build a matching VPS.
- PHP version (in WordPress, open Tools, then Site Health, then Info)
- Database type and version
- Active plugins and themes
- Cron jobs, including any you set in your hosting panel
- Email setup, including
MXrecords and any mailboxes on the old host
Try to match your old PHP version on the VPS first. Current WordPress releases need PHP 8.1 or newer, though.
If your site runs an older version of WordPress, update WordPress and your plugins on the old host before you move.
Change PHP versions after the migration works, not during it. Two changes at once make errors hard to trace.
- Note every credential
Write down the new database name, user, and password before you start. Wrong credentials cause the most common error after a migration.
The new server issues fresh values, but your old wp-config.php still holds the previous ones. A simple note file saves you a lot of guessing later.
- Lower your DNS
TTLto300seconds.
TTL tells DNS servers how long to remember your record. Many domains default to 24 hours. That means visitors can reach the old server for a full day after you switch.
Log in to your DNS provider and find the A record for your domain. Drop the TTL to 300 seconds, which is about 5 minutes. Do this 24 to 48 hours before you plan to switch. The old value needs time to expire across the board.
Skipping this step causes the classic mix-up where some visitors see the old site and others see the new one. It takes two minutes, so do it today.
Using Cloudflare in proxy mode? Then you can change the origin IP instantly. Even so, lowering the TTL is harmless.
- Take and verify a full backup.
Create a full backup of your files and your database. Download it to your computer. Then open it and confirm the archive holds real content. Finally, copy it to a second location. A backup you never tested is just a guess.
Choose Your WordPress Migration Method: Plugin or Manual
You have two routes, and both work. Your site size and your comfort with the command line decide which one fits.
| Factor | Plugin method | Manual method |
|---|---|---|
| Best for | Small to mid-size sites, first-time movers | Large sites, developers, agencies |
| Tools | Duplicator, All-in-One WP Migration, WPvivid, UpdraftPlus | rsync or SFTP, mysqldump, WP-CLI |
| SSH access | Helpful, not required | Required |
| Upload limits | Free tiers often cap file size | None |
| Fresh WordPress on the VPS | Yes | No |
| Typical hands-on time | One to two hours | One to three hours |
| Control over permissions and cron | Low | High |
Plugins hide the details, which helps beginners. However, free versions often limit upload size, which blocks larger sites. When you hit that wall, switch to the manual method.
The plugin method needs a fresh WordPress install on the VPS first. The plugin then imports your backup on top of the existing one. The manual method needs only the server stack and an empty database. You copy your real files straight in.
Our default advice is simple. Use a plugin if your site is small and the command line feels unfamiliar. Otherwise, go manual. You get more control and fewer size limits.
Both methods share the same server setup, so build the VPS next either way.
Step 1: Provision and Secure Your VPS
Now you build the new home for your site. Every command below runs on Ubuntu. Replace example.com with your own domain as you go.
- Choose a plan and an operating system.
Pick a plan with at least 1 vCPU and 2 GB of RAM. That runs a clean install comfortably. A mid-size site with caching performs well on 1 vCPU and 4 GB of RAM. Busy stores need more. Use this table as a starting point.
| Site profile | vCPU | RAM | Disk |
|---|---|---|---|
| Small blog or brochure site | 1 | 2 GB | 25 to 40 GB SSD |
| Mid-size content site with caching | 1 to 2 | 4 GB | 50 GB SSD |
| WooCommerce store or heavy plugin load | 2 to 4 | 8 GB | 80 GB SSD or more |
Choose an Ubuntu LTS release. This guide uses Ubuntu 24.04 LTS; Ubuntu 26.04 LTS works as well.
The steps match. Package versions and the PHP-FPM service name differ. Ubuntu 24.04 ships PHP 8.3, while Ubuntu 26.04 ships PHP 8.5. Check plugin compatibility before you jump to a newer PHP release.
If you still need a server, an unmanaged TrueHost VPS plan gives you the root access this guide uses. A managed plan works too if you would rather hand the server work to a team.
- Connect over SSH and update the system.
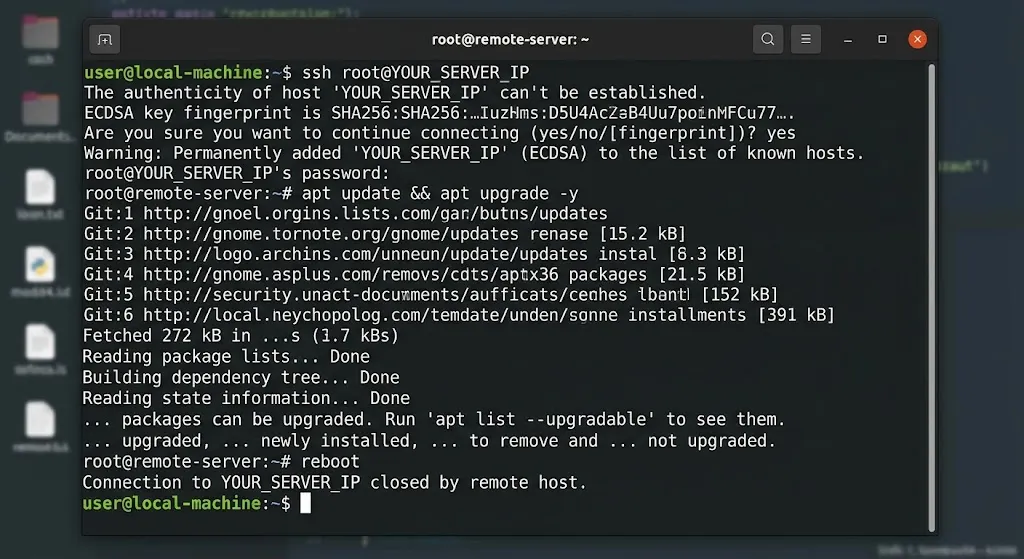
Log in using the IP address and root password provided by your provider. Then update the package list and every installed package.
ssh root@YOUR_SERVER_IP

apt update && apt upgrade -y

reboot
The reboot takes about a minute. Reconnect when it finishes.
- Create a sudo user and add SSH keys
Running everything as root is risky. Create a normal user instead.
adduser deploy

usermod -aG sudo deploy
Now, copy your public key from your own computer.
ssh-copy-id deploy@YOUR_SERVER_IPOpen a second terminal and log in as the new user. Confirm it works. Only then, lock down SSH.
sudo nano /etc/ssh/sshd_configSet these two lines, then restart the SSH service.
PermitRootLogin no

PasswordAuthentication no

sudo systemctl restart ssh
Keep your first session open until the new login works. That habit saves you from a lockout.
- Turn on the firewall in the right order,
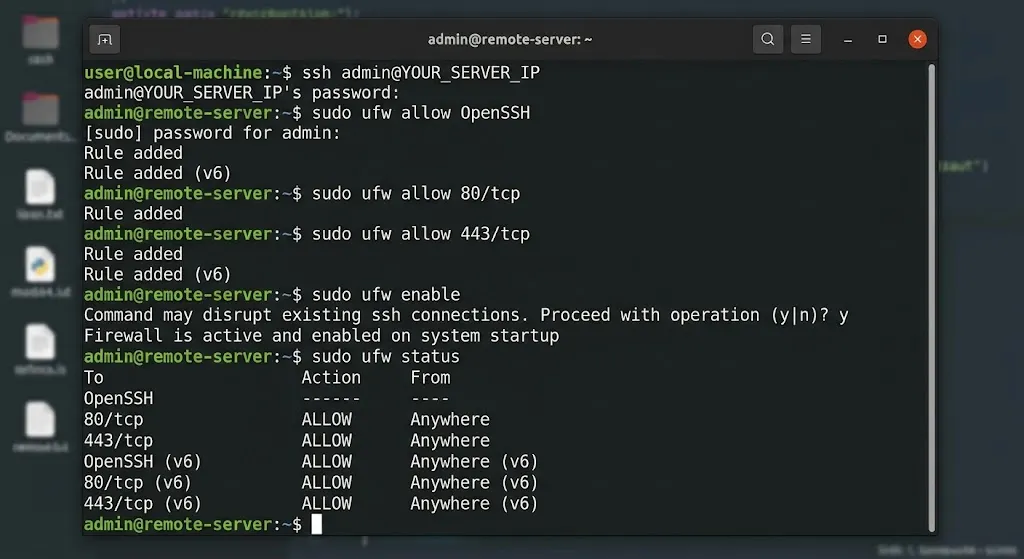
sudo ufw allow OpenSSH.

sudo ufw allow 80/tcp

sudo ufw allow 443/tcp

sudo ufw enable

sudo ufw status
Allow SSH first. If you enable the firewall before that, a remote session locks you out.
- Set the hostname, timezone, and swap
sudo hostnamectl set-hostname wp-vps

sudo timedatectl set-timezone UTC

sudo fallocate -l 2G /swapfile

sudo chmod 600 /swapfile

sudo mkswap /swapfile

sudo swapon /swapfile

echo '/swapfile none swap sw 0 0' | sudo tee -a /etc/fstab
Swap gives small plans a safety net. Large imports can otherwise trigger out-of-memory kills.
Step 2: Install the LEMP Stack (Nginx, MariaDB, PHP-FPM)
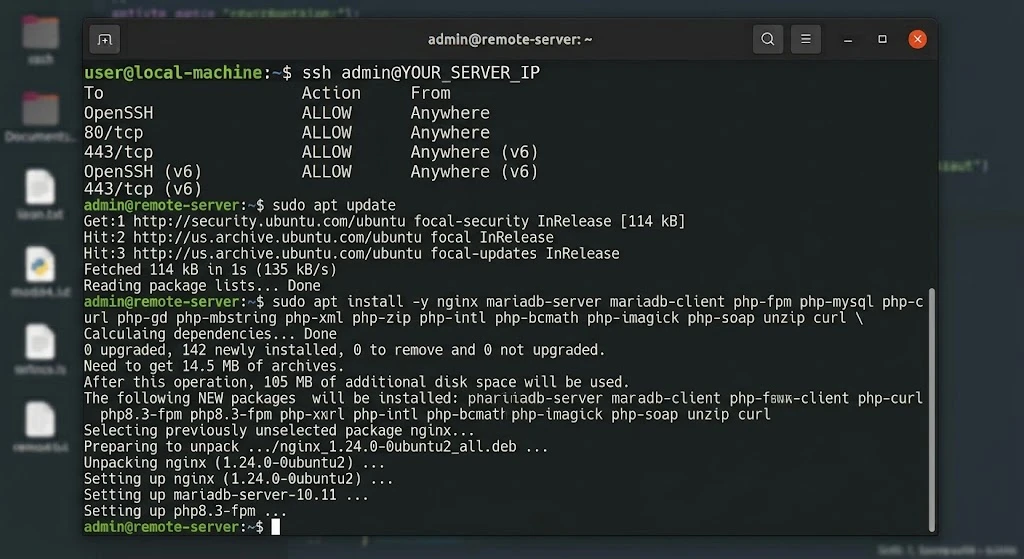
LEMP is the four-part stack for your new server: Linux, Nginx, MariaDB, and PHP-FPM. Nginx serves pages. PHP-FPM runs WordPress code. MariaDB stores your content.
- Install the packages in one command
sudo apt update

sudo apt install -y nginx mariadb-server mariadb-client \

  php-fpm php-mysql php-curl php-gd php-mbstring php-xml php-zip \

  php-intl php-bcmath php-imagick php-soap unzip curl
Here is what the extensions do:
php-mysqllets PHP talk to MariaDB.php-gdandphp-imagickresize images and build thumbnails.php-mbstringhandles multibyte text, so non-English content displays correctly.php-ziplets plugins unpack archives.php-intlandphp-bcmathgive quite a few compatibility warnings from plugins such as WooCommerce.
- Confirm all three services run.
Run php -v first to see your PHP version. Then enable and check each service.
sudo systemctl enable --now nginx mariadb php8.3-fpm

systemctl is-active nginx mariadb php8.3-fpm
On Ubuntu 26.04, replace php8.3-fpm with php8.5-fpm.
You should see the word active three times. If any service says failed or inactive, stop. Run systemctl status on that service and read the reason. Nothing later works until all three run.
- Secure MariaDB
sudo mysql_secure_installationOn Ubuntu, the MariaDB root account uses socket authentication. That means sudo mysql opens a root shell without a password.
Accept the defaults. Remove anonymous users, block remote root login, and drop the test database.
- Tune PHP for WordPress
Open the PHP-FPM configuration file.
sudo nano /etc/php/8.3/fpm/php.iniSet these values, since imports need headroom.
upload_max_filesize = 256M

post_max_size = 256M

memory_limit = 512M

max_execution_time = 300
Set the upload limits to at least as large as your largest backup file. You can lower them after the migration finishes. Then restart PHP-FPM.
sudo systemctl restart php8.3-fpm- Decide whether you need a control panel.
The steps above replace a control panel. You get a lean server and full control. Some people prefer a browser interface, though. Three panels handle WordPress well.
| Panel | Cost | Web server | Good to know |
|---|---|---|---|
| CloudPanel | Free | Nginx | Creates the site, database, and a fresh WordPress install in one step |
| HestiaCP | Free, open source | Nginx and Apache | Installs with one script on a clean server |
| Plesk | Paid license | Nginx and Apache | Includes the WordPress Toolkit |
Install a panel on a fresh operating system. Do not add one to a server you configured by hand. If you choose a panel, skip the database and Nginx sections below. The panel builds those for you. Then jump to the transfer step.
Step 3: Create the Database and Configure Nginx for WordPress
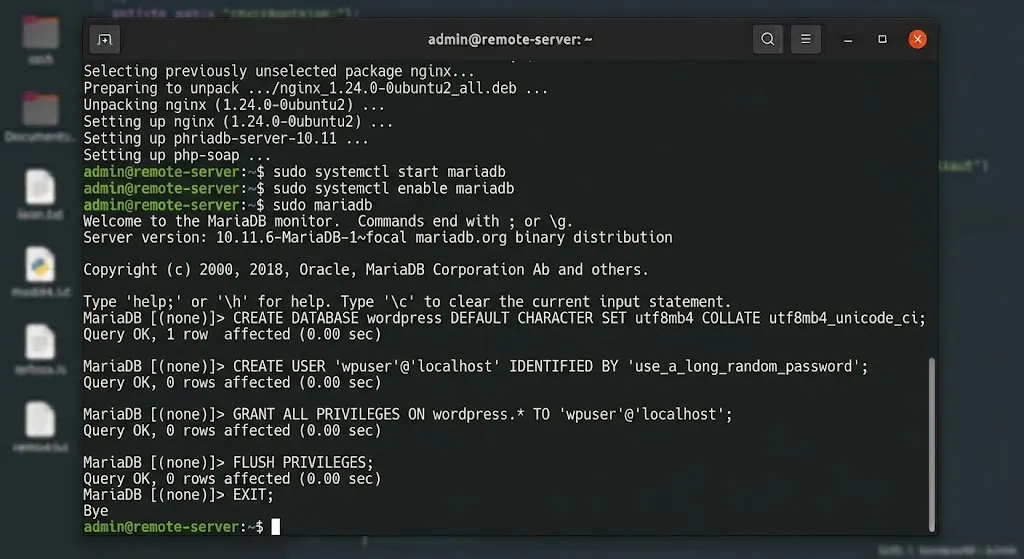
- Create the database and a dedicated user
Open a MariaDB shell.
sudo mysqlThen run these statements.
CREATE DATABASE wordpress DEFAULT CHARACTER SET utf8mb4 COLLATE utf8mb4_unicode_ci;

CREATE USER 'wpuser'@'localhost' IDENTIFIED BY 'use_a_long_random_password';

GRANT ALL PRIVILEGES ON wordpress.* TO 'wpuser'@'localhost';

FLUSH PRIVILEGES;

EXIT;
Use a dedicated user for each site. Never reuse the MariaDB root account for WordPress. Swap in your own names and a long random password. Then save them in your credential note.
- Create the web root and set ownership
sudo mkdir -p /var/www/example.com

sudo chown -R www-data:www-data /var/www/example.com

sudo find /var/www/example.com -type d -exec chmod 755 {} \;

sudo find /var/www/example.com -type f -exec chmod 644 {} \;
Run the two find commands again after you copy your files. Directories need 755, and files need 644.
- Write the Nginx server block
Create a config file for your domain.
sudo nano /etc/nginx/sites-available/example.comPaste this starting point.
server {

    listen 80;

    listen [::]:80;

    server_name example.com www.example.com;

    root /var/www/example.com;

    index index.php index.html;

    client_max_body_size 256M;

    location / {

        try_files $uri $uri/ /index.php?$args;

    }

    location ~ \.php$ {

        include snippets/fastcgi-php.conf;

        fastcgi_pass unix:/run/php/php8.3-fpm.sock;

    }

    location ~ /\.ht {

        deny all;

    }

}
Three parts carry the most weight here:
rootpoints Nginx at your WordPress folder.try_filesin the first location block sends pretty permalinks to WordPress.- The PHP socket line in the second block must match your PHP version.
Set client_max_body_size to match the PHP upload limits from earlier. Without it, Nginx rejects large uploads with a 413 error.
Also note that Nginx ignores .htaccess files. The redirect and security rules from your old Apache setup need to be moved into this file.
- Enable the site and test the config
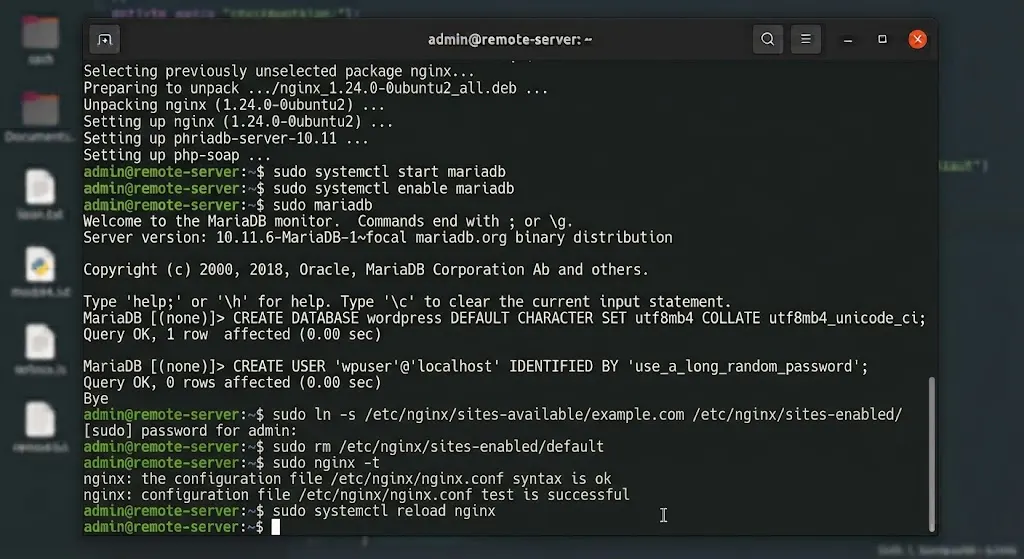
sudo ln -s /etc/nginx/sites-available/example.com /etc/nginx/sites-enabled/

sudo rm /etc/nginx/sites-enabled/default

sudo nginx -t

sudo systemctl reload nginx
Run nginx -t before every reload. It must report that the syntax is ok. If it fails, fix the file first.
- Install WP-CLI
curl -O https://raw.githubusercontent.com/wp-cli/builds/gh-pages/phar/wp-cli.phar

php wp-cli.phar --info

chmod +x wp-cli.phar

sudo mv wp-cli.phar /usr/local/bin/wp

wp --info
WP-CLI runs WordPress tasks from the terminal. You will use it for URL fixes, cache flushes, and health checks. From here on, run it as the web user from your site folder.
Step 4: Transfer WordPress Files and Database to the VPS
Pick one method below. Both end in the same place: your site running on the VPS under your domain name.
Method A: Plugin transfer
First, point your computer to the VPS with a hosts file entry. The testing section shows how. Without it, your browser keeps loading the old server.
- Install a fresh WordPress on the VPS.
cd /var/www/example.com

sudo -u www-data wp core download

sudo -u www-data wp config create --dbname=wordpress --dbuser=wpuser --dbpass='YOUR_PASSWORD' --dbhost=localhost

sudo -u www-data wp core install --url="http://example.com" --title="Temporary Site" --admin_user=tempadmin --admin_password='CHOOSE_A_STRONG_ONE' [email protected]- Log in at
http://example.com/wp-adminthrough your host’s entry.
- Install the same migration plugin on both the old and new sites.
- Export your site from the old dashboard.
- Upload and import that export on the new site.
- Log in again with your old site credentials. The import replaces the users table.
- Open Settings, then Permalinks, and click Save Changes.
If the import stalls, raise the PHP limits from the tuning step. Or switch to Method B.
Method B: Manual transfer
- Export the database to the old host.
mysqldump -u OLD_DB_USER -p --single-transaction OLD_DB_NAME > backup.sqlNo SSH on the old host? Export from phpMyAdmin instead.
- Copy the files and the dump to the VPS. Run this from the VPS.
rsync -avz --progress OLD_USER@OLD_HOST:/home/OLD_USER/public_html/ ~/site-copy/

scp OLD_USER@OLD_HOST:~/backup.sql ~/backup.sql

sudo rsync -a ~/site-copy/ /var/www/example.com/
If the old host blocks SSH, download by SFTP, and upload to the VPS. You need free disk space for two copies until you delete the site copy.
- Import the database.
mysql -u wpuser -p wordpress < ~/backup.sql- Edit
wp-config.phpon the VPS.
sudo nano /var/www/example.com/wp-config.php- Set
DB_NAME,DB_USER, andDB_PASSWORDto the new values. - Set
DB_HOSTtolocalhost. - Keep
$table_prefixidentical to the imported tables. - Replace the salt lines with fresh ones from the WordPress secret-key service at
https://api.wordpress.org/secret-key/1.1/salt/.
New salts log everyone out. That is fine.
- Reset ownership and permissions with the four commands from the
web-rootstep.
- Verify the copy. Compare file counts and table counts.
# On the old server

find public_html -type f | wc -l

# On the VPS

find /var/www/example.com -type f | wc -l

mysql -u wpuser -p -e "SHOW TABLES;" wordpress | wc -l
Small differences from cache folders are normal. Big gaps mean the copy failed, so repeat it.
Step 5: Fix URLs, Permissions, and Permalinks After the Transfer
Did your domain, protocol, or folder path change? If not, skip the URL replacement and go to the permalink step. If something changed, run WP-CLI’s search-replace.
Always preview first.
cd /var/www/example.com

sudo -u www-data wp search-replace 'https://old-domain.com' 'https://example.com' --skip-columns=guid --report-changed-only --dry-run
Read the report carefully. WP-CLI accepts any replacement text, so a typo still reports success. When the numbers look right, run the same command without –dry-run.
The command handles PHP serialized data safely. It leaves primary key values alone. The --skip-columns=guid flag protects post identifiers.
Some plugins store URLs in JSON, where slashes are escaped with backslashes. Run a second pass for those.
sudo -u www-data wp search-replace 'https:\/\/old-domain.com' 'https:\/\/example.com' --skip-columns=guid --report-changed-only --dry-runElementor sites need one more step. Elementor stores some serialized data that search-replace misses. Open Elementor, then Tools, then Replace URL. Afterward, regenerate the CSS and data files from the same screen.
Next, flush caches and rewrite rules.
sudo -u www-data wp cache flush

sudo -u www-data wp rewrite flush
Then log in, open Settings, and open Permalinks. Click Save Changes without editing anything. This refreshes the rules stored in your database.
Step 6: Test the Migrated Site Before You Switch DNS
A hosts-file entry tells your computer to load your domain from the VPS. Nobody else sees the change. That makes it the safest way to test.
macOS or Linux
sudo nano /etc/hostsAdd this line, using your server’s IP.
YOUR_SERVER_IP example.com www.example.comWindows
Open Notepad as administrator. Open C:\Windows\System32\drivers\etc\hosts. Add the same line and save.
Then flush your DNS cache. Use sudo dscacheutil -flushcache on macOS or ipconfig /flushdns on Windows.
Prefer the terminal? This command sends a single request to the VPS without modifying any files.
curl -I --resolve example.com:80:YOUR_SERVER_IP http://example.comExpect a 200 or a 301 status line.
Run the test checklist.
- Home page loads with correct images and styling
- Inner pages, category pages, and search work
- Contact and other forms submit and deliver
- Login and logout work for admin and regular users
- Checkout completes with a test order (stores only)
- Media library accepts a new upload
- Scheduled tasks appear in the WP cron event list
- Plugin settings pages open without errors
Watch the logs while you click around.
sudo tail -f /var/log/nginx/error.log

sudo journalctl -u php8.3-fpm -n 50
Here is the rule: do not touch DNS until every check passes. When testing ends, delete the host’s entry. Otherwise, it will fool you later.
Step 7: Install SSL and Switch DNS Without Downtime
Get your certificate before cutover.
Certbot typically verifies that you own a domain by serving a file over HTTP. That check fails while your domain still points to the old host. You have two ways around it.
Option A: DNS challenge (no gap). Certbot asks you to add a TXT record instead. Plugins for Cloudflare, DigitalOcean, and other DNS hosts automate this and renew on their own. Manual SSL mode works too, but you repeat the steps at each renewal.
sudo snap install --classic certbot

sudo ln -s /snap/bin/certbot /usr/bin/certbot

sudo certbot certonly --manual --preferred-challenges dns -d example.com -d www.example.com
Add the TXT record Certbot shows you, wait a minute, and press Enter. Then update your Nginx file to serve HTTPS.
server {

    listen 80;

    listen [::]:80;

    server_name example.com www.example.com;

    return 301 https://example.com$request_uri;

}

server {

    listen 443 ssl;

    listen [::]:443 ssl;

    server_name example.com www.example.com;

    ssl_certificate /etc/letsencrypt/live/example.com/fullchain.pem;

    ssl_certificate_key /etc/letsencrypt/live/example.com/privkey.pem;

    root /var/www/example.com;

    index index.php index.html;

    client_max_body_size 256M;

    location / {

        try_files $uri $uri/ /index.php?$args;

    }

    location ~ \.php$ {

        include snippets/fastcgi-php.conf;

        fastcgi_pass unix:/run/php/php8.3-fpm.sock;

    }

}
Run sudo nginx -t and reload Nginx. Then test renewals.
sudo certbot renew --dry-runOption B: Issue after cutover. Switch DNS first. Then run the certificate command.
sudo certbot --nginx -d example.com -d www.example.comThis works within minutes. However, HTTPS visitors may see a warning until it finishes. We recommend Option A for busy sites.
Anything that changes your database during cutover can vanish. An order placed on the old server after your last copy never reaches the new one. So plan for it.
- Pick a low-traffic window, such as early morning.
- Turn off comments and new signups on the old site. Use Settings, then Discussion.
- Stores: pause checkout with a maintenance-mode plugin on the old site.
- Export the database one last time and import it into the VPS. Run search-replace again if your URLs have changed.
- Switch DNS.
- Turn comments, signups, and checkout back on, this time on the new server.
With a 300-second TTL, the overlap lasts only minutes. Still, the freeze protects your data.
B) Update the A record
Change the A record for your domain to the VPS IP. Do the same for www, whether it uses an A record or a CNAME. Keep the TTL at 300 for now.
Also check for an AAAA record. It points IPv6 visitors to an address. If it still names the old server, those visitors keep reaching the old site. Update it or delete it.
Then check propagation from your own machine.
dig +short example.com @1.1.1.1You should see the VPS IP. Delete your hosts-file entry first, or the test proves nothing.
Prefer changing the A record over changing nameservers. A nameserver change affects your entire DNS zone, so every record must exist with the new provider before the change takes effect. It also propagates more slowly because nameserver records often have long TTLs.
C) Protect your email
Website moves break email more often than people expect. Protect yours before you touch DNS.
- Copy every
MXandTXTrecord (SPF, DKIM, DMARC) from the old zone. Keep them unchanged. - Leave the
Arecord for mail.example.com alone if your mailboxes stay on the old host. - Update your
SPFrecord if WordPress now sends mail from the VPS IP. - Keep the old hosting plan active until the mail moves for good.
D) Force HTTPS and confirm the redirect chain
Choose one canonical address, such as https://example.com. Then check that every other version reaches it in one hop.
curl -sIL http://www.example.com | grep -iE "^(HTTP|location)"You want one redirect, not three. Also, confirm that Settings> General shows HTTPS in both URL fields. Test from your phone on mobile data, too. That network never saw your host’s entry.
After the Cutover: Monitor Performance and Protect Your SEO
Your site is live, but the job is not finished. The next two weeks will decide whether the move stays smooth.
- Watch the first 48 hours. Check uptime and run htop to monitor server load. Read the Nginx error log daily. Add a free uptime monitor that pings your site every few minutes.
- Check Search Console. Review the Pages report and Crawl stats for any new errors. Resubmit your sitemap. If your domain stayed the same, you need no Change of Address. If it changed, set up
301redirects and use that tool. - Keep the old host for two weeks. It works as your rollback plan. Cancel it only after traffic, orders, and email are stable.
- Automate updates and backups. Turn on unattended security updates. Then schedule daily backups to storage off the server, using a plugin or your provider’s snapshots.
sudo apt install unattended-upgrades

sudo dpkg-reconfigure --priority=low unattended-upgrades- Restore your settings. After a week of stable traffic, raise the
TTLback to3600seconds. Lower the PHP upload limits too. - Add caching when ready. A page-cache plugin or Nginx page caching cuts server load. A Redis object cache helps busy stores. Add them one at a time, and test after each.
Troubleshooting Your WordPress Migration to a VPS
Something will probably go wrong. That is normal, and most fixes take minutes. Start by finding which layer failed. Then use the matching fix below.
| Layer | Typical symptom | First place to look |
|---|---|---|
| Server (Nginx, firewall) | 502, 413, timeouts, site unreachable | Nginx error log, nginx -t, ufw status |
| PHP | White screen, 500 error, memory errors | PHP-FPM log, debug.log |
| Database | “Error establishing a database connection” | wp-config.php, wp db check |
| WordPress | Redirect loops, 404 errors, broken images | siteurl and home values, permalinks, search-replace |
When to roll back
Set your rollback rule before cutover day. For example, if checkout or login stays broken for 30 minutes, roll back. Deciding early removes the panic.
- Point the
Arecord and, if you use one, theAAAArecord back to the old server’s IP. - Wait a few minutes. The
300-secondTTLmakes this quick. - Export any orders or comments created on the VPS so that you can import them later.
- Fix the problem on the VPS using your hosts-file entry, then try again.
Your old host stays live for exactly this reason.
FAQs
How long does a WordPress migration to a VPS take?
Plan on one to three days from start to finish. Most of that time is waiting, not working. The TTL needs 24 to 48 hours to expire, and monitoring after cutover runs about two weeks.
Your hands-on work usually takes one to three hours. A small site moved with a plugin lands near the low end. Large media libraries, WooCommerce data, and thorough testing push you toward the high end.
Can I host more than one WordPress site on the same VPS?
Yes. Give each site its own folder, database, database user, and Nginx server block. Never share one database user across sites. Each site also needs its own certificate, or a single certificate that covers all domains.
Watch your RAM. Every site adds PHP workers and database load. A 4 GB server often carries a few low-traffic sites, but a busy store needs its own space.
Start Your WordPress Migration on the Right VPS
You now have the full sequence. Two steps decide whether the switch feels calm: lowering the TTL and testing through a hosts file. Each takes about ten minutes, and most people skip both.
Your next move is the server. Size it with the table above. A TrueHost VPS gives you an unmanaged plan for hands-on control. It also offers a managed plan. Choose that one if you want a team to run the server.
Either way, start tonight. Lower your TTL, run the pre-flight checklist, and book the cutover for a quiet hour two days from now. Your visitors will never notice the move, and that is the goal.