 Web Hosting
 Windows HostingBuilt for Windows apps and websites – stability, speed and flexibility
 Reseller HostingLaunch a hosting business without technical skills or expensive infrastructure
 Affiliate ProgramRefer customers and earn commissions from sales across our platform
 Domain SearchFind and secure a domain name in seconds with our quick lookup tool
 CO ZA Domains
 All DomainsExplore domain names from over 324 TLDs globally – all in one place
 Free Whois Lookup Tool South Africa
 VPS
VPS Website Builder
 Online ShopSet up a sleek eCommerce store with zero coding knowledge
 SSLs
SSLs SupportAccess help articles, how-tos, and everything about our services
 Blog
Blog Contact UsReach our team instantly via live chat or drop us an email
Setting up a WooCommerce store on WordPress is one of the fastest ways to launch a real, functional online shop, and now is the best time to launch one in South Africa.
Online shopping has become part of everyday life for many South Africans. According to the Stitch 2026 Consumer Payments Report, 62.5% of consumers now shop online as much as, or even more than, they shop in physical stores.
That’s not a trend still forming; it’s already here, and it’s growing. And if your business doesn’t have an online shop yet, you’re leaving customers to find someone else who does.
The best part is that creating an online store doesn’t require a huge budget or advanced technical skills.
Plus, your store runs on your own WordPress website, so you control your branding, products, customer information, and business decisions.
As your business grows, your store can grow with it. You can add more products, expand into new markets, connect payment gateways, automate shipping, and install new features without moving to a different platform.
Unlike many hosted eCommerce platforms, you also avoid being locked into expensive monthly plans as your sales increase.
Before you begin, make sure your hosting environment meets WooCommerce’s minimum requirements.
Your server should support:
- PHP 8.1 or higher
- MySQL 5.7 or later (or MariaDB equivalent)
- A WordPress memory limit of at least 256 MB
Most quality WordPress hosting providers already meet these requirements, but it’s worth confirming before you begin.
With everything in place, you’re ready to build your WooCommerce store from the ground up.
Table of Contents
Step-by-Step Guide To Set Up a WooCommerce Store on WordPress
Step 1: Get a Domain and Hosting Service
Every WooCommerce store starts with two important things: a domain name and web hosting.
Your domain name is your store’s online address, while your hosting provides the resources needed to keep your website running smoothly.
Since WooCommerce handles products, customer accounts, shopping carts, and payments, choosing reliable hosting from the start makes a big difference to your store’s speed and performance.
If your target audience is in South Africa, a .co.za domain is a smart choice. It’s familiar to local shoppers, easy to remember, and helps reinforce your local brand identity.
When choosing a hosting provider, look for features that are optimized for WordPress and WooCommerce, including fast storage, reliable uptime, free SSL certificates, and one-click WordPress installation.
Hosting with local South African servers can also improve loading speeds for visitors across the country.
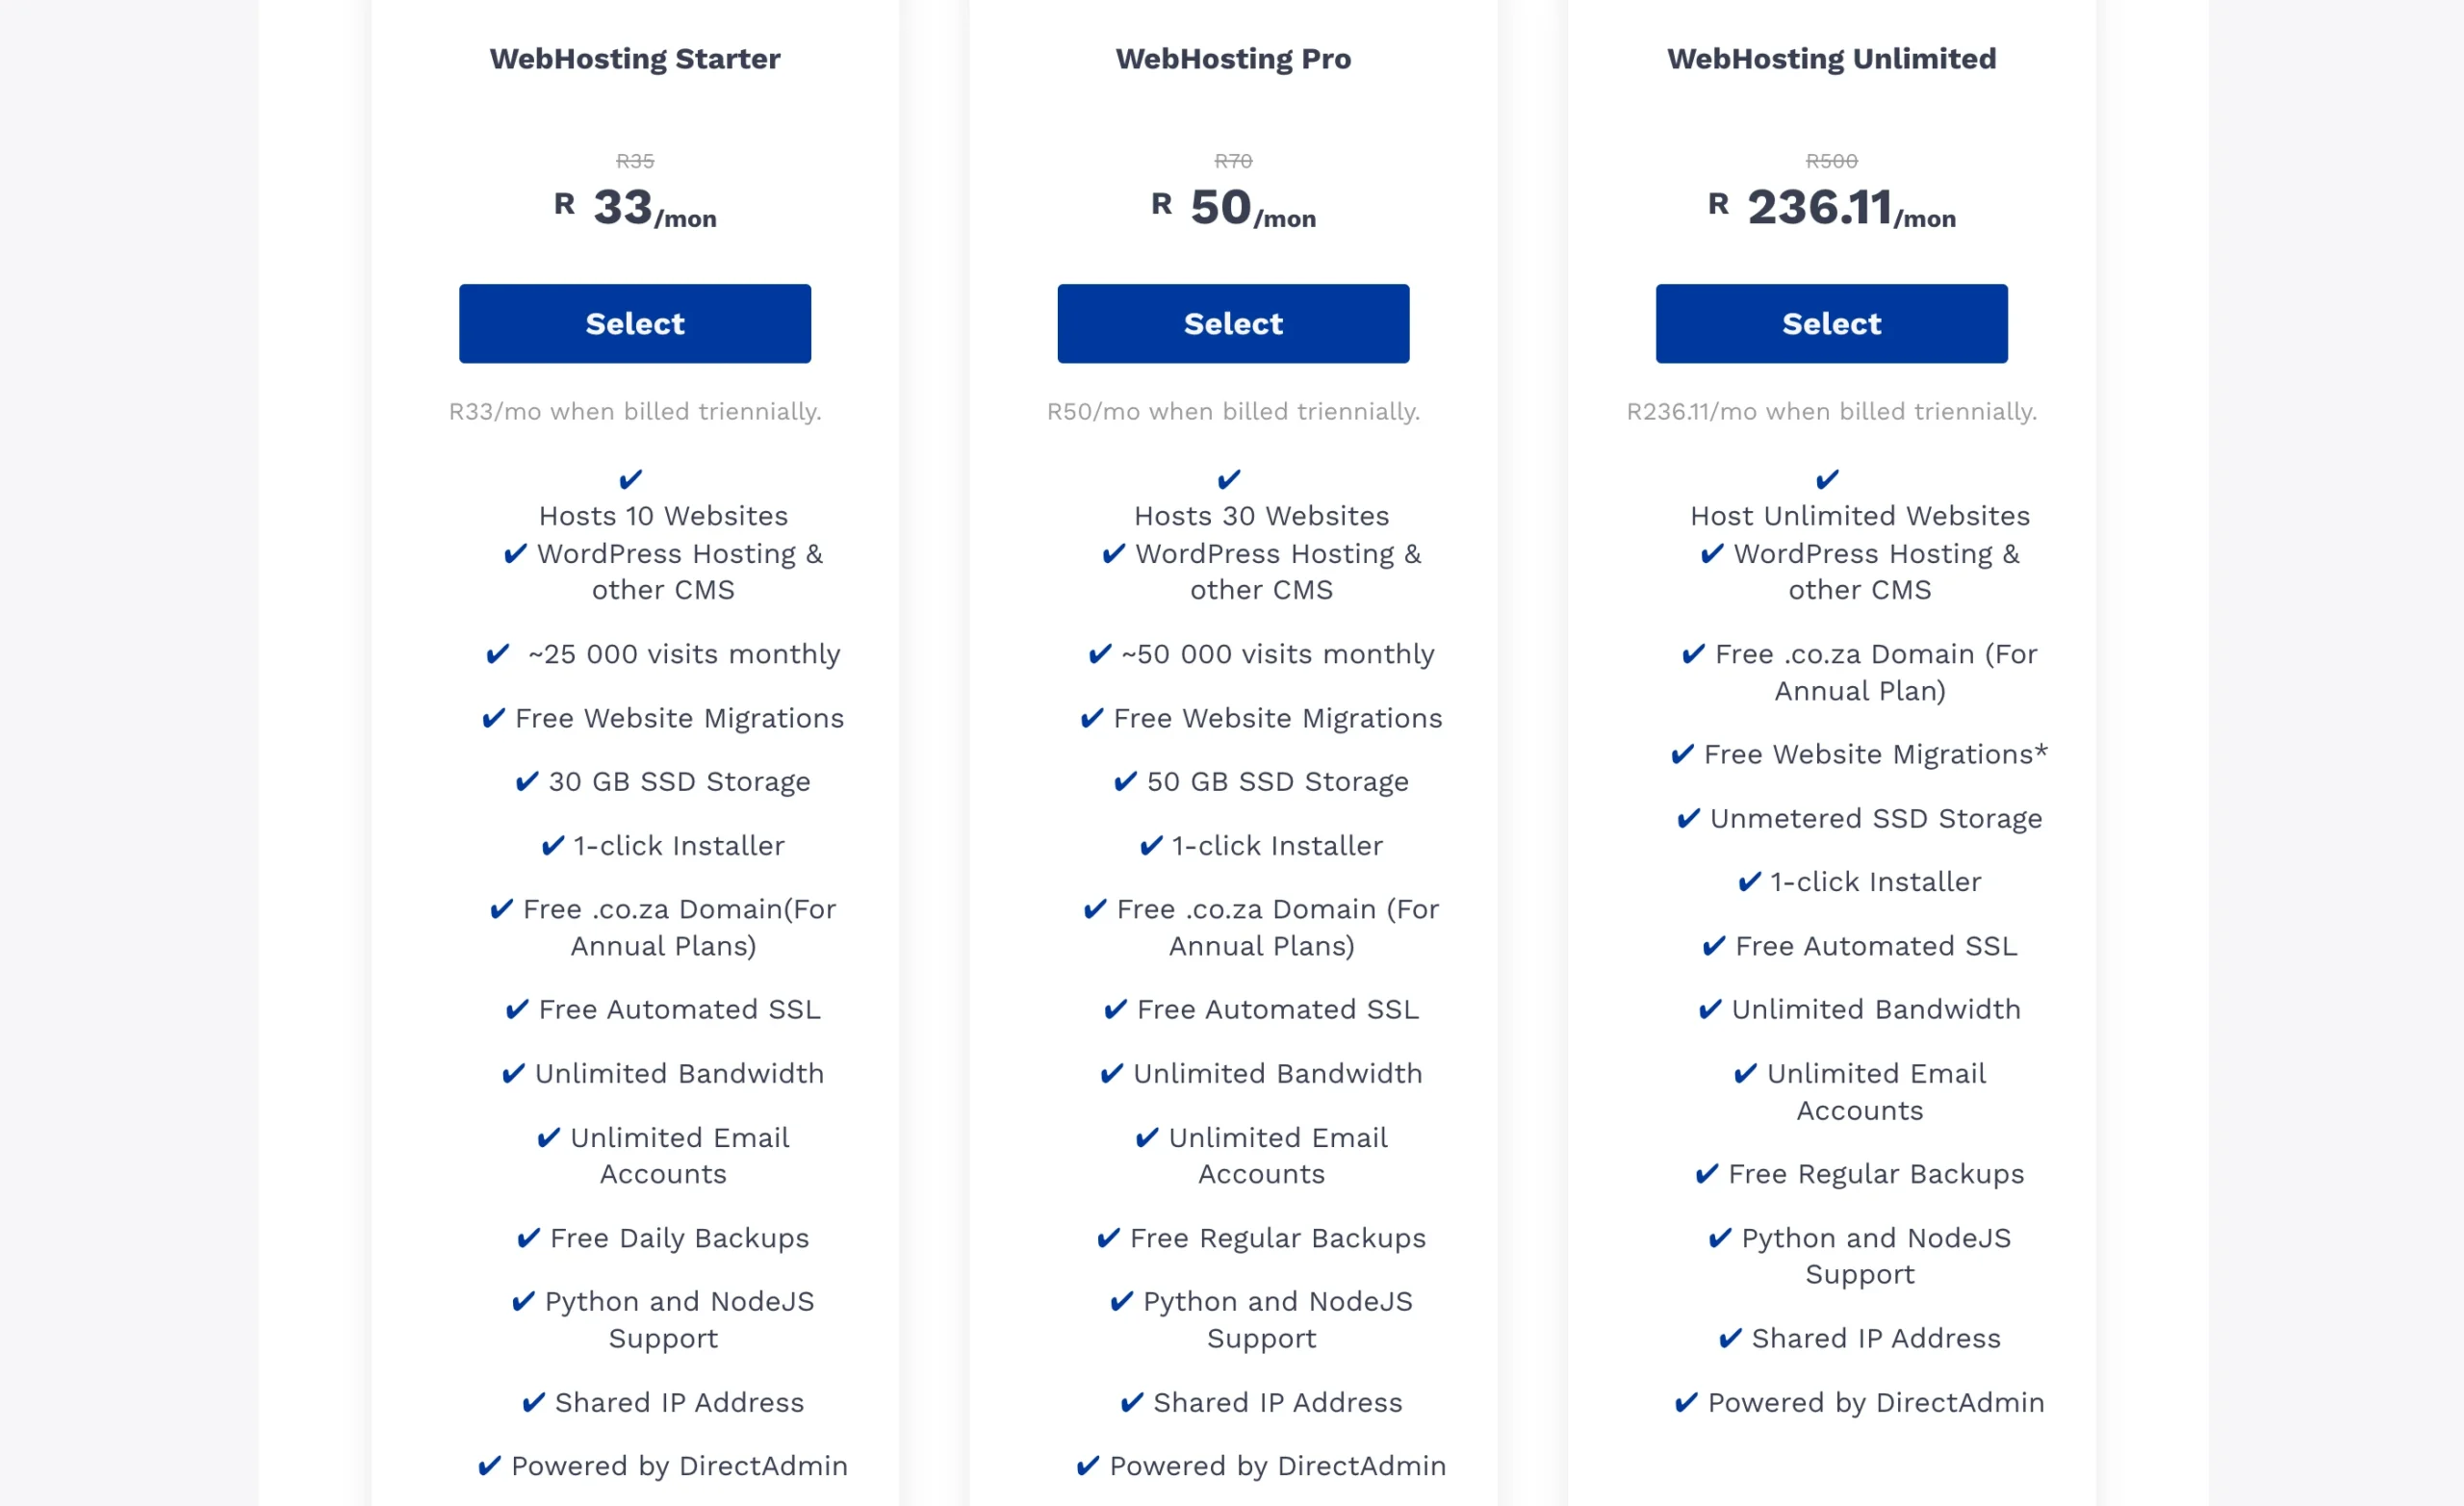
For beginners and growing businesses, our Truehost Starter and Pro hosting plans are designed to run WooCommerce stores efficiently.
They include one-click WordPress installation, free SSL certificates, a free .co.za domain, and hosting infrastructure optimized for eCommerce websites, with servers located in Johannesburg for faster local performance.
Once your hosting account is active, installing WordPress only takes a few minutes.
From your hosting control panel (cPanel):
- Open Softaculous Apps Installer.
- Select WordPress.
- Click Install.
- Choose your domain name.
- Create your administrator username and password.
- Complete the installation.
After the installation finishes, you can log in to your WordPress dashboard and begin setting up your online store. The next step is installing WooCommerce, which adds all the eCommerce features your website needs.
Step 2: Install and Activate WooCommerce
With WordPress installed, it’s time to transform your website into a fully functional online store.
WooCommerce is a free plugin that adds everything you need to sell online, including product pages, shopping carts, secure checkout, order management, shipping options, and payment processing.
To install it, log in to your WordPress dashboard and go to “Plugins,” then “Add New,” or straight to “Manage Plugins,” from your Softaculous WordPress management interface.
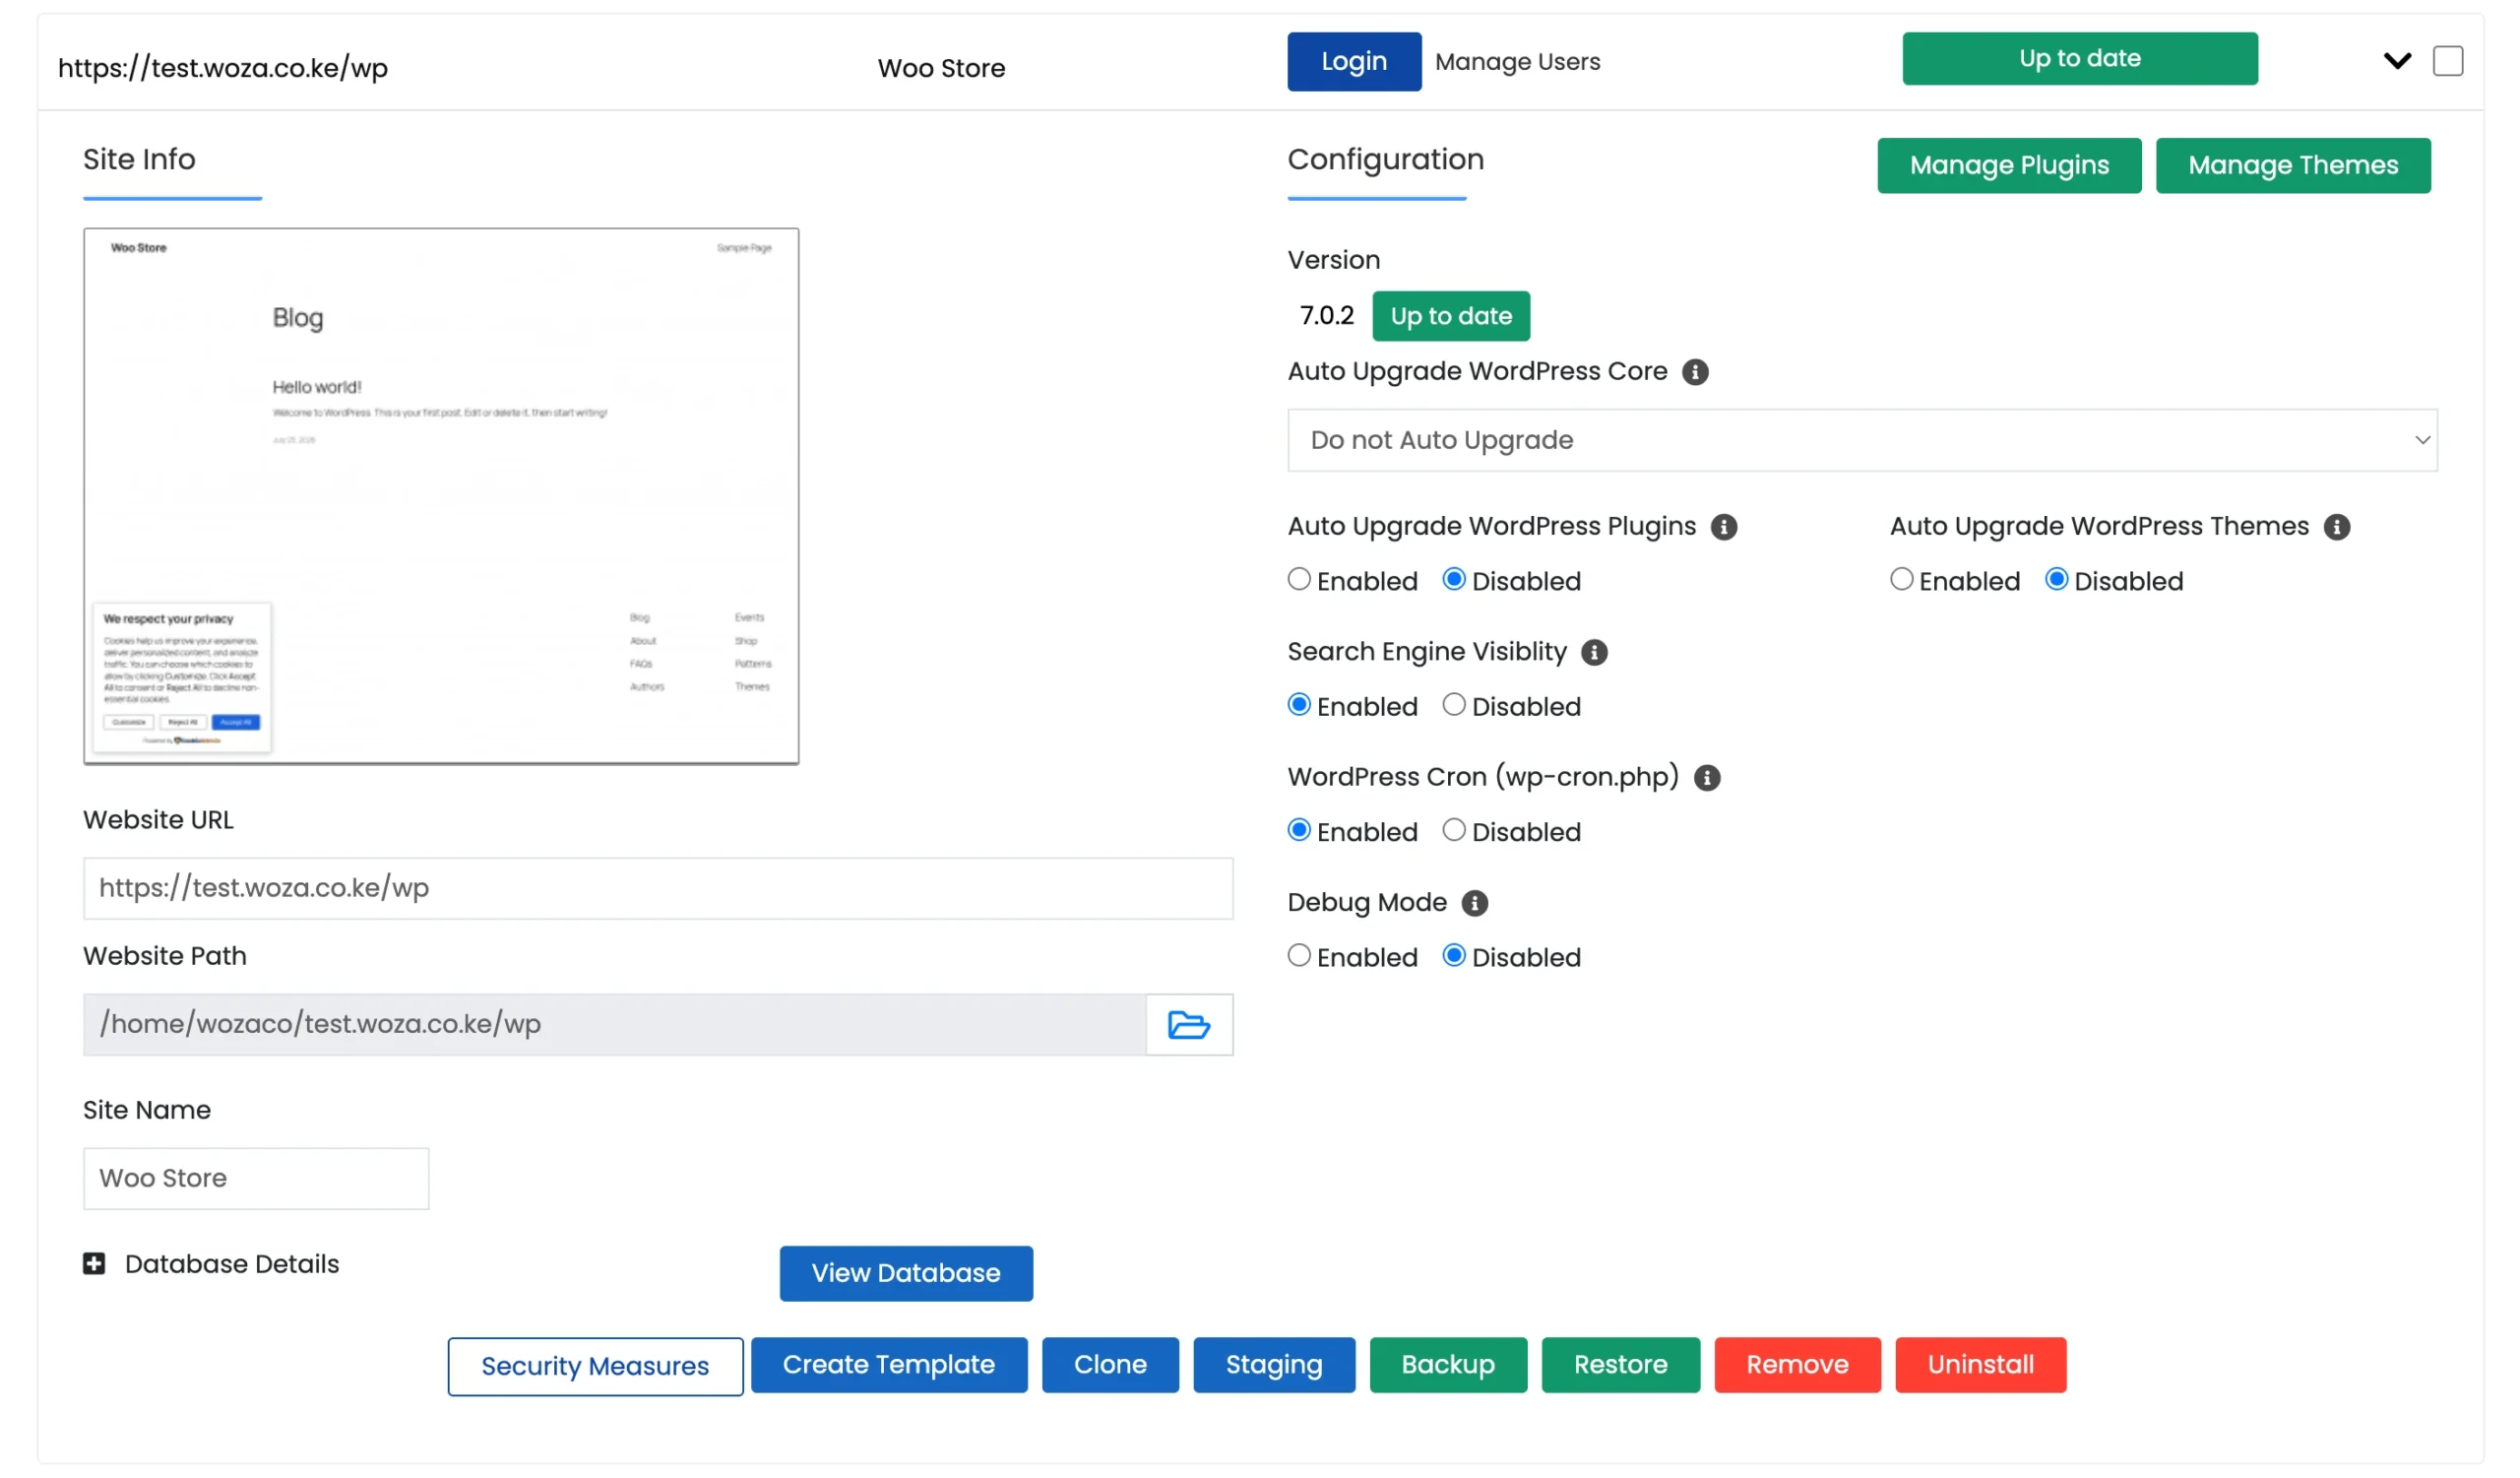
Type “WooCommerce” in the search bar. The official plugin, published by Automattic, will appear at the top.
Click “Install,” then “Activate” once the installation finishes.
As soon as WooCommerce is activated, the setup wizard opens automatically. This wizard guides you through the basic store settings, so you can start selling with the right configuration from day one.
The wizard walks you through:
- Store details: Enter your South African address and currency. Set this to ZAR (South African Rand) from the start. This ensures your products display the correct prices and helps simplify payment and tax configuration later.
- Industry and product type: Select the option that best matches your business. If your store sells, say, both physical and digital products, you can choose multiple product types.
- Business specifics: How many products you plan to list and if you’re selling on other platforms. WooCommerce uses this to suggest relevant extensions. You don’t have to install any of them now.
- Theme selection: The wizard will offer a few theme options. You can pick one here to get started or come back to this in the next step.
Step 3: Choose and Set Up an E-Commerce Theme
Your theme controls what customers see when they land on your store. A heavy, slow, or poorly structured theme will cost you sales before a shopper even reaches your products.
To browse themes, go to “Appearance,” “Themes,” then “Add New,” or continue directly from the wizard’s theme selection screen.
If you already have a theme you’ve purchased or designed, scroll to the bottom of the themes page and click “Drop a theme zip file here” to upload.
When choosing a theme, prioritize speed, simplicity, and WooCommerce compatibility over flashy animations or unnecessary features.
Two excellent choices are:
- Astra: lightweight, fast, and highly customizable.
- Blocksy: modern, responsive, and built with WooCommerce in mind.
Both themes work well for beginners and offer plenty of customization options without slowing down your website.
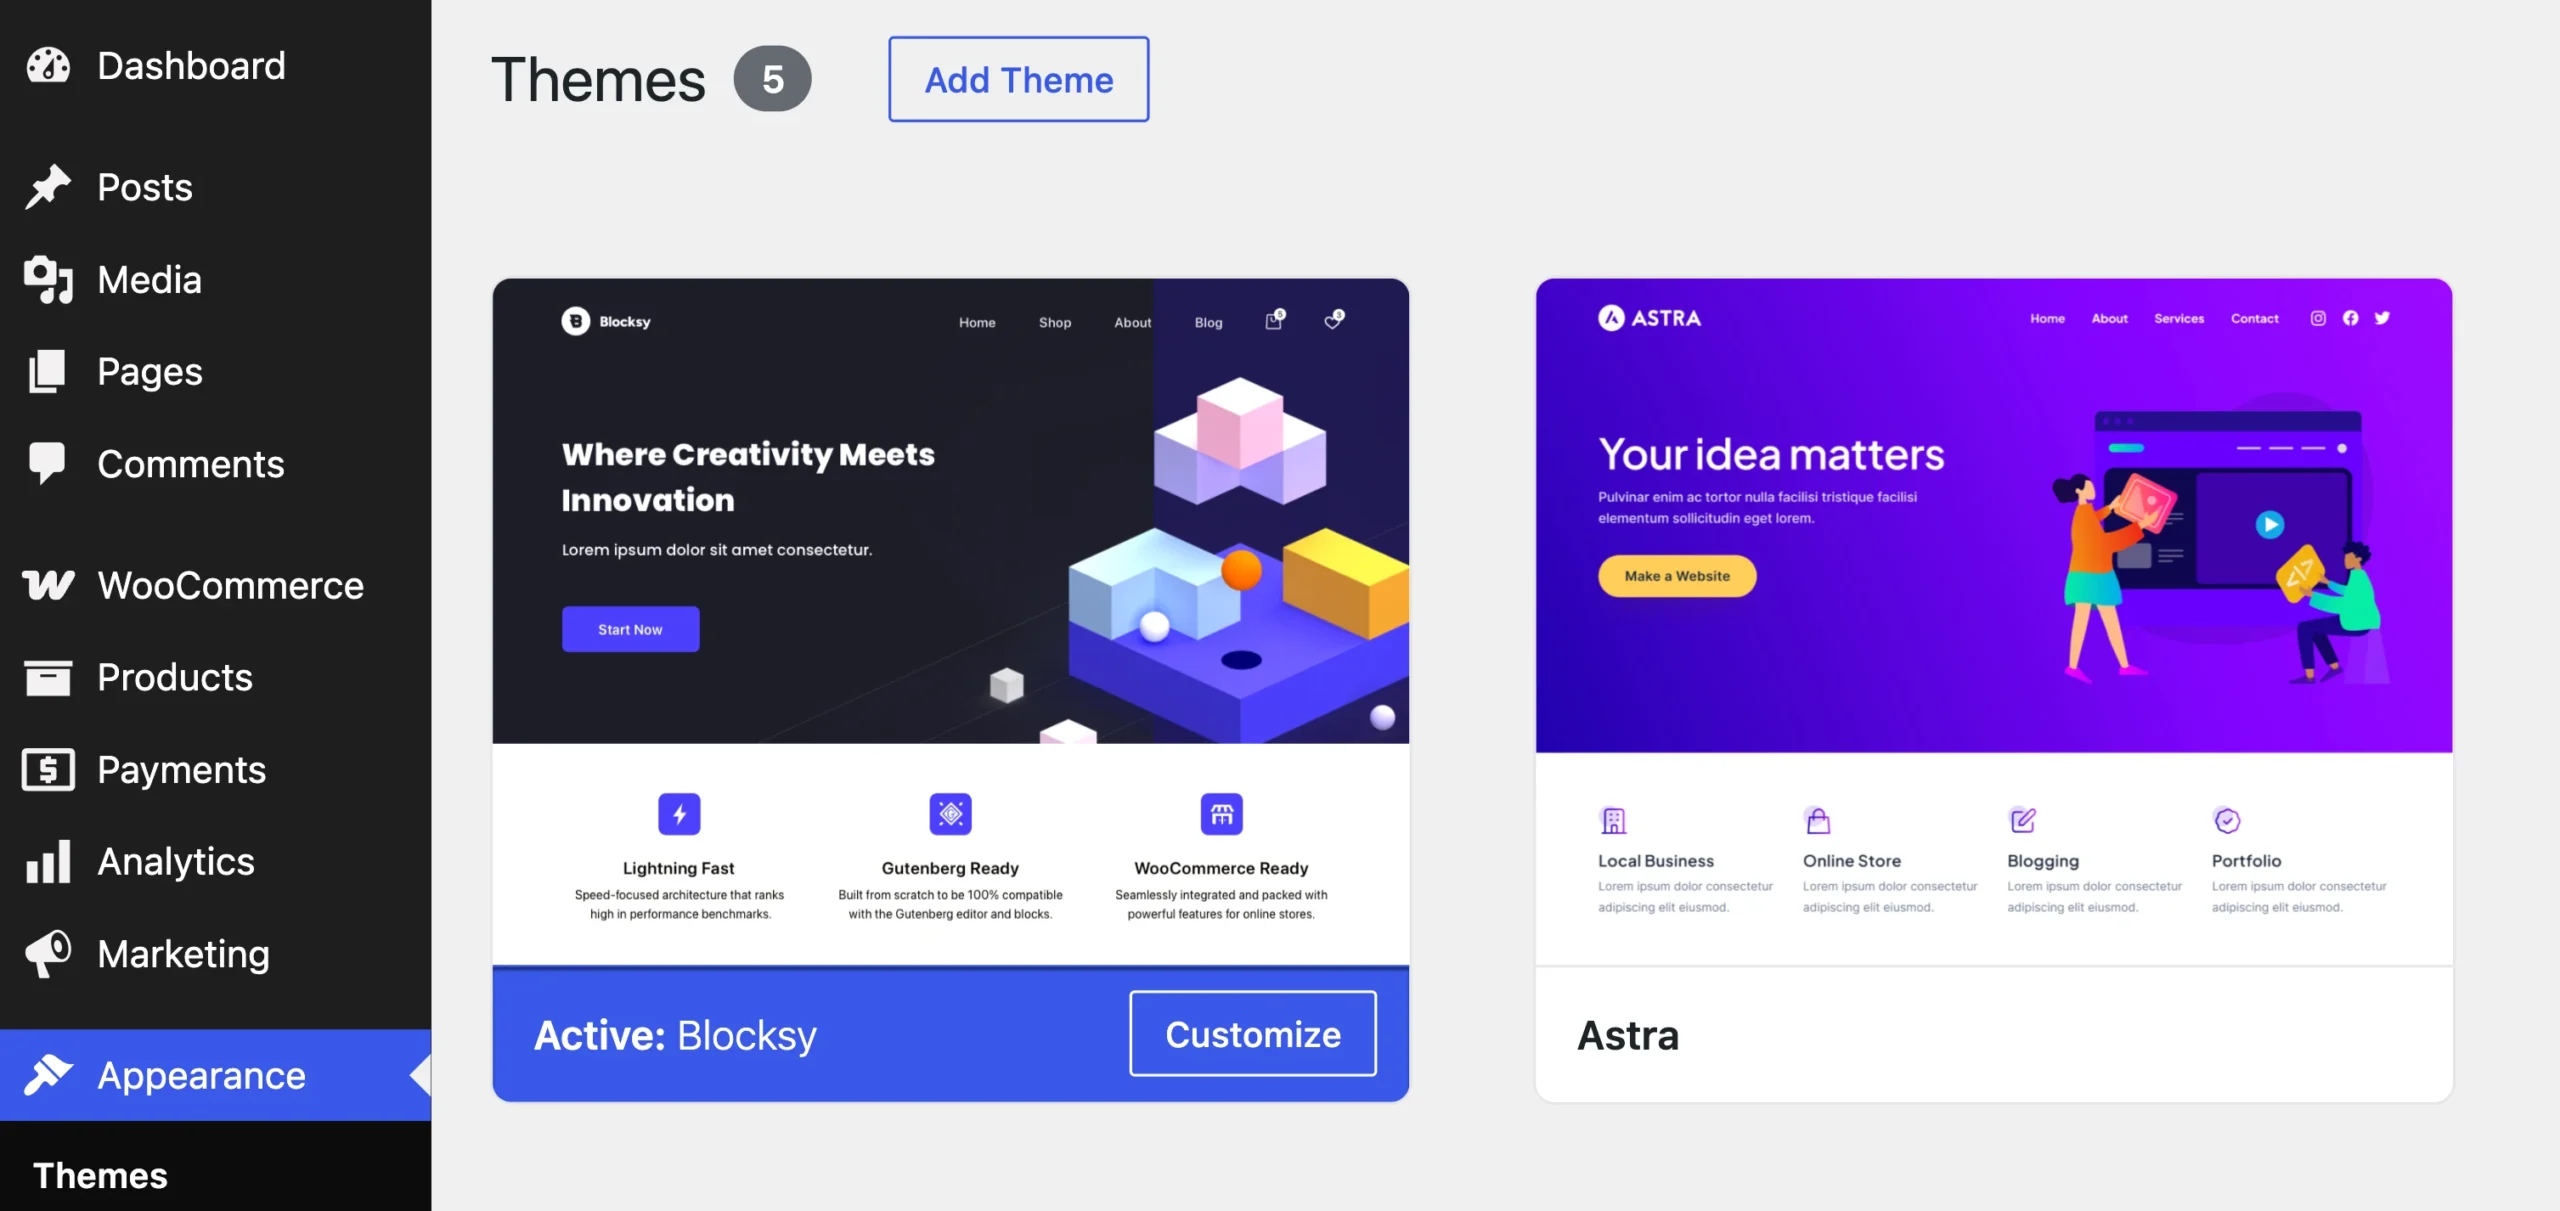
To speed up the design process, import one of the pre-built starter templates included with your chosen theme. Instead of creating every page from scratch, you’ll have a professionally designed layout that you can personalize with your own branding, products, and content.
If you’d like even more design flexibility, install Elementor, a popular drag-and-drop page builder.
It lets you customize pages visually, making it easy to adjust layouts, add sections, and create landing pages without touching a single line of code.
As you customize your store, keep mobile users in mind.
A large percentage of South African shoppers browse and buy using their smartphones, so your store should load quickly, display properly on smaller screens, and make it easy to browse products and complete purchases.
If you’re happy with the way your store is looking, the next step is adding the products you’ll be selling.
Step 4: Add Your Products
To add your first product, go to “Products,” then “Add New.”
This opens the product editor, where you’ll enter all the information customers need before making a purchase.
a) Product Type
Before you add the product information, scroll down first to the “Product Data” section and choose the product type. WooCommerce supports several product types, allowing you to sell almost anything from a single store.
The most common options include:
- Simple Products for single items with one price, such as books or electronics.
- Variable Products for items available in different sizes, colors, or styles.
- Digital Downloads for products like eBooks, templates, software, or online courses.
- Grouped and External Products if you’re selling collections or linking to products on another website.
Choose the option that best matches what you’re selling before filling in the product details.
b) Product Information
For the product information, you’ll fill in the following:
Title: This is the product name. Give your product a clear, descriptive title that customers can easily recognize.
Description: Write a detailed product description that answers the questions buyers are likely to have. Instead of simply listing features, explain how the product benefits the customer, what it’s made from, what’s included, and any important specifications.
c) Product Data
Below the description, you’ll be back to the “Product Data” section, where you can configure the rest of your product.
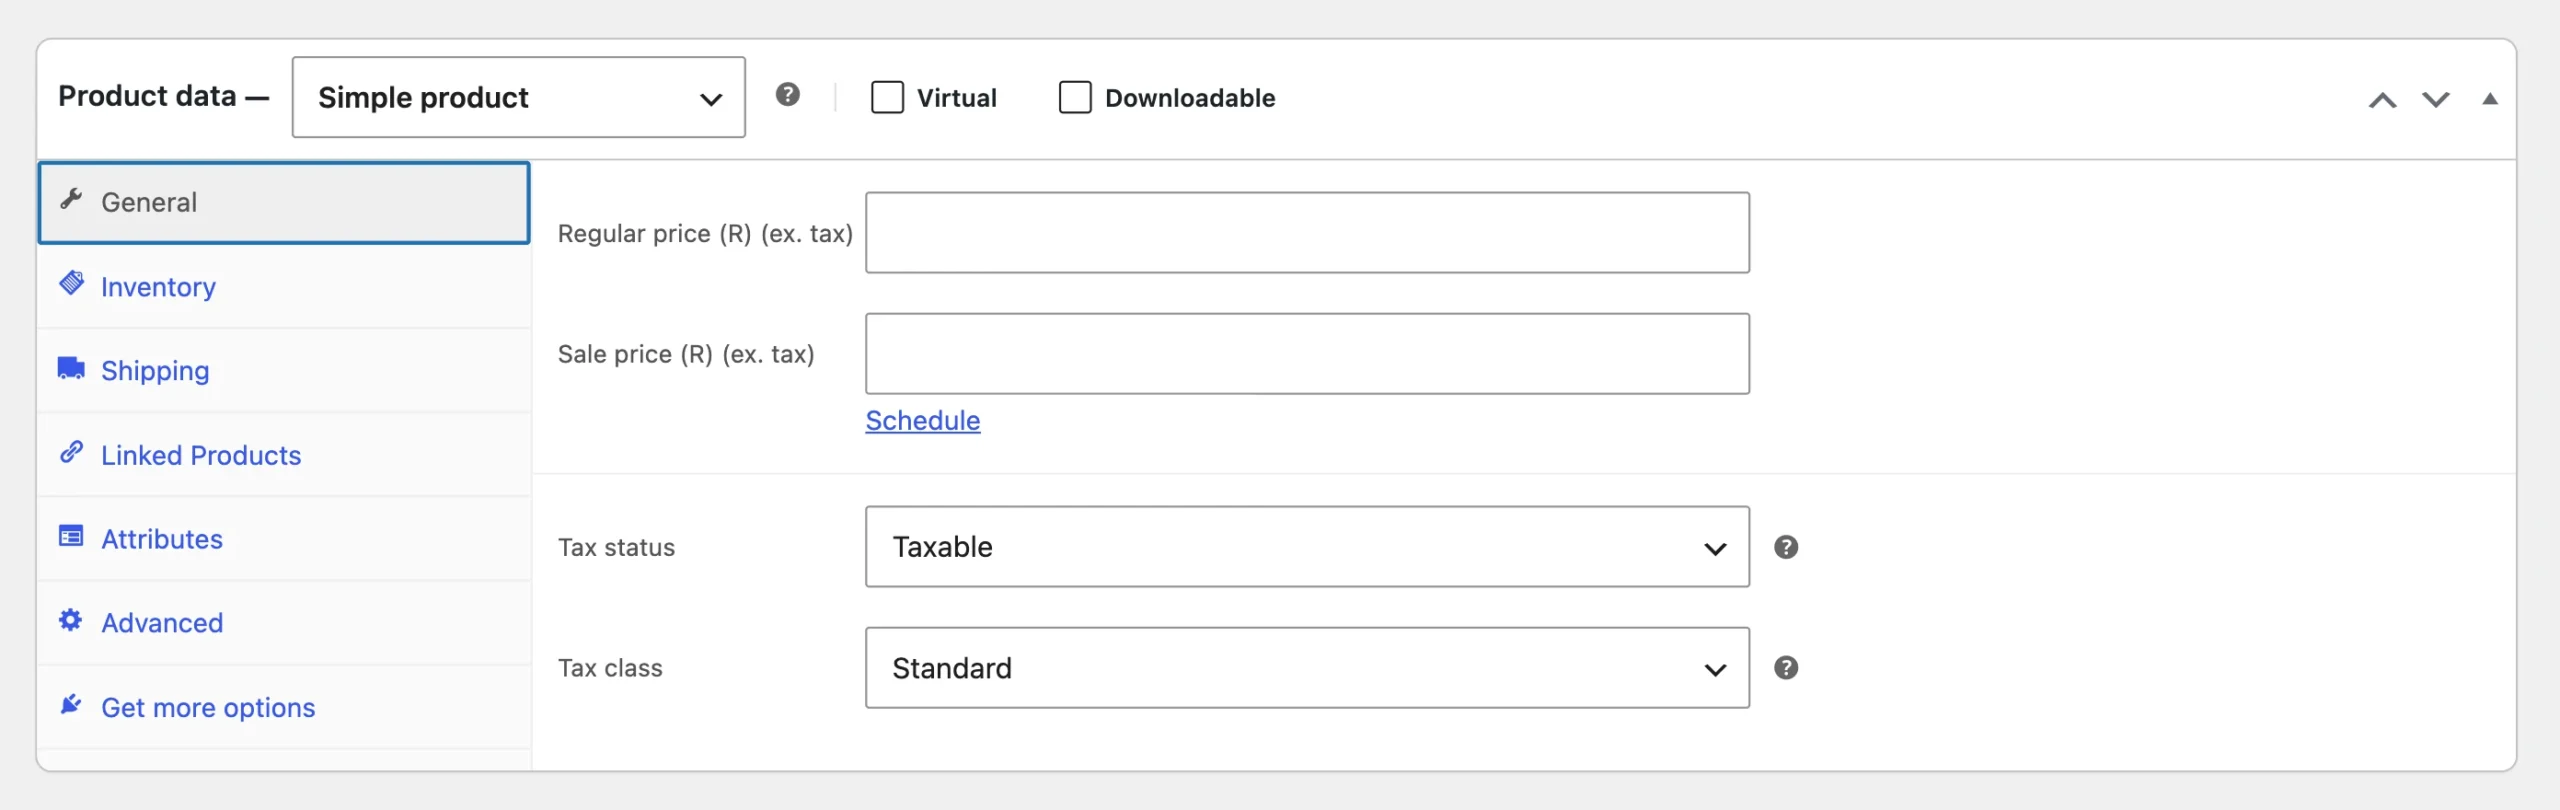
Here, you’ll set:
- The selling price in South African Rand (ZAR).
- Sale prices, if you’re running promotions.
- Stock levels and inventory management.
- Product weight and dimensions for shipping calculations.
- Shipping class, if different shipping rates apply.
Uploading high-quality images is equally important. Use clear, well-lit photos from multiple angles so customers can see what they’re buying. If your product comes in different colors or styles, include images that showcase each variation.
d) Product Image, Category and Publishing
On the right-hand panel, add a “Product Image” (clean photo, plain background), assign a “Product Category,” and add any relevant tags that help shoppers find the product through search or navigation.
When everything looks right, click “Publish.” Your product is now live.
Repeat the same process for the rest of your catalog until your store is fully stocked and ready for customers to browse.
For larger catalogs, WooCommerce supports CSV bulk import, which is useful if you already have a spreadsheet of products built out.
Step 5: Configure Payments, Shipping, and Taxes
Your store may look great and have all the right products at this point, but customers still need a way to pay for their orders and receive them.
Go to “WooCommerce,” then “Settings,” and work through “Payments,” “Shipping,” and “Tax” in turn.
a) Payments
WooCommerce supports a wide range of payment providers, but if you’re selling in South Africa, it’s best to choose gateways that local customers already know and trust.
Popular options include:
- PayFast: One of SA’s most recognized gateways, supporting card payments, SnapScan, Ozow, and more. Install the PayFast WooCommerce plugin and connect it to your PayFast merchant account.
- Capitec Pay: This is growing fast among Capitec’s large customer base in South Africa.
- Peach Payments: Supports credit and debit cards, digital wallets, and other popular online payment methods.
- Stripe and PayPal: Ideal if you plan to sell internationally, with support for multiple currencies and payment methods.
Each gateway has a test mode. Use it instead of going live without confirming payments really process end to end.
b) Shipping
Go to “WooCommerce,” “Settings,” “Shipping,” “Add Shipping Zone,” and create a zone for South Africa.
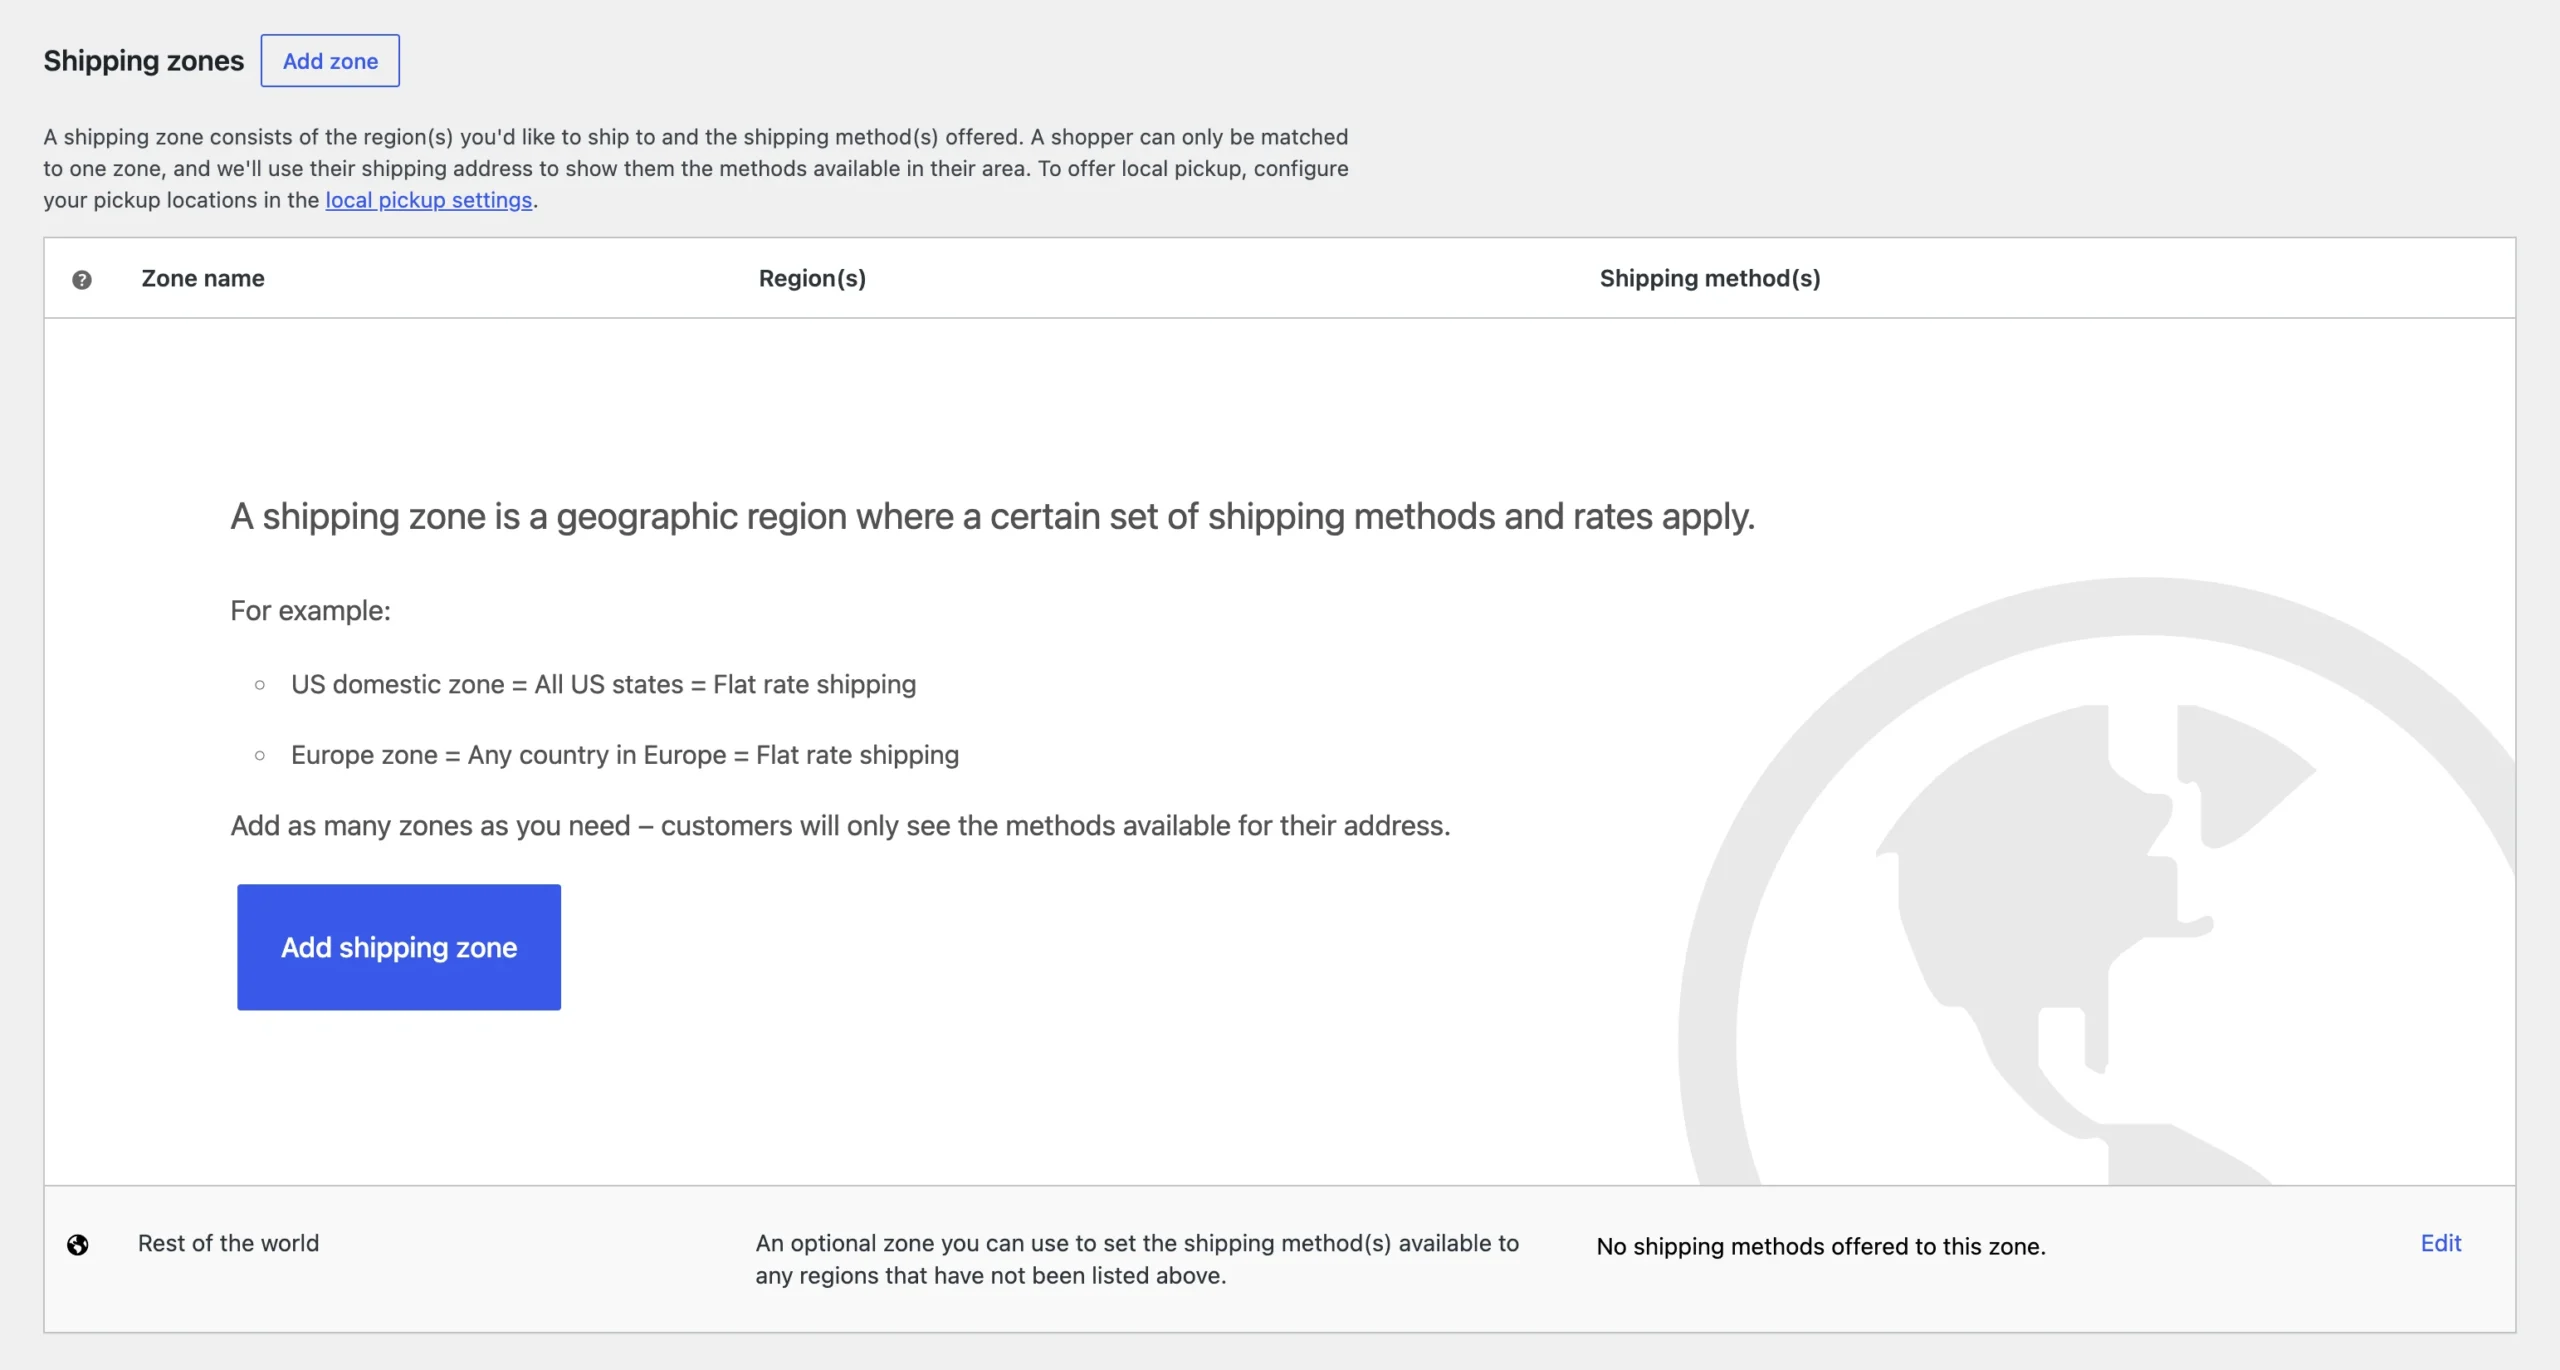
Within that zone, you can configure:
- Flat rate: A fixed fee per order (e.g., R80 per delivery)
- Free shipping: Triggered above a minimum order value (e.g., free on orders over R500)
- Local pickup: If customers can collect from a physical location
For courier integration, plugins like Pargo connect WooCommerce directly to South African courier networks for real-time shipping quotes and booking.
c) Taxes
Go to “WooCommerce,” “Settings,” and “General” and tick “Enable taxes.” Save, then open the “Tax” tab that appears.
South Africa’s standard VAT rate is 15%. Add a new tax rate with the following:
- Country code: ZA
- Rate: 15
- Name: VAT
- Tax class: Standard
Decide if your prices are tax-inclusive (VAT already in the listed price, the norm for retail) or tax-exclusive (VAT added at checkout, more common for B2B). For most South African consumer stores, tax-inclusive pricing is the cleaner experience for shoppers.
If your business isn’t VAT-registered yet, don’t charge VAT. Consult a tax professional if you’re unsure if the SARS registration threshold applies to you.
Step 6: Optimise, Secure, and Test Your WooCommerce Store on WordPress
Your store is now configured. Before you launch it to the public, do these three things first: secure it, speed-test it, and place a test order.
a. Security and speed basics:
1. Start by confirming that your SSL certificate is active. Most WordPress hosting providers, including Truehost, include a free SSL certificate that encrypts data exchanged between your store and your customers.
You’ll know it’s working when your website loads with https:// and displays the padlock icon in the browser.
2. To further protect your store, install a trusted WordPress security plugin.
These tools help defend your website against malware, brute-force login attempts, and other common security threats while alerting you to suspicious activity.
3. Install a caching plugin like WP Super Cache or LiteSpeed Cache. Caching reduces page load times by storing frequently accessed content, allowing pages to load much faster for returning visitors.
b. Run a test order:
Switch your payment gateway to test/sandbox mode, then visit your store as a customer would. Add a product to the cart, go through checkout, and complete a purchase using the test credentials your gateway provides.
Check that:
- Products show correct ZAR prices and images
- Cart and checkout load without errors
- VAT is calculating correctly
- The test payment goes through without error messages
- A confirmation email arrives in the inbox you used
- The order appears in WooCommerce, under “Orders” in your dashboard
Once everything checks out, switch the gateway back to live mode, disable any maintenance mode you had active, and submit your sitemap to Google Search Console.
Make sure each product page has a clear title tag and meta description. Your WooCommerce store on WordPress is now live.
Common pitfalls to watch for:
Plugin conflicts (deactivate plugins one by one if something breaks after an update), slow load times on mobile (usually a theme or unoptimized images issue), and payment errors at checkout (almost always an API key that wasn’t saved correctly).
WooCommerce Store on WordPress FAQs
Is WooCommerce free or paid?
WooCommerce itself is free. You’ll pay for hosting, your domain, and any premium plugins or themes you choose to add, but the core platform costs nothing to download and use.
What WordPress plan do I need for WooCommerce?
WooCommerce runs on self-hosted WordPress (wordpress.org), not WordPress.com. You need your own hosting account, not a WordPress.com subscription. Truehost’s Starter and Pro plans both support WooCommerce out of the box.
Is WooCommerce good for beginners?
Yes. The setup wizard handles the most technical parts of the configuration, and the dashboard is simple and direct once you’re past the initial setup. Most beginners have a working store within a day.
How much is WooCommerce per month?
WooCommerce is free. Your ongoing costs are hosting (Truehost plans start at R
33 per month), your domain renewal, and any premium plugins you’ve added. No platform percentage is taken from your sales.
Which is better, WordPress or WooCommerce?
They’re not competing options. WooCommerce is a plugin that runs inside WordPress. WordPress is the content management system; WooCommerce adds the store functionality on top of it. You need both.
Next Steps for Success After Launch
Launching your WooCommerce store is a major milestone, but it’s only the beginning.
Your first week is the perfect time to build momentum, learn how customers interact with your store, and make small improvements that support future growth.
During that time, do this:
1. Connect Google Analytics or MonsterInsights
You need to see where visitors are coming from and where they’re dropping off. MonsterInsights connects Google Analytics directly to your WooCommerce dashboard, so conversion data is visible without leaving WordPress.
2. Set up your product categories and navigation menu
Go to “Appearance,” then “Menus,” and make sure your product categories are easy to find in the main navigation. A shopper who can’t locate what they’re looking for in two clicks won’t stay to look harder.
3. Share on WhatsApp, Facebook, and Instagram
Social commerce in South Africa is high-intent traffic. People who find your store through a WhatsApp message or an Instagram post are often already in buying mode.
Post your store link, share a product, and run a small launch offer. Start building that presence from the first day you’re live.
Now, if you’re ready to launch your WooCommerce store on WordPress, get started today with Truehost’s optimized hosting, with fast setup, local support in South Africa, and everything priced in ZAR.