 Web Hosting
 Windows HostingBuilt for Windows apps and websites – stability, speed and flexibility
 Reseller HostingLaunch a hosting business without technical skills or expensive infrastructure
 Affiliate ProgramRefer customers and earn commissions from sales across our platform
 Domain SearchFind and secure a domain name in seconds with our quick lookup tool
 CO ZA Domains
 All DomainsExplore domain names from over 324 TLDs globally – all in one place
 Free Whois Lookup Tool South Africa
 VPS
 Website Builder
 Online ShopSet up a sleek eCommerce store with zero coding knowledge
 SSLs
 SupportAccess help articles, how-tos, and everything about our services
 Blog
 Contact UsReach our team instantly via live chat or drop us an email

Your new VPS just came online. You have an IP address, a root password, and a blinking cursor.
No control panel exists yet. A cPanel license would add a monthly bill, and you would rather skip it.
HestiaCP solves that problem. It is free, open source, and light enough for a modest server.
In about 20 minutes, you can manage websites, email, DNS, and databases from one dashboard.
First, though, one rule breaks more installs than any other. HestiaCP needs a clean operating system. Leftover web servers or old panels will block the installer.
This guide walks through pre-install checks, the install itself, login, firewall rules, SSL, and fixes for failed installs. Every command is ready to copy. Each step also shows what a healthy result looks like.
Table of Contents
What You Need Before You Install HestiaCP
Two checks prevent most failed installs. Spend a minute on them before you touch the installer.
HestiaCP System Requirements for a VPS
HestiaCP runs on modest hardware. However, the services you enable decide how much memory you need.
| Resource | Minimum | Recommended |
|---|---|---|
| CPU | 1 core, 64-bit | 4 cores |
| RAM | 1 GB (without SpamAssassin and ClamAV) | 4 GB |
| Disk | 10 GB free | Sized to your sites and mailboxes |
A few more requirements apply:
- Architecture: AMD64 (x86_64) or ARM64 (aarch64). Any 32-bit system is unsupported.
- Virtualization: Pick KVM or LXC. Older OpenVZ setups can cause DNS and firewall problems.
- Access: You need root login over SSH and a public IP address.
- Memory hogs:
ClamAVandSpamAssassinuse the most RAM. Skip both on a 1 GB server.
Supported Linux Distributions (and Why CentOS Isn’t One)
HestiaCP currently supports four releases: Debian 11, Debian 12, Ubuntu 22.04, and Ubuntu 24.04. For a new server, Ubuntu 24.04 is the safest pick. It has the longest support window ahead. Debian 12 is a solid second choice.
The project supports LTS releases only. A non-LTS build, such as Ubuntu 21.10, gets no help from the HestiaCP team.
Red Hat family systems fail too. CentOS, AlmaLinux, and Rocky Linux are not supported. HestiaCP builds on apt, while those systems use dnf. If you run one of them, rebuild the VPS with Ubuntu or Debian first.
The clean-install rule deserves one more note. Many providers ship images with extra software preloaded, so choose a plain OS image.
If the image already has an admin account, delete it. Otherwise, add the --force flag when you run the installer.
Step 1: Connect to Your VPS and Run Pre-Install Checks
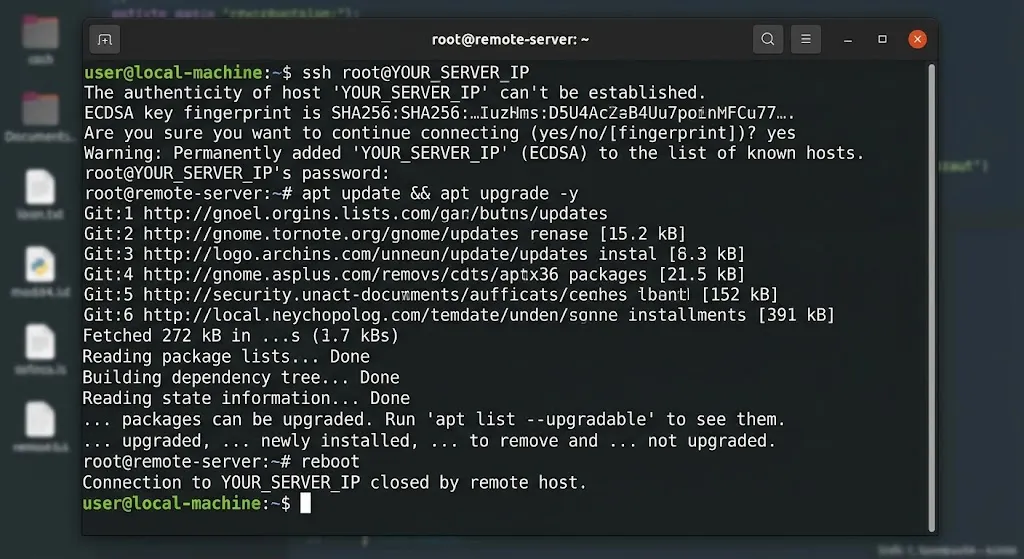
Open a terminal on Linux or macOS. Windows users can use PuTTY or the built-in SSH client.
ssh root@YOUR_VPS_IPType yes if SSH warns about an unknown host. That prompt appears on every first connection.
Now run four quick checks:
cat /etc/os-release

uname -m

free -h

df -h /
Read the output carefully. The first command should show Ubuntu 22.04 or 24.04, or Debian 11 or 12.
The second should print x86_64 or aarch64. The third should show at least 1 GB of total memory. The fourth should show about 10 GB of free space.
Next, look for leftover software:
dpkg -l | grep -E "apache2|nginx|mariadb|mysql|exim4|postfix"No output means the server is clean. A match means another stack is installed. The installer may offer to remove it. Still, a rebuild with a plain image is cleaner.
Then update the system:
apt update && apt upgrade -yReboot if the update replaced the kernel. After that, reconnect over SSH.
Step 2: Set Your Server Hostname
HestiaCP uses the hostname for the panel address, SSL, and mail. Therefore, set it before you install. Use a fully qualified name, such as panel.example.com.
hostnamectl set-hostname panel.example.com

hostname -f
The second command should print panel.example.com.
Next, add a DNS A record that points panel.example.com to your VPS IP address. Do this now so the record spreads while the install runs. Let’s Encrypt needs it later.
No domain yet? The installer accepts a placeholder hostname, and you can log in through the IP address. Still, a real hostname saves rework.
Step 3: Download the HestiaCP Installer Script
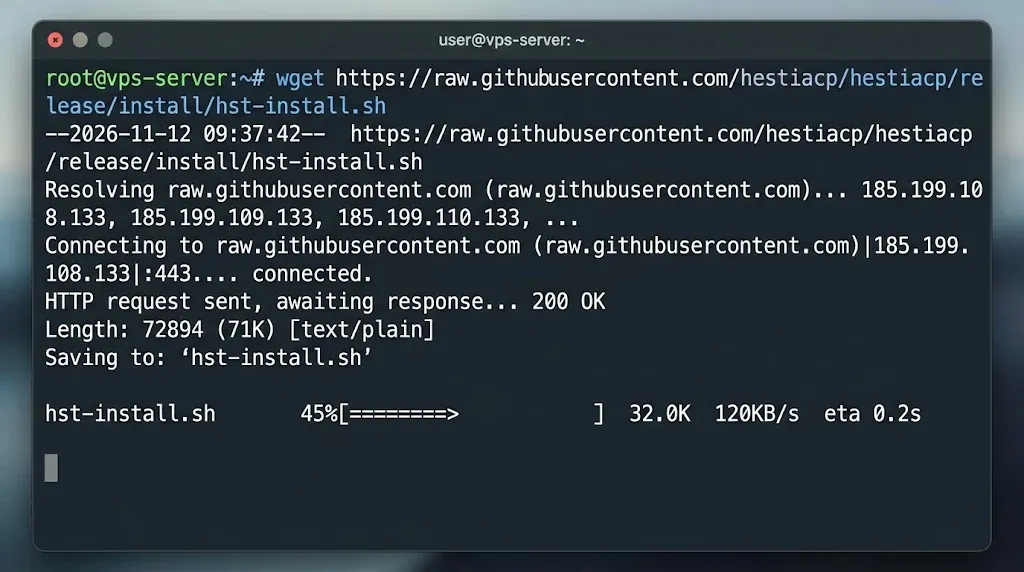
Fetch the official script from the HestiaCP repository:
wget https://raw.githubusercontent.com/hestiacp/hestiacp/release/install/hst-install.shThe file hst-install.sh lands in your current folder. Since it runs as root, read it first:
less hst-install.shPress q to exit. Also check the official docs for the latest download path. The project updates it from time to time.
Step 4: Run the HestiaCP Installer
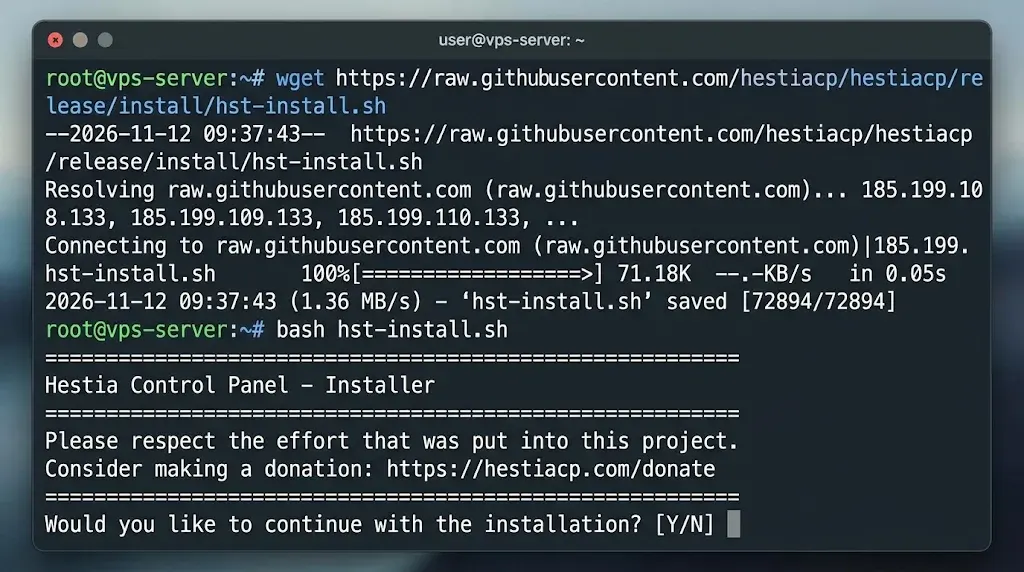
Start the interactive installer:
bash hst-install.shThe script asks you to confirm. Then it requests an admin email address and a hostname. Answer the prompts and let it work.
Choose Which Services to Install
The default run installs a full stack. It includes Nginx, Apache, PHP-FPM, MariaDB, Exim, Dovecot, Bind, ClamAV, SpamAssassin, and Fail2Ban. That suits a 4 GB server. However, a 1 GB server needs a lighter build.
You pick services with flags, which the next section covers. This table shows what to skip:
| Service | Memory use | Skip it if |
|---|---|---|
| ClamAV (antivirus) | Heavy | You run a 1 GB server or no mail |
| SpamAssassin | Moderate to heavy | You run a 1 GB server or no mail |
| Exim and Dovecot (mail) | Moderate | You use an outside email provider |
| Bind (DNS) | Light | Your registrar or Cloudflare handles DNS |
| Apache backend | Moderate | You want Nginx with PHP-FPM only |
Run an Unattended Install with Flags
Flags let you skip prompts and trim the stack. This suits scripted deployments and repeat builds.
bash hst-install.sh \

  --interactive no \

  --hostname panel.example.com \

  --email [email protected] \

  --username admin \

  --password 'ChangeThisPassword123' \

  --clamav no \

  --spamassassin no
Run bash hst-install.sh --help to see every flag your version supports. Also use a strong password. A password typed on the command line stays in your shell history.
How Long the Installation Takes
Expect 10 to 20 minutes. Server size and package mirror speed change that number. Do not interrupt the script, even if the output pauses.
A healthy run ends with a summary screen. It shows the panel URL, the username admin, and a generated password. Copy those details into a password manager right away. The installer may also ask you to reboot. Say yes.
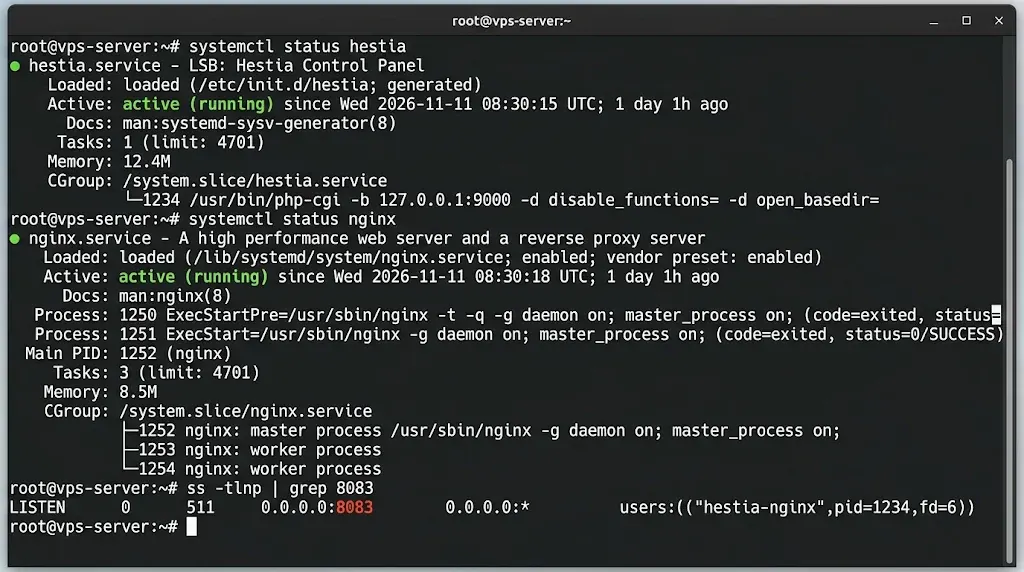
After the reboot, verify the installation:
systemctl status hestia

systemctl status nginx

ss -tlnp | grep 8083
Both services should show active (running). The last command should show a listener on port 8083.
Step 5: Log In to the HestiaCP Control Panel
Open one of these addresses in your browser:
- https://panel.example.com:8083
- https://YOUR_VPS_IP:8083
Your browser will warn you about the certificate. The panel uses a self-signed certificate until you add a real one. Accept the warning for now. The SSL section below fixes it.
Sign in with the username admin and the generated password. Then change that password under User, then admin, then Edit.
The top menu holds the areas you will use first:
- Web: Add domains, set PHP versions, and enable SSL.
- DNS: Manage zones and records for hosted domains.
- Mail: Create mail domains and mailboxes.
- DB: Create databases and users.
- Backups: Run and download site backups.
Open the Right Firewall Ports for HestiaCP
HestiaCP sets up its own firewall with iptables and Fail2Ban. Your provider may also run a firewall in front of the server. If port 8083 times out, check the provider’s firewall first.
| Port | Protocol | Purpose |
|---|---|---|
| 22 | TCP | SSH access |
| 80 | TCP | HTTP and Let’s Encrypt checks |
| 443 | TCP | HTTPS for websites |
| 8083 | TCP | HestiaCP panel |
| 25, 465, 587 | TCP | Sending and receiving mail |
| 993, 995 | TCP | Secure mailbox access (IMAP and POP3) |
| 53 | TCP and UDP | DNS |
| 21 | TCP | FTP, only if you use it |
Never disable the firewall to reach the panel. Open port 8083 instead. On the server, add a rule with this command:
v-add-firewall-rule ACCEPT 0.0.0.0/0 8083 TCPYou can also add rules from the firewall page in the panel. Afterward, confirm the listener again with ss -tlnp | grep 8083.
Secure the Panel with a Let’s Encrypt SSL Certificate
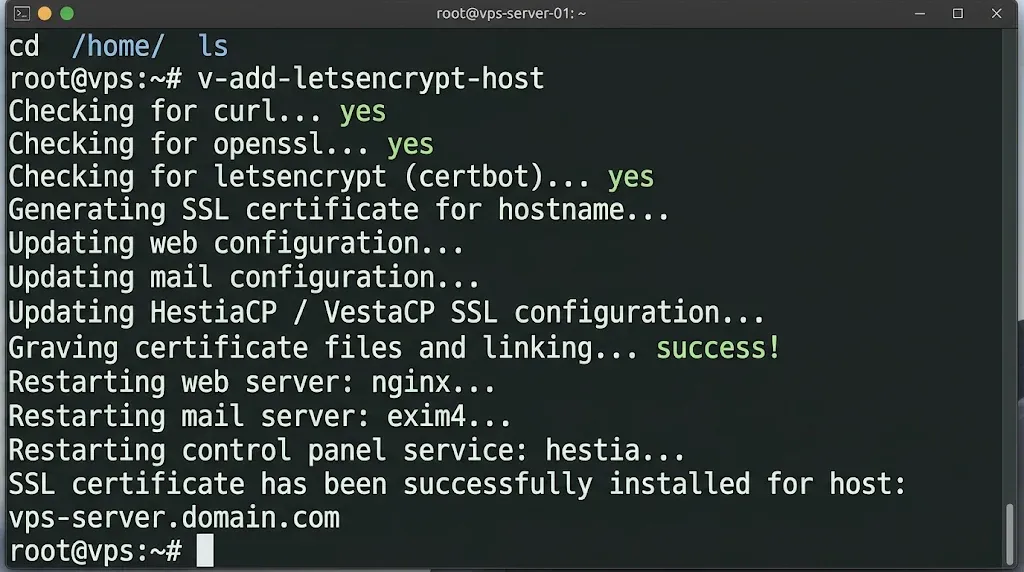
First, confirm two things. The DNS record for your hostname must point to the VPS. Also, port 80 must be open. Without both, certificate issuance fails.
Then run this command as root:
v-add-letsencrypt-hostIt requests a certificate for the server hostname and applies it to the panel. Reload https://panel.example.com:8083. The browser warning should be gone.
Your websites need their own certificates. Point the domain’s DNS to the VPS, then follow these steps:
- Go to Web and edit the domain.
- Tick Enable SSL.
- Tick Use Let’s Encrypt.
- Click Save.
How to Reset the HestiaCP Admin Password
Locked out? Reset the password over SSH:
v-change-user-password admin 'NewStrongPassword'If the shell says the command is missing, call it by full path: /usr/local/hestia/bin/v-change-user-password.
This command also lands in your shell history. Clear it afterward with history -c. If you can still log in, the panel route is safer. Go to User, then admin, then Edit, then Password.
Troubleshooting a Failed or Stalled HestiaCP Installation
Most failures trace back to a short list of causes.
- Installer refuses to start: You may not be root. The OS may also be unsupported, or an admin account may already exist. Switch to root, check the OS, then delete the account or add
--force. - Installer stalls: Run
df -handfree -h. A full disk or low memory is the usual cause. Another apt process may also hold the package lock. Check withps aux | grep apt. On a small server, add swap or skip ClamAV and SpamAssassin. - Port
8083is unreachable: Check the provider’s firewall first. Then runsystemctl status hestia. Also, confirm you typed https:// in the address bar. - Unclear errors: Read the logs in
/var/log/hestia/. Runjournalctl -xeandsystemctl --failedfor service problems. - Half-finished install: These rarely repair cleanly. Rebuild the VPS with a clean image and rerun the steps above.
HestiaCP Installation FAQs
Is HestiaCP Really Free?
Yes. HestiaCP uses the GPLv3 license, so there is no license fee. It began as a fork of VestaCP. You still pay for the VPS, your domain names, and any backup storage.
How Do I Update HestiaCP After Installing It?
HestiaCP installs from its own apt repository. Therefore, the usual system update also updates the panel:
apt update && apt upgrade -yThe panel also has an updates area in its server settings. Back up your sites before every update. Check the current docs for the steps that match your version.
How Do I Uninstall HestiaCP?
HestiaCP has no official one-click uninstaller. Removing packages by hand leaves configuration files behind.
As a result, the cleanest route is a rebuild. Download your backups from the Backups page first. Then reinstall a plain Ubuntu or Debian image.
Your Panel Is Running, So Put It to Work
You now have a working control panel. Your next three moves are short. First, add your domain under Web.
Second, create a mailbox and test it in a mail client. Third, schedule backups and send copies off the server. HestiaCP supports FTP, SFTP, and rclone targets for that job.
One decision remains. You can keep patching and monitoring the VPS yourself. Otherwise, you can move to a managed plan and hand that work off.
No clean server yet? Start with a fresh Ubuntu 24.04 VPS from Truehost, then follow this guide line by line.