 Web Hosting
 Windows HostingBuilt for Windows apps and websites – stability, speed and flexibility
 Reseller HostingLaunch a hosting business without technical skills or expensive infrastructure
 Affiliate ProgramRefer customers and earn commissions from sales across our platform
 Domain SearchFind and secure a domain name in seconds with our quick lookup tool
 CO ZA Domains
 All DomainsExplore domain names from over 324 TLDs globally – all in one place
 Free Whois Lookup Tool South Africa
 VPS
VPS Website Builder
 Online ShopSet up a sleek eCommerce store with zero coding knowledge
 SSLs
SSLs SupportAccess help articles, how-tos, and everything about our services
 Blog
Blog Contact UsReach our team instantly via live chat or drop us an email
Your Supabase Cloud bill just crossed budget again. Or your compliance lead asked where your user data actually sits.
Either way, you are staring at the same question. Should you run Supabase on your own server instead of leaving it in someone else’s cloud?
Self-hosting Supabase puts you back in control. You get the same database, authentication, and storage tools. Only now they run on infrastructure you own and manage yourself.
Supabase is built from several open-source pieces working together. Postgres handles your data. Auth, built on GoTrue, manages sign-ups, logins, and sessions.
PostgREST turns your database into a REST API automatically. Storage handles file uploads. Realtime pushes database changes to connected clients over websockets.
Self-hosting is different from the two other things people often confuse it with. The first is Supabase Cloud, the fully managed platform Supabase runs for you.
The second is the Supabase CLI local stack, which spins up Supabase on your own machine for development only.
This guide walks through the full setup on a VPS, built with South African teams in mind.
That means POPIA, ZAR pricing, and local latency, not just generic Docker commands copied from a global blog post.
Table of Contents
VPS Requirements Before You Start
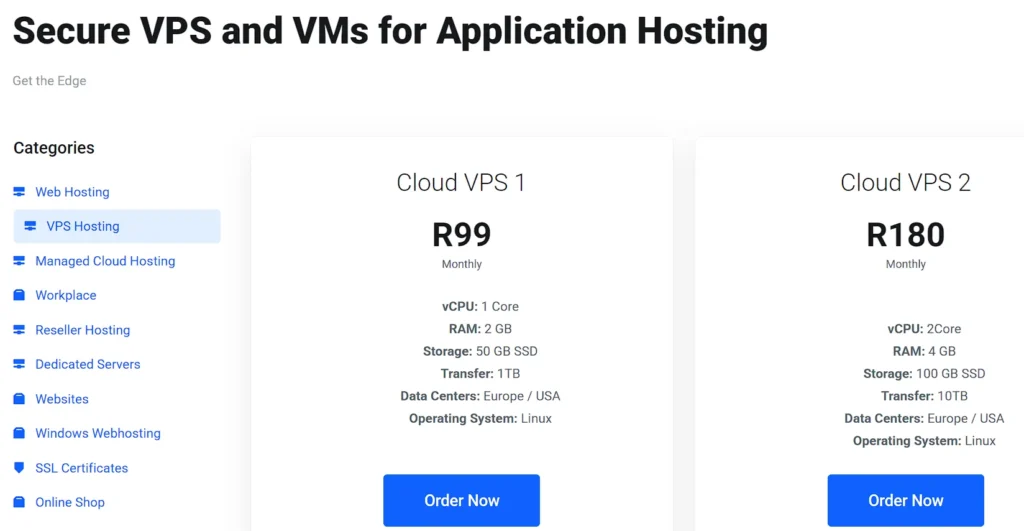
Check your server specs before you install anything. Supabase publishes clear minimums, and skipping this step leads to slow, unstable deployments.
For small to medium production workloads, aim for:
- Minimum: 4GB RAM, 2 vCPUs, 40GB SSD
- Recommended: 8GB or more RAM, 4 or more vCPUs, 80GB or more SSD
Run Ubuntu as your base OS. Install Docker Engine and Docker Compose before moving to the next step.
Match your VPS tier to what you actually plan to run. If you skip Realtime, Storage, or Edge Functions, your resource needs drop.
Choose a Truehost VPS plan sized for your real traffic, not the biggest option on the page.
Step-by-Step: Deploying Supabase with Docker Compose
Two paths get you to a working install. Pick the one that fits your setup and comfort level.
Two Ways to Install: Quick Start vs Manual
The quick start script only works on Linux, covering Debian, Ubuntu, RHEL, CentOS, and Fedora. It handles almost everything for you in one command.
The manual install works on any operating system. It takes a few more steps, but it shows you exactly what each piece does.
Quick Start Installation (Recommended for Most VPS Setups)
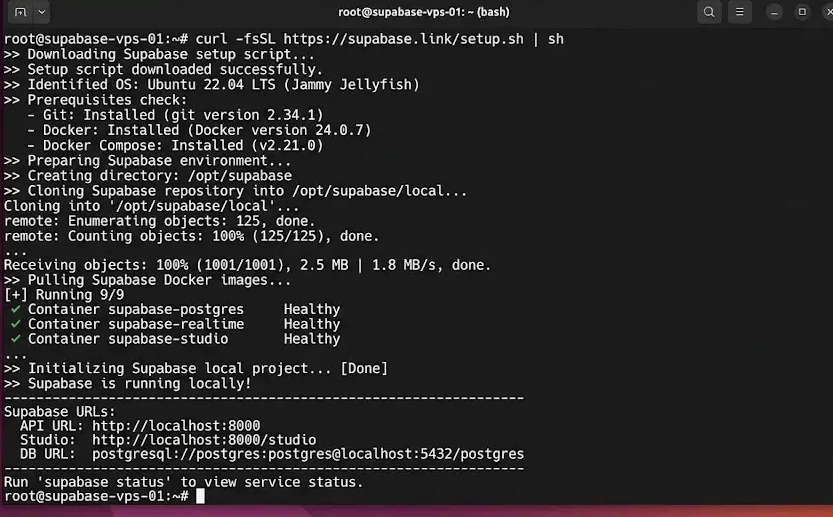
Start with this single command:
curl -fsSL https://supabase.link/setup.sh | shThis script installs Docker, git, and jq automatically if they are missing. It then pulls the Docker folder from the Supabase repository into a new project directory.
You will be prompted for your URLs, including your public URL, external API URL, site URL, and proxy domain. The script writes these straight into your .env file.
From there, it generates every secret you need. That includes a random dashboard password and the full JWT signing key pair. It finishes by pulling the required Docker images.
Once the script finishes, start the stack:
cd supabase-project && sh run.sh startView your generated credentials any time with:
sh run.sh secretsManual Installation (Any OS, More Control)
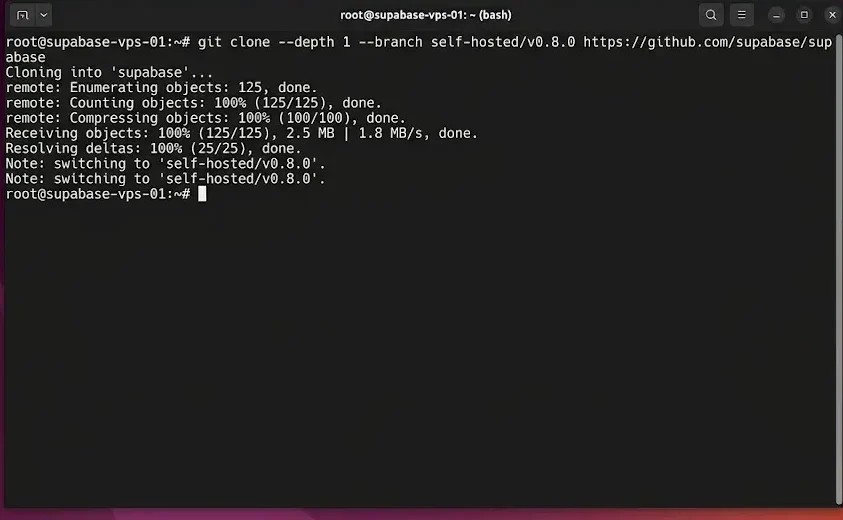
Clone the repository first:
git clone --depth 1 --branch self-hosted/v0.8.0 https://github.com/supabase/supabaseCreate a fresh project folder, then copy the Docker configuration into it:
mkdir supabase-project

cp -rf supabase/docker/. supabase-project
Move into that folder and create your environment file:
cd supabase-project && cp .env.example .envRecord your installed version so future updates run smoothly:
printf 'ref=self-hosted/v0.8.0\n' > .supabase-versionPull the images:
docker compose pullIf you run rootless Docker, edit .env and set DOCKER_SOCKET_LOCATION to your actual socket path. Skip this, and the supabase-vector container will fail to start.
Generating Secrets and Locking Down Access
Never launch Supabase using the placeholder values in .env.example. Those defaults exist only as examples, not real credentials.
Generate secure secrets with:
sh utils/generate-keys.shThen add your API keys and JWT key pair:
sh utils/add-new-auth-keys.shSet a strong DASHBOARD_PASSWORD in .env before your first launch. This step is not optional, so do not skip it.
Review three URL variables carefully:SUPABASE_PUBLIC_URL,API_EXTERNAL_URL, andSITE_URL. Each one needs your real domain, not the placeholder example.com.
Starting the Stack and Confirming It Runs Cleanly
Start everything with:
sh run.sh startThis command waits until every service reports healthy before finishing. Check the status any time with:
docker compose psIf a service shows “created” instead of “Up” something needs attention. Run the built-in test script to narrow down the cause:
sh tests/test-container-logs.shPull logs from one specific service when you need more detail:
sh run.sh logs <service-name>Securing Your Self-Hosted Supabase Instance
A working install still needs proper security before real users touch it.
Confirm your DASHBOARD_PASSWORD is genuinely strong. Basic auth is the only thing standing between the public internet and your Studio dashboard by default.
Limit which ports are reachable from outside your server. Only the API gateway needs to face the public internet directly.
Add a second layer of protection in front of Studio if you can. Tools like Authelia support multi-factor login on top of basic auth.
Set firewall rules on the VPS itself, not only inside Docker. A container-level rule means little if the underlying server allows open access.
Connecting a Domain and Reverse Proxy
Point an A record from your domain to your VPS IP address. This step gives your Supabase instance a real, memorable address.
Set up Nginx or Caddy as a reverse proxy in front of the API gateway. Supabase publishes an official guide for this exact setup, so follow it closely.
Issue an SSL certificate through your proxy and confirm HTTPS loads correctly everywhere. Traffic over plain HTTP should never reach production.
Turn on WebSocket support in your proxy configuration. Skip this step, and Realtime will not work at all.
Troubleshooting Common Self-Hosted Supabase Issues
Even a careful install runs into problems sometimes. Here are the ones that show up most often, and how to fix them.
I) Containers are stuck as “unhealthy” after startup. This usually points to supabase-analytics, supabase-vector, or supabase-studio.
A manually edited .env value is often the cause. Revert the affected variable to its generated default, then run:
sh run.sh recreateII) API gateway fails with an entrypoint error. This almost always traces back to CRLF line endings from a Windows checkout.
Re-clone the repository, or normalize the Docker folder to LF line endings.
III) Realtime container stuck in a restart loop. Watch for an RLIMIT_NOFILE error in the logs. Set the ulimit explicitly in your compose override, then extend the healthcheck timeout.
IV) Studio loads but you cannot create users or upload files. Check that DASHBOARD_USERNAME and DASHBOARD_PASSWORD match what your gateway has picked up. Confirm the auth schema permissions were not changed by a manual .env edit.
V) “Tenant or user not found” error on external connections. This points to a mismatch. Confirm POOLER_TENANT_ID in your server .env matches the value in your client connection string.
VI) Rootless Docker users are seeing supabase-vector exit right away. Set DOCKER_SOCKET_LOCATION in .env to your real Docker socket path.
When none of these match your problem, start with the logs:
sh run.sh logs <service>Most self-hosted issues reveal their cause directly inside that output.
Testing, Monitoring, and Keeping Supabase Updated
1) Test each service on its own before you call the installation finished. Confirm Studio loads, Auth issues tokens, the REST API responds, and Realtime connects.
2) Use the update. A script to pull new releases and merge them into your existing setup. Check the self-hosted changelog before running any update in production.
3) Back up your Postgres volume on a regular schedule. Self-hosting means you now own backups, and nobody else will handle this for you.
4) If a single update causes problems, roll back that one service. Pin the previous image tag directly in docker-compose.yml, then restart just that container.
Self-Hosted Supabase vs Supabase Cloud: What It Actually Costs
Run the numbers before committing either way.
A suitable VPS in South Africa typically costs a fixed amount in ZAR each month. Supabase Cloud starts free, then moves to usage-based pricing in USD as your app grows.
Self-hosting comes with trade-offs worth naming clearly. You lose managed backups, point-in-time recovery, and analytics dashboards enabled from day one.
In return, you gain steady costs with no billing surprises. You also gain full control over your data and freedom from vendor lock-in.
A simple rule helps here. Small projects with light traffic often do fine on Supabase Cloud. Growing apps with predictable, heavy usage tend to save more by self-hosting.
FAQs
Can you self-host Supabase for free?
Yes, the Supabase software itself carries no license cost. You still pay for the VPS running it, so the real expense is your server, not the platform.
Is self-hosted Supabase actually production-ready?
Yes, when set up and secured correctly. Skipping steps like the dashboard password or HTTPS setup causes most production problems, not the platform itself.
Does self-hosted Supabase support Edge Functions and Realtime the same way Cloud does?
Both are available, and both run through the same open source components as Cloud. Some managed conveniences, like automatic scaling, still sit only inside Supabase Cloud.
Can you migrate an existing Supabase Cloud project to a self-hosted setup?
Yes, Supabase publishes tools for restoring a project from the platform and copying storage data across. Plan for downtime during the switch, and back up everything first.
Get Started With Self-hosted Supabase
Self-hosting Supabase is not a one-time setup you finish and forget. It is an ongoing commitment to running your own infrastructure, complete with updates, backups, and security work.
For South African teams working with sensitive data or tight budgets, that trade-off often pays off. You get full control over where your data lives and what it costs each month.
If you are ready to move off Supabase Cloud, start with the right setup. Compare Truehost VPS plans built for exactly this kind of workload, and pick one sized for your real traffic.