 Web Hosting
 Windows HostingBuilt for Windows apps and websites – stability, speed and flexibility
 Reseller HostingLaunch a hosting business without technical skills or expensive infrastructure
 Affiliate ProgramRefer customers and earn commissions from sales across our platform
 Domain SearchFind and secure a domain name in seconds with our quick lookup tool
 CO ZA Domains
 All DomainsExplore domain names from over 324 TLDs globally – all in one place
 Free Whois Lookup Tool South Africa
 VPS
VPS Website Builder
 Online ShopSet up a sleek eCommerce store with zero coding knowledge
 SSLs
SSLs SupportAccess help articles, how-tos, and everything about our services
 Blog
Blog Contact UsReach our team instantly via live chat or drop us an email
A fresh Ubuntu server gets scanned within minutes of going public. Bots probe open ports around the clock, looking for weak logins and outdated software.
Most beginners install WordPress and WooCommerce first, then think about security later. That order gets stores hacked before they process a single order.
In South Africa, a breach involving customer payment data is not just embarrassing. It can trigger real POPIA compliance problems and lasting damage to customer trust.
This guide flips the usual order. Lock the server down first, then build the store on top of it.
By the end, your WooCommerce site will run on a server that was secure before WordPress even touched it.
Table of Contents
Choose the Right Ubuntu Version and Server Specs for Your Store
Pick Ubuntu 24.04 LTS for a new e-commerce server. LTS releases get five years of security patches, so your store stays protected without forcing a full OS upgrade mid-launch.
Older versions like 20.04 still show up in tutorials, but their support window is closing fast, and running an unpatched OS defeats the purpose of hardening it.
For specs, size the server to the store, not the other way around:
- A small WooCommerce store with a few hundred products runs comfortably on 2 vCPUs, 4GB RAM, and SSD storage.
- A growing catalog with regular traffic spikes benefits from 4 vCPUs and 8GB RAM, especially around sale periods.
- SSD storage is not optional. Product images and database queries both slow down noticeably on spinning disks.
- Monthly VPS costs in South Africaon Truehost for this tier is R 500.00, depending on the provider and support level.
Shared hosting cannot give you root access. Every step in this guide, from firewall rules to SSH keys, depends on having full control of the server.
If your current plan does not offer root access, a VPS is the right starting point.
Step 1: Complete the Initial Ubuntu Server Setup
Before WordPress ever gets installed, the server itself needs to be locked down. This part takes about ten minutes and closes the biggest gap between your store and an attacker.
1) Create a Non-Root Sudo User
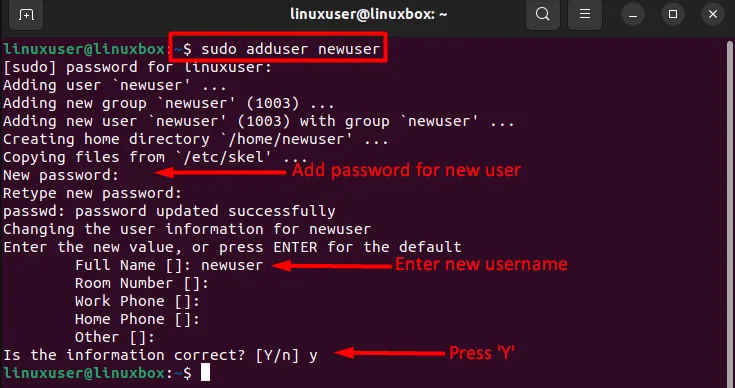
Running WordPress installs as root is not a shortcut; it is a risk. If that account gets compromised, the attacker has full control of the machine instantly.
Create a separate user with admin rights instead.
adduser storeadminusermod -aG sudo storeadminOpen a second terminal window and log in as storeadmin before closing your root session.
Confirm you can run sudo commands successfully. Only then should you consider the root session safe to close.
2) Lock Down SSH Access with Key Authentication
Passwords can be guessed or brute-forced. SSH keys cannot be compromised, which makes them the standard for any production server.
Generate a key pair on your local machine and copy the public key to the server.
ssh-keygen -t ed25519ssh-copy-id storeadmin@your_server_ipNext, edit the SSH configuration file to disable password logins and root logins entirely.
sudo nano /etc/ssh/sshd_configSet these two values:
PasswordAuthentication noPermitRootLogin noRestart SSH, then confirm the settings actually took effect. Do not just trust that the file saved correctly.
sudo systemctl restart sshsshd -T | grep -E 'permitrootlogin|passwordauthentication'That command should return permitrootlogin no and passwordauthentication no if it does not, go back and check the config file again before moving forward.
3) Configure UFW to Allow Only Required Ports
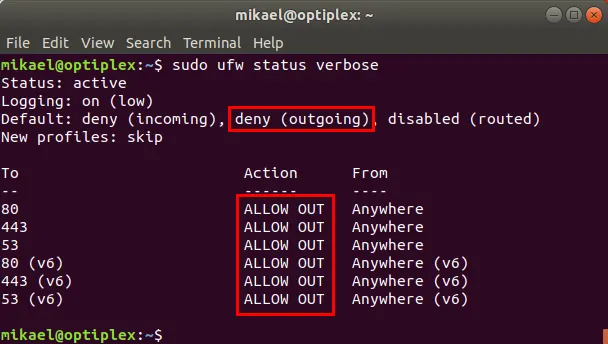
UFW is Ubuntu’s built-in firewall, and it is simple enough for a beginner to configure correctly.
The goal is a server that blocks everything except what your store actually needs.
sudo ufw default deny incomingsudo ufw default allow outgoingsudo ufw allow OpenSSHsudo ufw allow httpsudo ufw allow httpssudo ufw enableCheck the rules landed correctly before you log out:
sudo ufw status verboseYou should see exactly three allowed ports: SSH, HTTP, and HTTPS. Anything else listed there needs a reason, or it needs to go.
4) Enable Automatic Security Updates
Manually patching a server every week is unrealistic for most store owners, so automate it instead.
sudo apt install unattended-upgradessudo dpkg-reconfigure --priority=low unattended-upgradesSelect yes when prompted. This installs security patches automatically and reboots the server during low-traffic hours when a kernel update requires it. Your store stays patched without daily attention from you.
Step 2: Install and Harden the Server Stack for WooCommerce
With the server locked down, it is time to install the software your store actually runs on.
I) Install Nginx, MySQL, and PHP
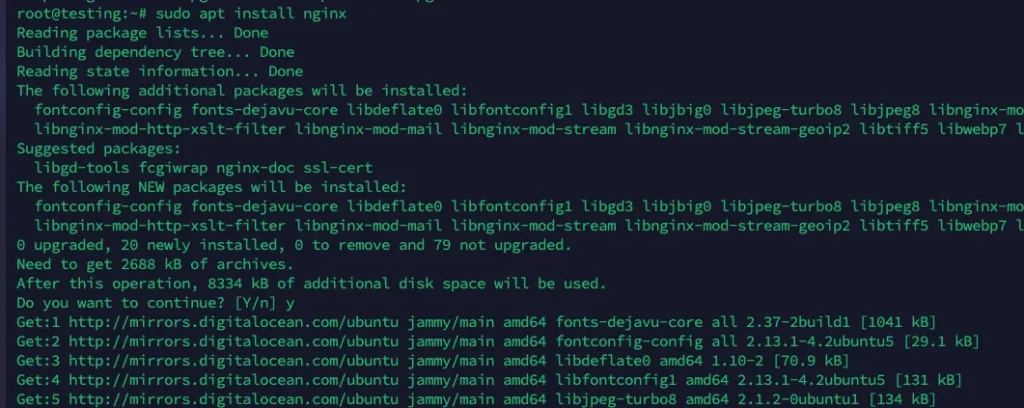
Nginx handles the kind of traffic spikes an e-commerce store sees during sales better than Apache does on comparable hardware. Install the full stack in one command.
sudo apt update && sudo apt install nginx mysql-server php-fpm php-mysql php-curl php-xml php-gd php-mbstring php-zip php-intlThose PHP extensions are not extras. WooCommerce needs php-curl for payment gateway calls, php-gd for image processing, and php-xml for product data imports. Skipping any of them causes errors later.
II) Secure MySQL with mysql_secure_installation
A freshly installed MySQL server ships with a few default settings that need cleaning up before real customer data touches it.
sudo mysql_secure_installationWalk through each prompt carefully:
- Remove anonymous user accounts, since they serve no purpose on a production server.
- Disable remote root login. Root should only ever connect locally.
- Remove the test database, which ships enabled by default and is not needed.
After that, create a dedicated database and a user scoped only to your store, rather than using the root account for WordPress.
sudo mysql -e "CREATE DATABASE storedb DEFAULT CHARACTER SET utf8mb4;"sudo mysql -e "CREATE USER 'storeuser'@'localhost' IDENTIFIED BY 'a_strong_unique_password';"sudo mysql -e "GRANT ALL PRIVILEGES ON storedb.* TO 'storeuser'@'localhost';"III) Configure PHP for Security
A few small changes to php.ini close off common attack paths without affecting how your store functions.
sudo nano /etc/php/8.3/fpm/php.iniDisable functions attackers use to run arbitrary commands on a compromised server:
disable_functions = exec,shell_exec,passthru,proc_openAlso, turn off the header that broadcasts your PHP version to every visitor:
expose_php = OffRestart PHP-FPM for the changes to apply.
sudo systemctl restart php8.3-fpmStep 3: Install WordPress and WooCommerce on the Hardened Server
The server is ready. Now the actual store gets built on top of it.
I) Download and Configure WordPress
Download the latest WordPress release and set the file permissions correctly from the start.
Many security issues on WordPress sites trace back to permissions being set too loosely during setup.
cd /var/www/html

sudo wget https://wordpress.org/latest.tar.gz

sudo tar -xzvf latest.tar.gz

sudo chown -R www-data:www-data /var/www/html/wordpress

sudo find /var/www/html/wordpress -type d -exec chmod 755 {} \;

sudo find /var/www/html/wordpress -type f -exec chmod 644 {} \;
Generate unique authentication keys and salts for wp-config.php using the official WordPress key generator, and paste them into the config file. These keys make session hijacking significantly harder for an attacker.
II) Install and Set Up the WooCommerce Plugin
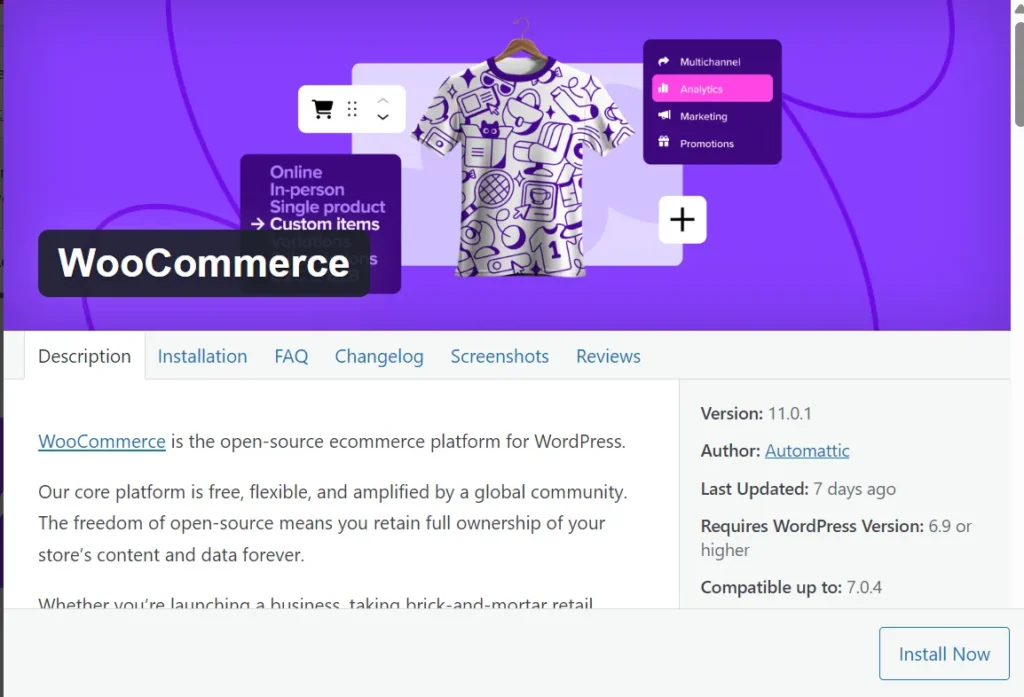
Run the WooCommerce setup wizard from the WordPress dashboard. During tax setup, enable South Africa’s standard VAT rate of 15 percent under WooCommerce settings.
Choose a theme built with caching in mind. A slow store loses sales, and a theme fighting against your security plugins later on causes more problems than it solves.
Step 4: Secure the Store with SSL and Additional Hardening
The store is live internally, but it still needs the protections that make it safe for real customers and real transactions.
I) Install a Free SSL Certificate with Let’s Encrypt
SSL is not optional for a checkout page. Without it, customer card details travel unencrypted, and that alone fails basic payment security expectations.
sudo apt install certbot python3-certbot-nginxsudo certbot --nginx -d yourstore.co.za -d www.yourstore.co.zaCertbot sets up auto-renewal by default, so the certificate stays valid without manual work.
Confirm HTTPS redirects are active in WordPress under Settings, then General, so no page ever loads over plain HTTP.
II) Add Fail2Ban to Block Brute-Force Login Attempts
Fail2Ban watches login attempts and blocks IP addresses that fail repeatedly, stopping automated attacks against your admin login.
sudo apt install fail2banSet up a WordPress-specific jail that bans an IP after a handful of failed login attempts within a short window.
A login page open to real customer traffic needs sensible thresholds, tight enough to stop bots, loose enough not to lock out a customer who simply mistyped a password.
III) Restrict WP-Admin Access and Disable File Editing.
If you work from a fixed IP address, restrict /wp-admin to that address at the server level. If your IP changes often, a strong two-factor authentication plugin covers the same risk.
Also, block file editing from inside the WordPress dashboard, since this closes a path that attackers use once they get into a compromised admin account.
define('DISALLOW_FILE_EDIT', true);Add that line to wp-config.php. Even if someone gets into the WP-admin, they cannot edit theme or plugin files directly from there.
Step 5: Meet South African E-Commerce Compliance and Payment Requirements
Server security handles one half of the problem. The other half is handling customer data and payments the right way.
I) Connect a Local Payment Gateway
South African stores generally connect to a local gateway rather than routing payments through an international processor alone.
PayFast, PayGate, and Netcash all offer official WooCommerce plugins with straightforward setup.
Routing card data through a compliant gateway removes most of the PCI burden from your own server, since the card details never actually touch it.
This is one of the simplest ways to reduce your compliance scope significantly.
II) Understand POPIA Obligations for Customer Data
POPIA governs how South African businesses collect, store, and protect personal information, and an online store collects plenty of it: names, addresses, order histories, and contact details.
A few practical steps cover most of the basics:
- Add a clear privacy policy that explains what data your store collects and why.
- Set a data retention policy, rather than keeping customer records indefinitely by default.
- Know your breach notification obligations before an incident happens, not after.
Step 6: Back Up the Store and Plan for Recovery
A hardened server reduces risk, but it does not remove it entirely. Backups are what turn a bad day into a minor inconvenience.
- Set up automated daily database backups using a cron job or a dedicated backup plugin.
- Store backups off the server itself. If the server gets compromised, an on-server backup is compromised too.
- Test a full restore at least once before launch, so you know the process works when it counts.
- Keep a separate export of order and customer data on hand, useful for POPIA-related data requests.
Troubleshooting Common Setup Problems
Even a careful setup runs into a few snags along the way. These are the issues you are most likely to hit, and the fastest way to fix each one.
I) UFW Locked Me Out of SSH
This happens when the firewall gets enabled before the SSH rule gets added.
If you still have console access through your VPS provider’s dashboard, log in there and run sudo ufw allow OpenSSH followed by sudo ufw reload.
To avoid this entirely next time, always allow SSH before running ufw enable, never after.
II) Nginx Shows a 502 Bad Gateway Error
A 502 almost always means PHP-FPM is not running or the socket path does not match your Nginx config. Check the service status first.
sudo systemctl status php8.3-fpmIf it shows inactive, restart it with sudo systemctl restart php8.3-fpm. If it keeps crashing, check /var/log/php8.3-fpm.log for the actual cause, which is often a memory limit set too low.
III) The Site Shows a White Screen or 500 Error
This points to a PHP error that WordPress is not displaying by default. Turn on debug mode temporarily by editing wp-config.php.
define('WP_DEBUG', true);

define('WP_DEBUG_LOG', true);
Reload the page, then check /wp-content/debug.log for the specific error. A plugin conflict is the most common cause, so deactivate plugins one at a time to isolate it.
Turn WP_DEBUG back to false once the site works again, since debug mode should never stay on for a live store.
IV) Checkout Pages Return a 500 Error After a Plugin Update
This usually traces back to PHP running out of memory during checkout, especially with several plugins active at once. Raise the PHP memory limit in php.ini.
memory_limit = 512MRestart PHP-FPM afterward. If the error only appears on checkout and nowhere else, a payment gateway plugin conflict is the next thing to check.
V) Let’s Encrypt Fails to Issue a Certificate
Certbot needs port 80 open, and your domain’s DNS to be pointed correctly at the server. Confirm both before retrying.
sudo ufw status

dig yourstore.co.za
If port 80 shows blocked, allow it with sudo ufw allow http. If the domain does not resolve to your server’s IP, wait for DNS to propagate before trying again, since a fresh DNS change can take a few hours to settle.
VI) WordPress Shows “Error Establishing a Database Connection”
Check that MySQL is actually running first.
sudo systemctl status mysqlIf it is running, the problem is usually a mismatch between the database credentials in wp-config.php and the user you created earlier.
Confirm that the database name, username, and password all match exactly what you set during the MySQL setup step.
FAQs
Is Ubuntu good for e-commerce hosting?
Yes. Ubuntu LTS releases get long-term security support, wide software compatibility, and strong documentation, which makes them a common choice for WooCommerce and similar stores.
How much does it cost to host a WooCommerce store on a VPS in South Africa?
Most small to mid-sized stores run comfortably on a VPS priced between R400 and R1,200 per month, depending on specs and whether the plan includes managed support.
Is WooCommerce PCI compliant out of the box?
Not fully. WooCommerce itself does not store card data by default when connected to a compliant gateway like PayFast or PayGate, which shifts most PCI responsibility away from your server.
Can I run WooCommerce without a managed hosting plan?
Yes, an unmanaged VPS works well if you are comfortable handling server setup, updates, and security yourself, following the steps covered in this guide.
Set Up a Secure Web Server on Ubuntu
Build order decides how secure a store actually is. Harden the server first, then install WordPress and WooCommerce on top of it, never the other way around.
Every step in this guide, from SSH keys to POPIA basics, exists to close a gap that attackers already know how to find.
If manually hardening a server feels like more than you want to take on right now, TrueHost’s VPS hosting plans come with the security groundwork already in place.
That gives you a ready foundation to launch your WooCommerce store on, without doing every step above by hand.