 Web Hosting
 Windows HostingBuilt for Windows apps and websites – stability, speed and flexibility
 Reseller HostingLaunch a hosting business without technical skills or expensive infrastructure
 Affiliate ProgramRefer customers and earn commissions from sales across our platform
 Domain SearchFind and secure a domain name in seconds with our quick lookup tool
 CO ZA Domains
 All DomainsExplore domain names from over 324 TLDs globally – all in one place
 Free Whois Lookup Tool South Africa
 VPS
VPS Website Builder
 Online ShopSet up a sleek eCommerce store with zero coding knowledge
 SSLs
SSLs SupportAccess help articles, how-tos, and everything about our services
 Blog
Blog Contact UsReach our team instantly via live chat or drop us an email
OpenClaw turns your Windows PC into a home for a personal AI agent that can read your files, draft your emails, run automated workflows, and sit inside the chat apps you already use, all without sending that work off to someone else’s server.
That local-first setup is a big part of the appeal, but it also means the install process itself deserves some care.
There are three ways to get it running on Windows:
- The native PowerShell installer if you just want to test things out quickly
- The Windows Hub app if you’d rather point and click on your desktop
- WSL2 if you’re planning to actually rely on this thing day to day and need real background services.
We’ll walk through all three so that you choose the path that suits your needs.
But one thing to keep in mind before you start, once OpenClaw is running, it has real access to your local files and shell.
That’s what makes it useful, and it’s also why the security steps near the end of this guide are important. Treat them as part of the install, and you’ll be all set.
Now, before we get to install openclaw on windows 10 and 11, this is a short checklist make sure you are well prepared:
- Windows 10 (20H2 or later) or Windows 11.
- Node.js 22.19 or higher, with 24 recommended.
- An LLM API key, from Anthropic, OpenAI, or another supported provider.
- Admin rights, needed for the PowerShell and WSL2 paths.
- Basic comfort with a terminal, if you’re going with PowerShell or WSL2, and a privacy-conscious browser to protect your security token.
With that sorted, here’s how we go about the three methods.
Table of Contents
Method 1: Native Windows Hub App (No Admin Required)
If you’d rather avoid the command line, the Windows Hub app is the easiest way to get OpenClaw running. It’s the official desktop application and the installation method recommended in OpenClaw’s documentation.
Unlike a terminal-based setup, Windows Hub is a full WinUI application designed for a smooth desktop experience.
It also installs without administrator privileges, making it a great choice if you’re using a work or school computer with restricted permissions.
Step 1: Download the Installer
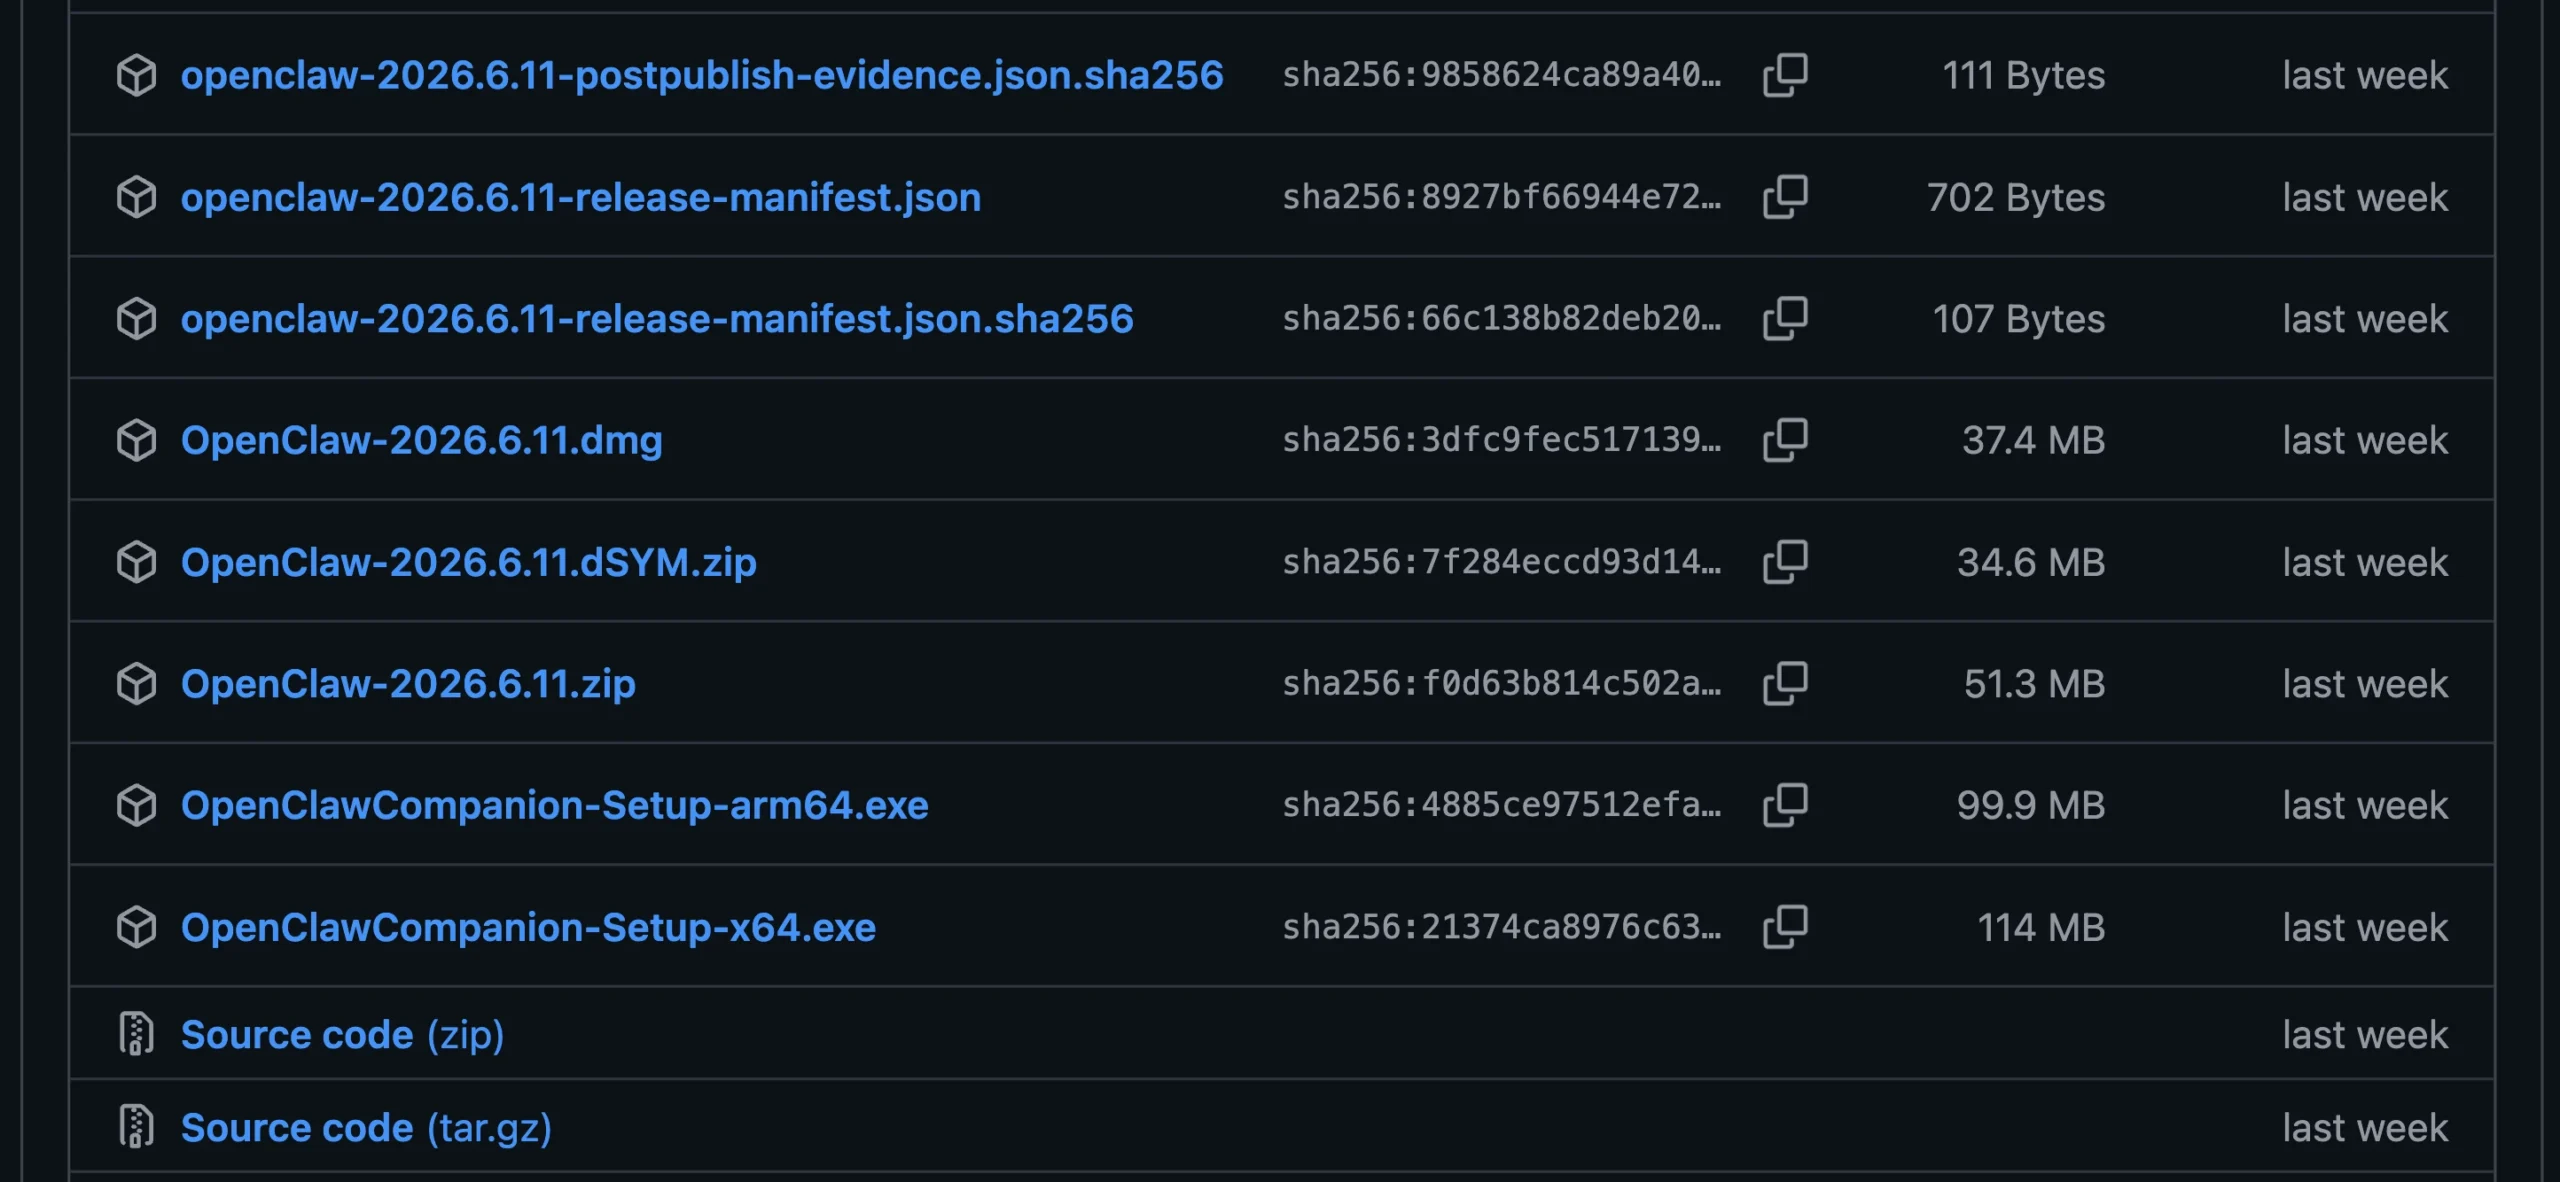
Download the latest installer for your system from the official OpenClaw GitHub releases page.
Most Windows PCs use OpenClawCompanion-Setup-x64.exe, while ARM-based devices should download the ARM64 version.
Step 2: Install Windows Hub and Launch OpenClaw
Run the installer. Since this installation doesn’t require administrator rights, you shouldn’t see a User Account Control (UAC) prompt.
To launch open OpenClaw Companion from your Start menu or system tray.
Step 3: Complete the Local Setup
When the app starts for the first time, choose the option to set up OpenClaw locally.
Windows Hub automatically creates its own dedicated WSL distribution, installs the OpenClaw Gateway, and pairs everything behind the scenes. It won’t affect any Ubuntu or WSL distributions you already have installed.
Step 4: Verify the Gateway
Wait for the tray icon to turn green, which confirms that the gateway is running.
Open Command Center from the tray icon to check the pairing status and confirm everything is working properly.
Step 5: Connect Your AI Provider
Finish the onboarding process by connecting your preferred AI provider, entering your API key, and configuring the messaging channels you want OpenClaw to use.
Accessing the Dashboard
Once setup is complete, the tray icon gives you instant access to the native chat window.
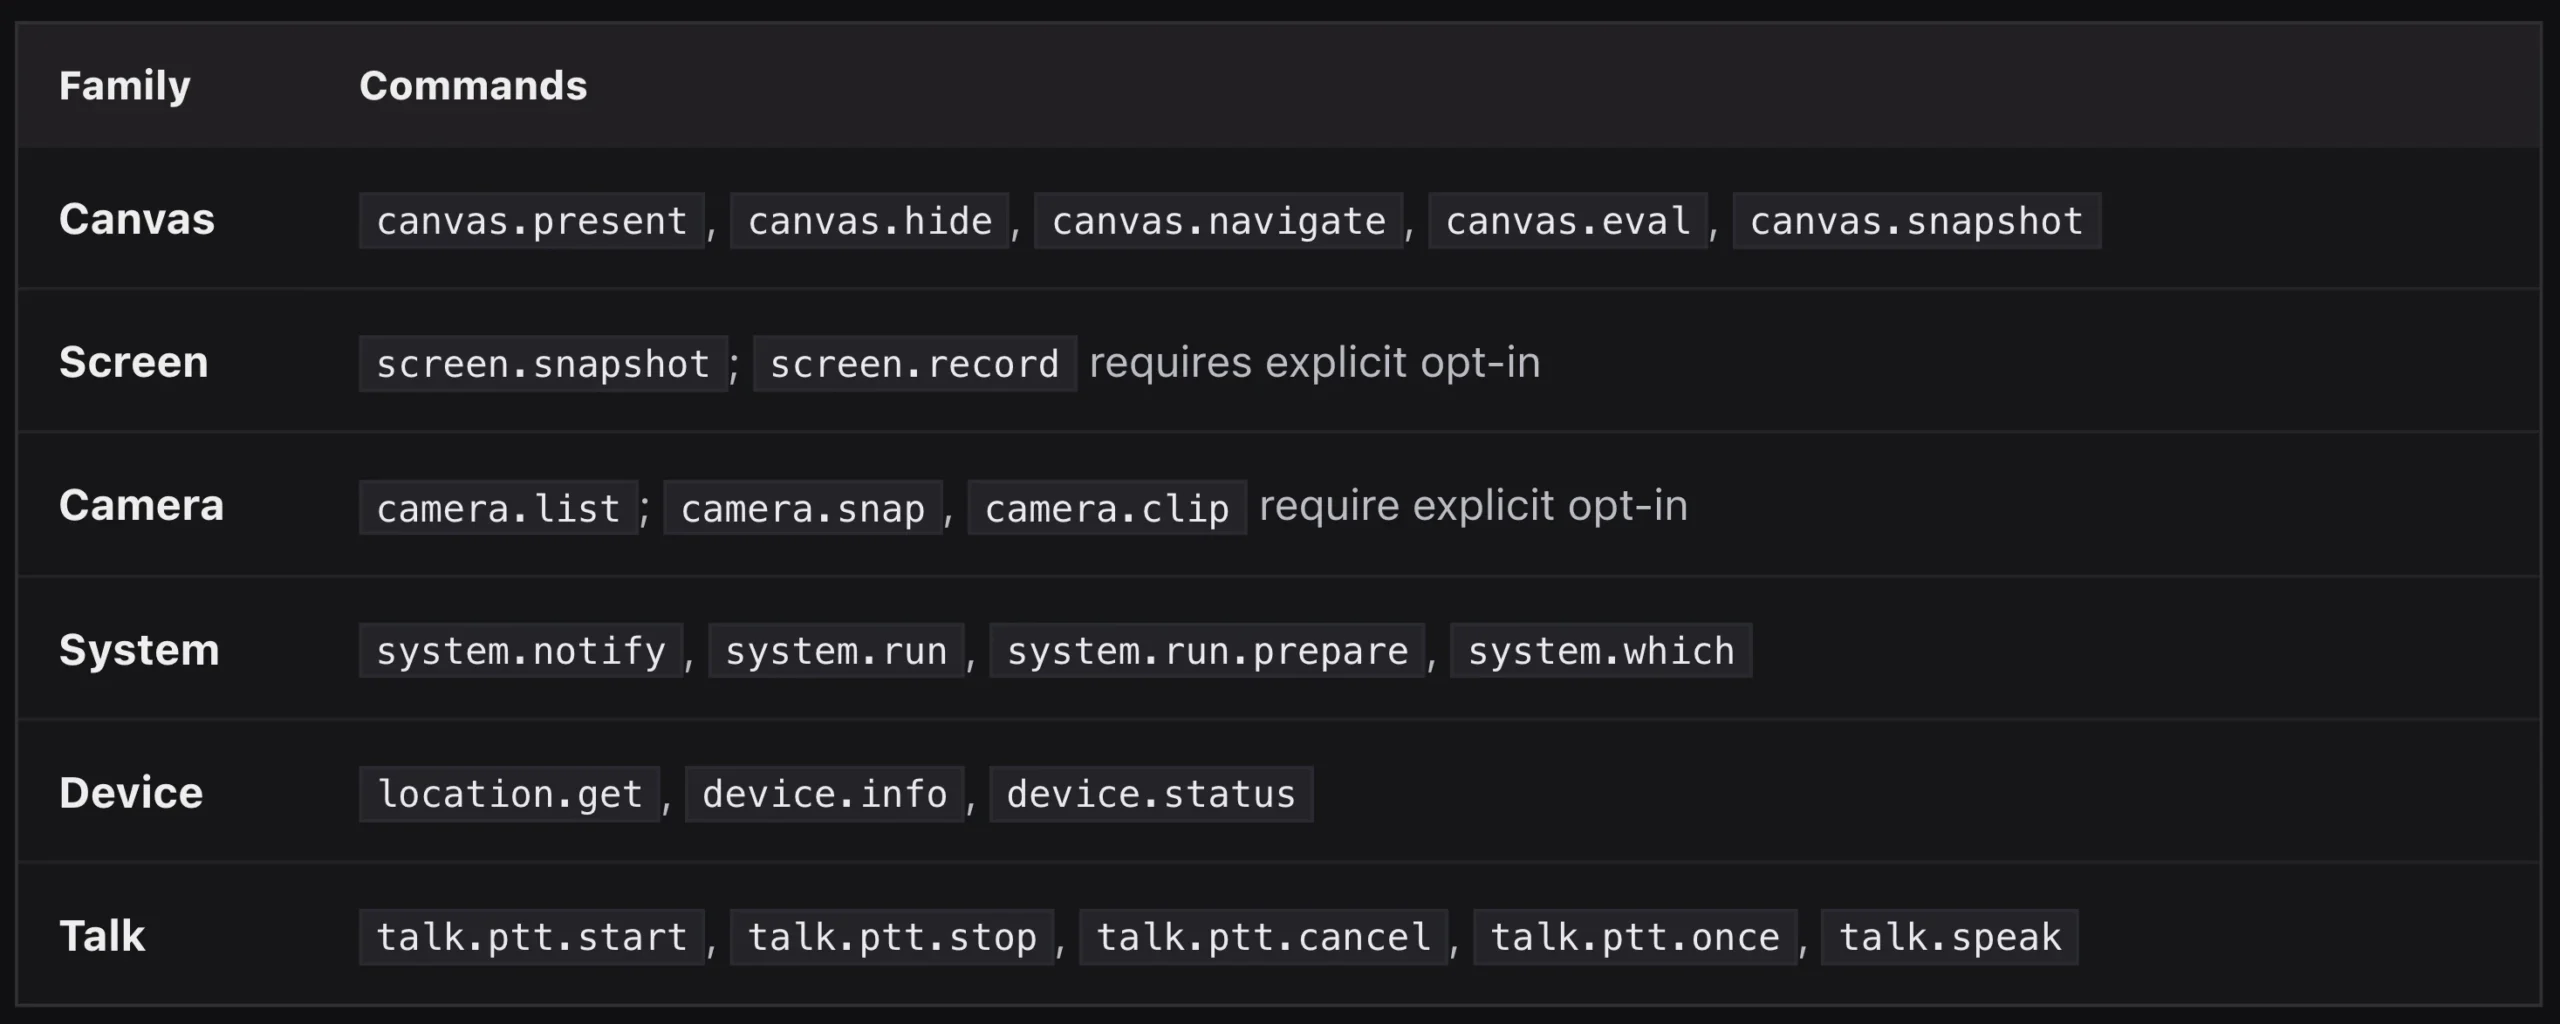
You can also enable Node Mode, allowing OpenClaw to use Windows features such as screen captures, desktop notifications, and text-to-speech.
Trade-offs
Windows Hub is the easiest installation method for most users.
Since the app handles nearly everything automatically, there’s very little manual configuration, and you don’t have to deal with PowerShell execution policies or systemd settings.
The trade-off is that it doesn’t offer the same level of background service reliability and advanced automation available with a dedicated WSL2 installation.
For many users, however, the simpler setup makes it the better choice.
Method 2: Native PowerShell Installation (Fastest for CLI Users)
If you’re comfortable working in PowerShell and prefer a native Windows installation, this method gets OpenClaw running quickly without installing a separate Linux environment.
It’s a great option for developers and anyone who likes working from the command line.
Step 1: Open PowerShell as Administrator
Right-click the Start button and select Terminal (Admin) to launch an elevated PowerShell session.
Step 2: Allow the Installer Script to Run
Windows blocks unsigned scripts by default, so you’ll need to temporarily adjust the execution policy for the current session:
Set-ExecutionPolicy RemoteSigned -Scope ProcessThis change only applies to the current PowerShell window.
Step 3: Install OpenClaw
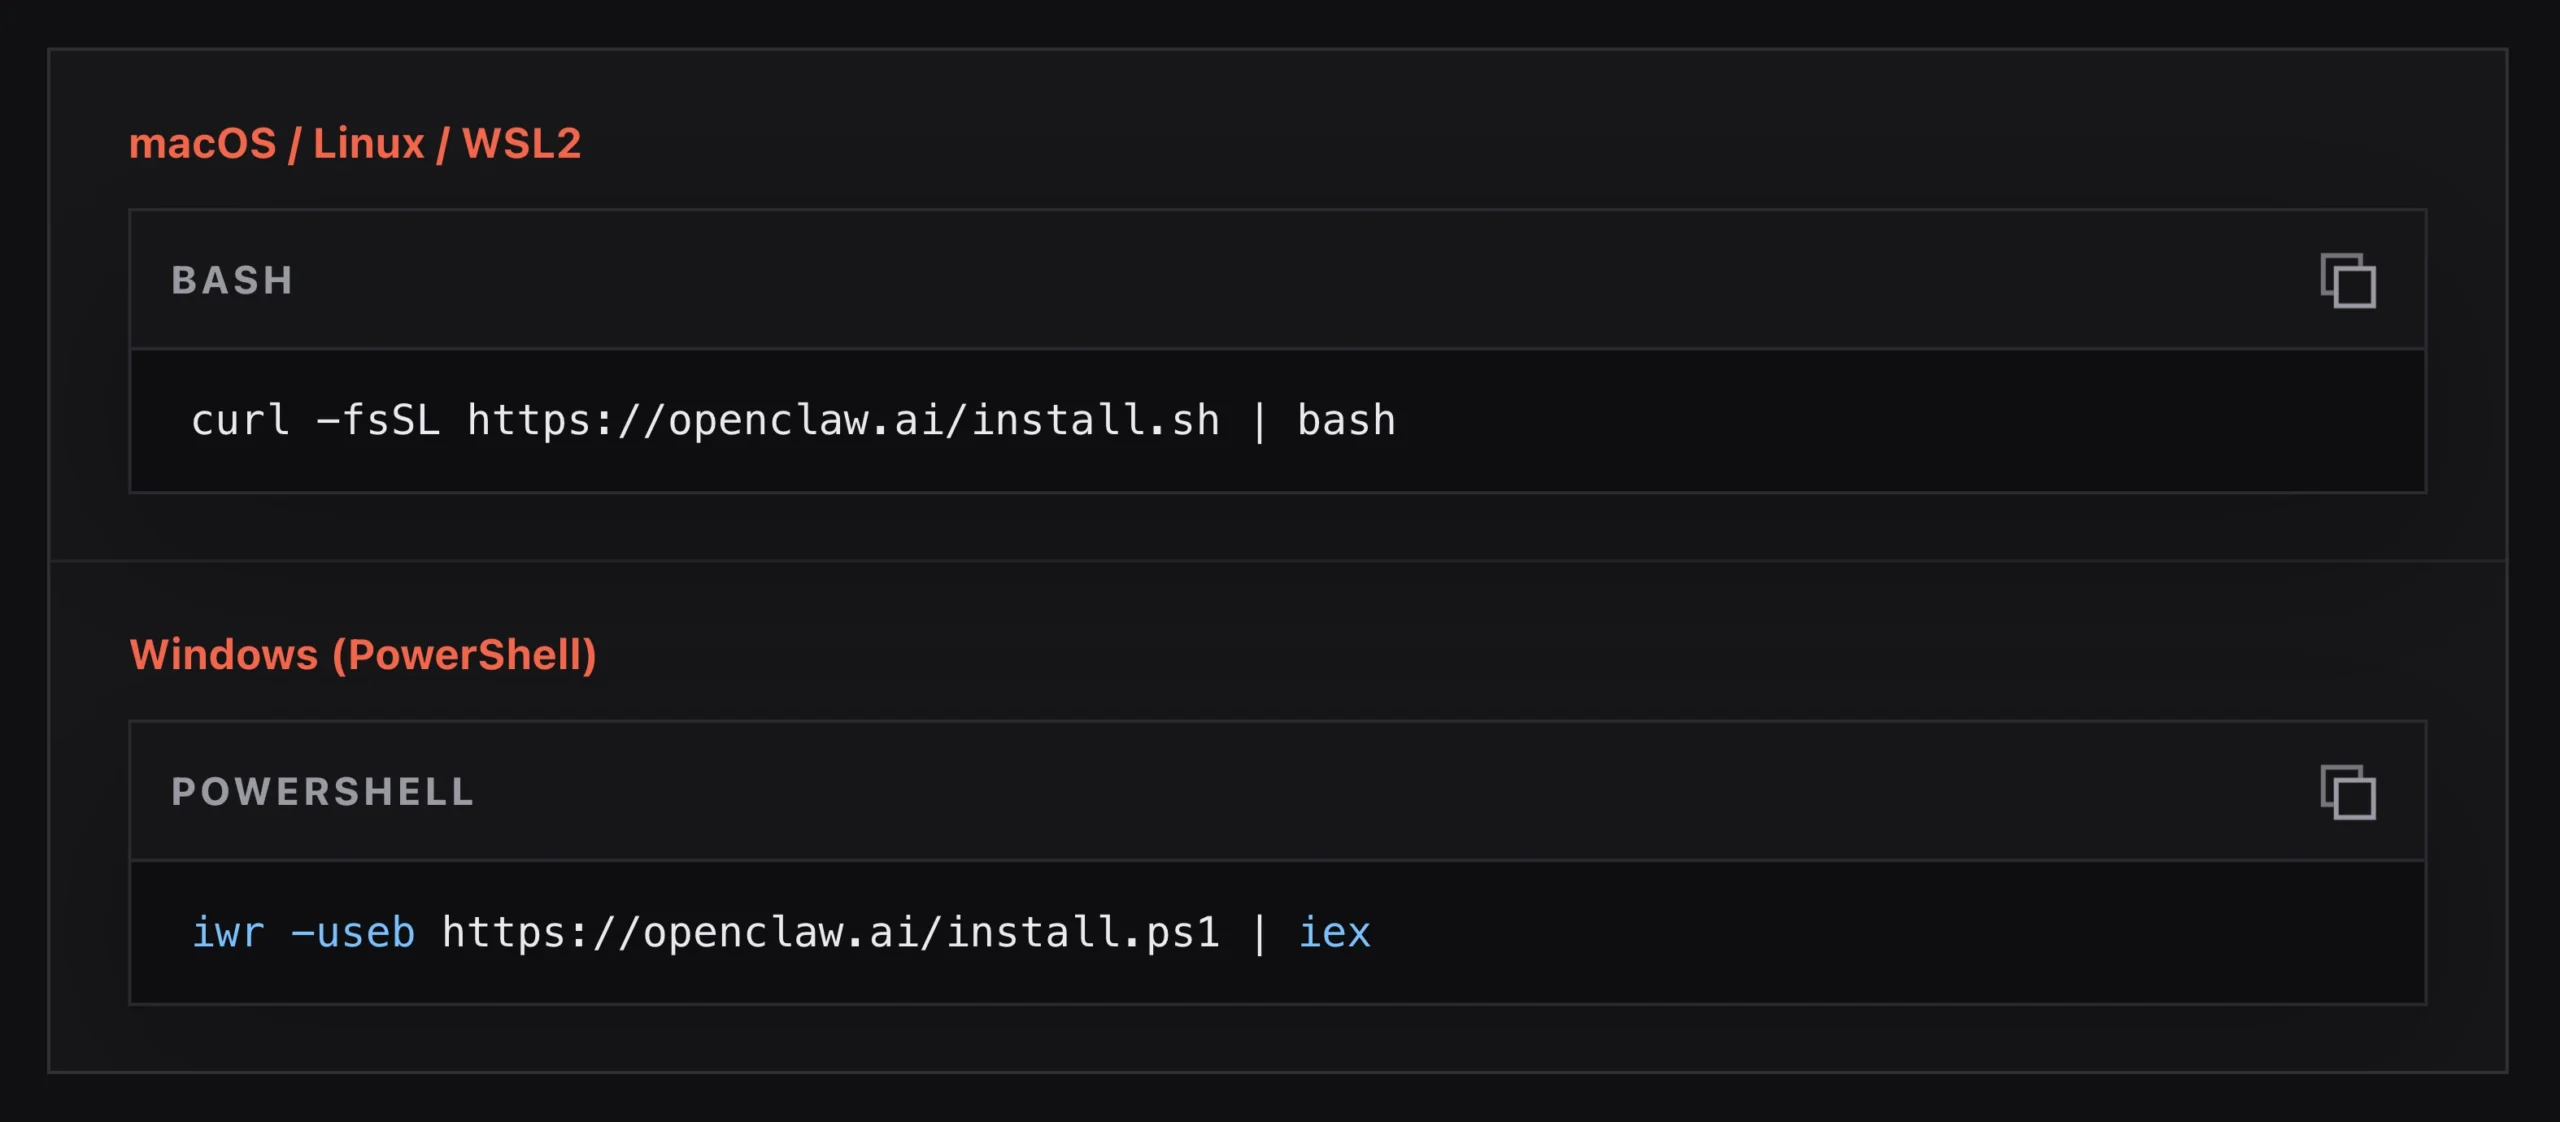
Run the installation command below:
iwr -useb https://openclaw.ai/install.ps1 | iexThe installer checks whether Node.js is already installed. If it isn’t, it automatically installs it using winget, Chocolatey, or Scoop, depending on what’s available on your system. It then downloads the latest OpenClaw release and starts the onboarding process.
Step 4: Complete Onboarding
If onboarding doesn’t launch automatically, run:
openclaw onboardFollow the prompts to connect your AI provider, add your API key, and configure any messaging channels you plan to use.
Step 5: Verify the Gateway
Check that the OpenClaw Gateway is running with:
openclaw gateway status --jsonIf everything is working correctly, the command returns the gateway status in JSON format.
To keep OpenClaw running in the background without leaving a terminal window open, install it as a Windows service:
openclaw gateway installThis creates a Scheduled Task that automatically starts the OpenClaw Gateway silently each time you sign in to Windows.
Trade-offs
Native PowerShell installation is the fastest way to install OpenClaw, especially if you’re testing features or already spend most of your time in the terminal.
The trade-off is that background services and automation aren’t as seamless as they are in a WSL2 environment, which provides a more Linux-like experience for long-running workloads.
Method 3: WSL2 Installation (Recommended for Production Use & Automation)
If you plan to use OpenClaw every day, WSL2 is the recommended installation method. It provides a full Linux environment inside Windows, giving you complete systemd support, better background service management, and access to OpenClaw’s full feature set.
It’s also the installation approach recommended in the official documentation for long-term use and automation.
Step 1: Install WSL2 and Ubuntu
Open PowerShell as an administrator and run:
wsl --install -d UbuntuRestart your computer when prompted. After Windows starts again, Ubuntu will launch automatically and ask you to create a Unix username and password. These credentials are separate from your Windows account, so choose something you’ll remember.
Step 2: Enable systemd
OpenClaw uses systemd to keep its Gateway running as a background service. In the Ubuntu terminal, create or update the WSL configuration file:
sudo tee /etc/wsl.conf > /dev/null << 'EOF'
[boot]
systemd=true
[interop]
enabled=true
appendWindowsPath=true
EOF
Close the Ubuntu terminal, then return to PowerShell and run:
wsl --shutdownOpen Ubuntu again to apply the new configuration.
Step 3: Install Node.js and OpenClaw
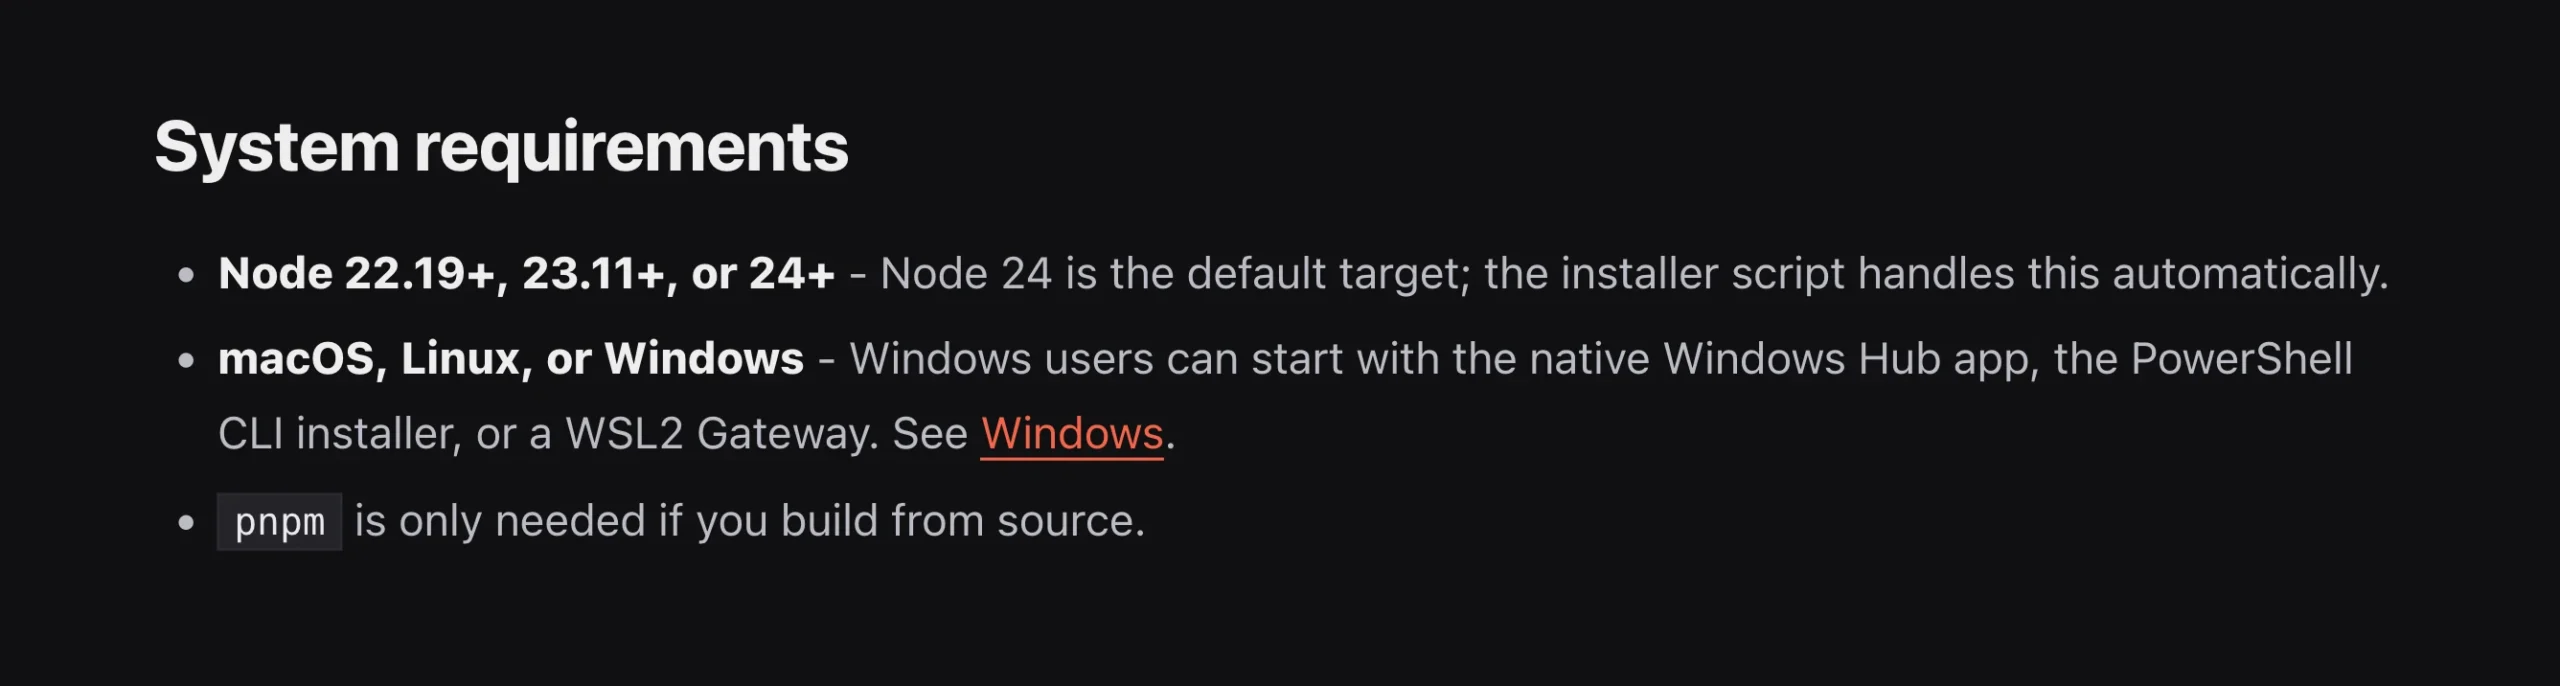
Inside the Ubuntu terminal, install Node.js and OpenClaw:
curl -fsSL https://deb.nodesource.com/setup_22.x | sudo -E bash -
sudo apt-get install -y nodejs
sudo npm install -g openclaw@latest
You can also use OpenClaw’s official Linux installer, which checks for Node.js automatically before installing OpenClaw:
curl -fsSL --proto '=https' --tlsv1.2 https://openclaw.ai/install.sh | bashStep 4: Complete Onboarding and Enable the Gateway
Run the onboarding command:
openclaw onboard --install-daemonFollow the prompts to select your AI provider and enter your API key.
To keep the OpenClaw Gateway running even after you close the terminal, enable user lingering:
sudo loginctl enable-linger $USEROne thing to keep in mind is a known WSL issue that can cause the Linux environment to shut down about 15 to 20 seconds after the last terminal window closes, even with lingering enabled.
If your Gateway stops unexpectedly after closing Ubuntu, it’s usually caused by this documented WSL behavior rather than a problem with your OpenClaw installation.
If you also have Windows Hub installed, it can connect to this same WSL Gateway instead of creating another one.
That lets both applications work together without running duplicate OpenClaw instances.
Accessing Your OpenClaw Dashboard and First Use
Once onboarding wraps up, regardless of which method you used, the Gateway starts a local web dashboard.
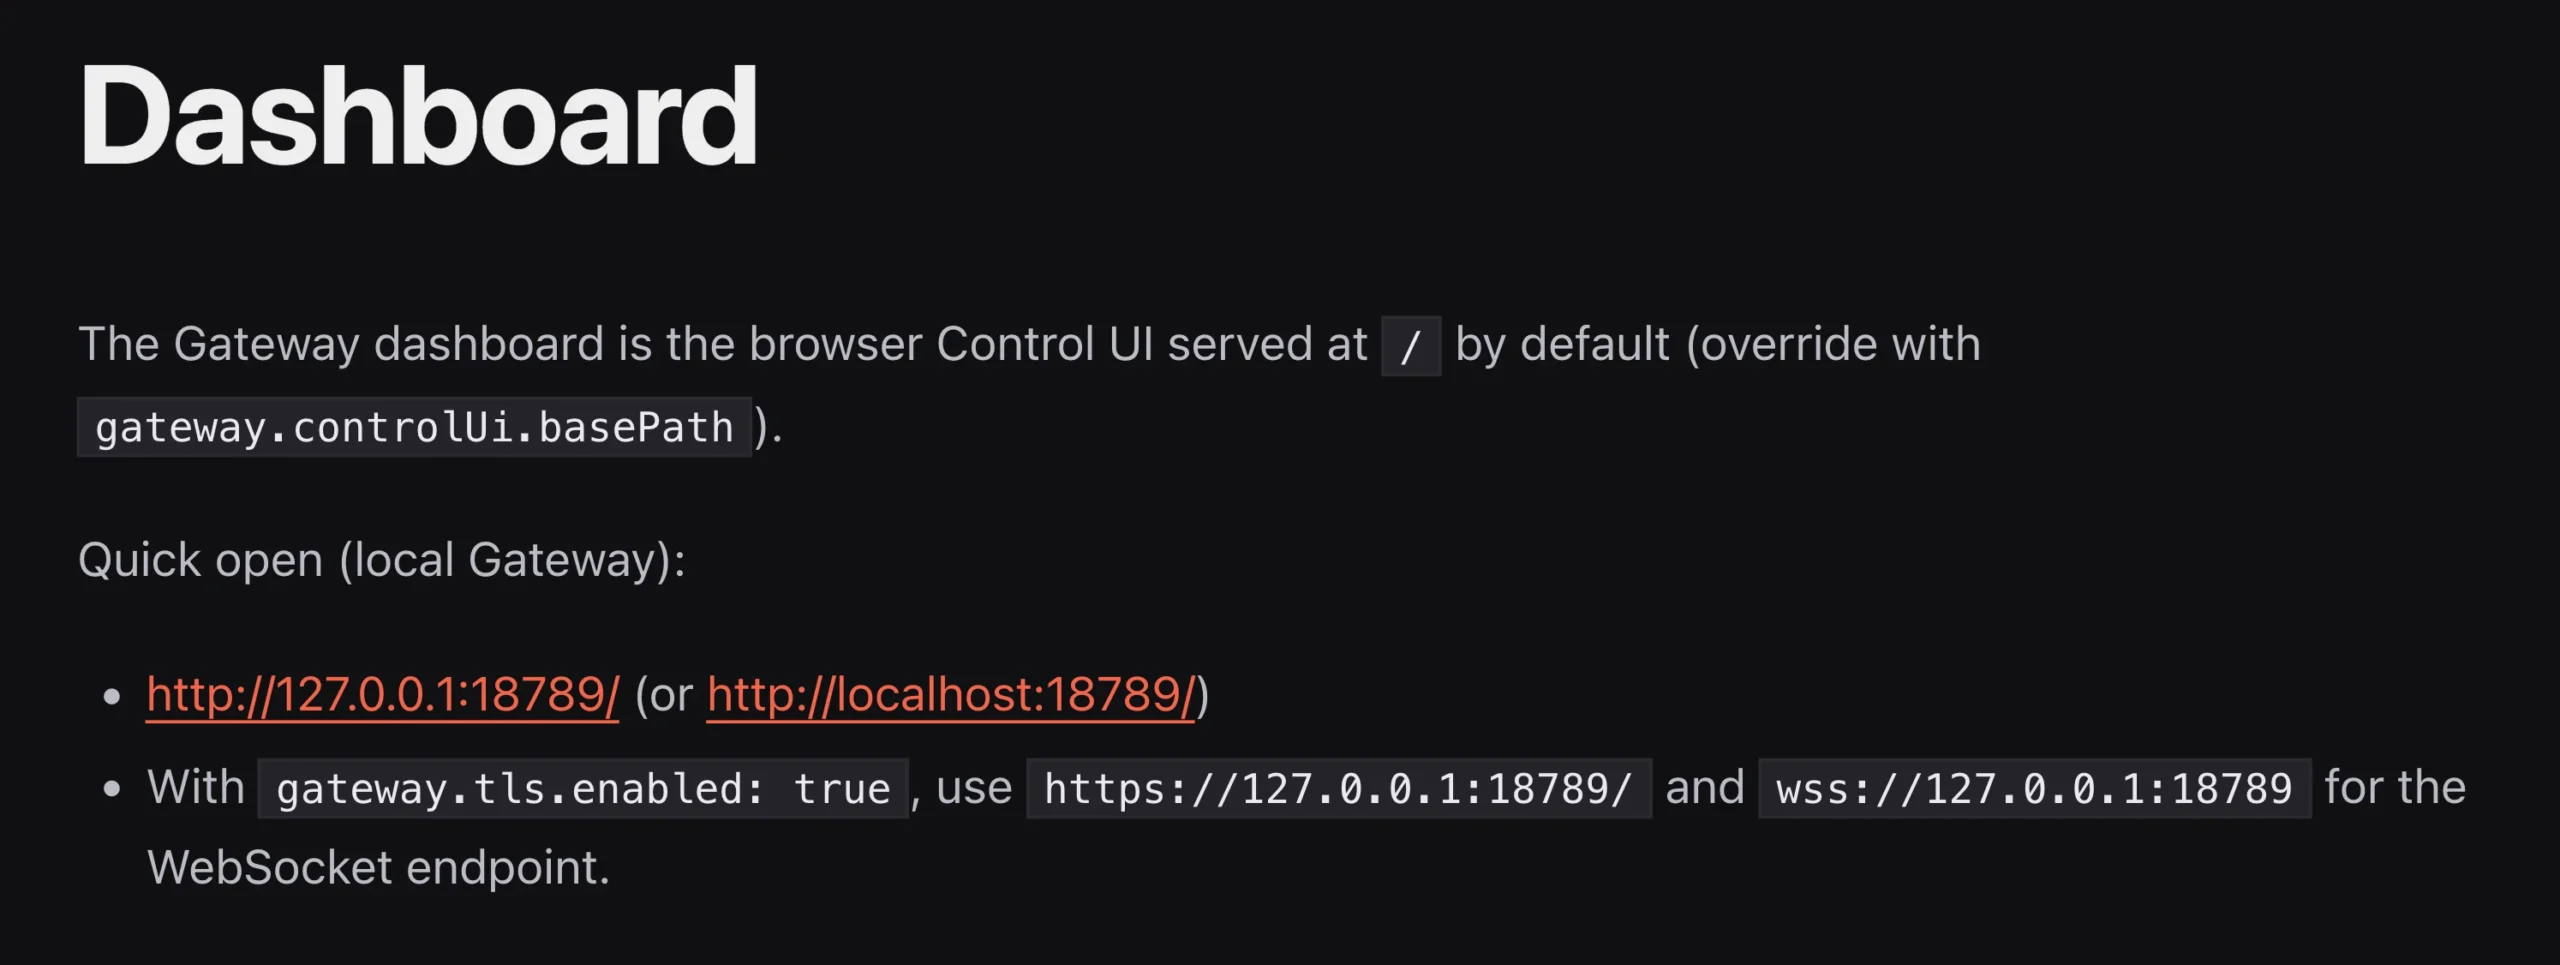
- Check your terminal output for the Web UI address and Gateway Token, or open the
.openclaw/openclaw.jsonfile in your user home directory to find both. - In your browser, go to the address shown, usually
http://127.0.0.1:18789. - Paste in the Gateway Token when asked, and you’re connected.
From here, try a few basic commands, connect the channels you plan to use, and get a feel for what you want to automate.
Security tips worth keeping in mind:
- Never expose the Gateway port to the open internet. If you need remote access, connect through an encrypted SSH tunnel rather than opening the port directly.
- Keep the connection bound to
127.0.0.1only, review what permissions you’ve granted, use a strong token, and check the logs now and then. - Remember that your Gateway has real control over local files and shell commands — treat that access with the same caution you’d give any admin-level tool.
Skip the Local Setup and Run OpenClaw on a Truehost OpenClaw VPS Instead
Reading through all three methods above, a pattern shows up: running OpenClaw locally means you’re now the one responsible for the Node version, the WSL quirks, the systemd config, the uptime, and the security exposure, on the same machine you use for everything else.
It works, but your laptop has to stay on and your home internet has to hold up, and you’re the one keeping it patched.
Our OpenClaw VPS Hosting at Truehost is built to take that off your plate. Instead of working through PowerShell, Windows Hub, or WSL2 yourself, you get a server that arrives with OpenClaw already configured and running.
Two plans are currently available:
- OpenClaw KVM1 – R285/month: 1 vCPU core, 2 GB RAM, 50 GB NVMe storage, 4 TB bandwidth
- OpenClaw KVM2 – R380/month: 2 vCPU cores, 4 GB RAM, 100 GB NVMe storage, 8 TB bandwidth
Both come pre-configured, so your agent stays online whether your laptop is open or not, and you’re no longer the one responsible for patching the server underneath it.
If you’ve been testing OpenClaw locally and you’re ready to move it somewhere more permanent, you can view current pricing and order directly on our OpenClaw Hosting page.