 Web Hosting
 Windows HostingBuilt for Windows apps and websites – stability, speed and flexibility
 Reseller HostingLaunch a hosting business without technical skills or expensive infrastructure
 Affiliate ProgramRefer customers and earn commissions from sales across our platform
 Domain SearchFind and secure a domain name in seconds with our quick lookup tool
 All DomainsExplore domain names from over 324 TLDs globally – all in one place
 Free Whois Lookup Tool South Africa
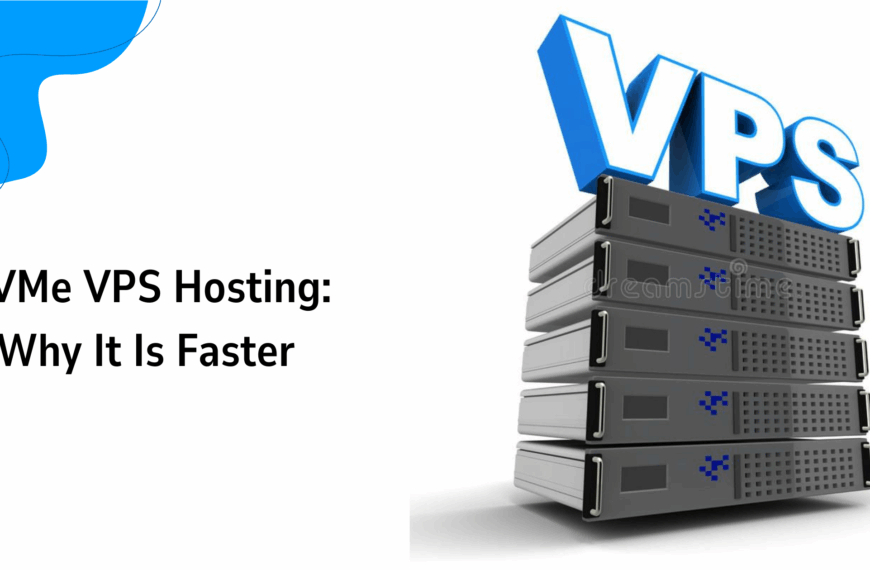
 VPS
VPS SSLs
SSLsIf you want to point a domain to a VPS using custom nameservers, then you need to create new nameserver records with your domain registrar and point them to your VPS’s IP addresses.
Lemme put this in simpler terms so we can stay on the same page.
Picture yourself as a small business owner, let’s say in Pretoria, who wants to start an online store that sells artisanal coffee throughout South Africa.
Then, you have managed to get a catchy domain name as well as a Virtual Private Server (VPS) to host your website.

However, a very important step remains to complete the connection: setting up custom nameservers.
 1")
As the domain and VPS need to be linked, nameservers will ensure that your website (yourcoffee.co.za) will be routed to the VPS for optimal and swift server response.
So, in order to be able to put all this in perspective, you need to ask yourself these questions:
What part do custom nameservers play?
How can you set up custom nameservers?
How does that help in pointing your domain to your VPS?
And lastly, why choose a VPS?
Well, you’re in luck coz we’ll be answering all these questions today.
So, if you’re ready to boost your website’s performance, let’s get your custom nameservers up and running!

Table of Contents
Understanding Custom Nameservers and VPS Hosting
What Are Custom Nameservers?
Custom nameservers are specific DNS (Domain Name System) addresses that connect your domain to your VPS.
Custom nameservers are more specific than generic nameservers provided by your domain registrar.
Instead of ns1.registrar.com generic nameservers, custom nameservers will be like ns1.yourbusiness.co.za and ns2.yourbusiness.co.za.
Custom nameservers aid like a translator, directing the internet to your website’s files that are stored on your VPS’s IP address.
For South African businesses, the advantages of custom nameservers are plenty.
For one, it increases the branding and professionalism of your business.
Imagine a customer uses your services and sees ns1.yourbusiness.co.za instead of a generic nameserver.
Enhanced branded professionalism screams credibility.
Second, custom nameservers provide full control over the DNS settings.
You are now capable of directly managing the subdomains, email settings, or redirects on your VPS.
Lastly, custom nameservers would reduce the reliance on third-party DNS servers, which would be beneficial for customers located in Johannesburg or Bloemfontein that experience slower load times.
Why VPS Hosting Requires Custom Nameservers
A VPS acts like separate and private portions of shared servers.
Unlike shared hosting, VPS hosting offers businesses enhanced resources of dedicated CPU, RAM, and storage.
Websites will have the ability to support traffic spikes.
For instance, businesses that are expecting traffic during a Black Friday sale will not have the website slow down.
However, in order for your domain to work with the VPS, custom nameservers will be required.
As mentioned earlier, custom nameservers are critical because they point your domain to your VPS’s unique IP address.
Without them, your website won’t know where to “live,” leaving visitors stranded.
Truehost’s VPS plans are optimized for South Africa, with local data centers reducing latency for users in Durban, Pretoria, or beyond.
By setting up custom nameservers, you ensure your website loads quickly and reliably, giving customers a seamless experience.
Plus, Truehost’s user-friendly tools, like cPanel or Plesk, make managing custom nameservers a breeze, even if you’re new to hosting.
Benefits of Using Custom Nameservers with VPS Hosting
1. Enhanced Control and Branding
Custom nameservers elevate your brand’s image.
Instead of generic nameservers, you can use ns1.yourdomain.co.za, which looks professional and builds trust.
 2")
For a South African SME, this is a small detail with a big impact—customers notice when your domain is consistent across all touchpoints.
With Truehost’s VPS hosting, you manage DNS settings directly on your server.
Need to add a subdomain for a blog or set up email hosting?
Custom nameservers give you the freedom to tweak settings without waiting on your registrar.
Truehost’s control panels, like cPanel or Plesk, simplify this process, making it accessible for non-technical users in South Africa.
2. Improved Performance for Your Target Audiences
Website speed is critical—47% of users expect a page to load in under 2 seconds.
Custom nameservers hosted on your VPS reduce latency by keeping DNS resolution close to your server.
Truehost’s VPS hosting leverages local infrastructure, ensuring fast load times for users in Pretoria, Port Elizabeth, or rural areas.
This is especially important for South African businesses targeting local customers, as low latency improves user experience and SEO rankings.
Truehost’s servers are optimized for the South African market, with data centers designed to minimize delays.
Pairing custom nameservers with their VPS hosting ensures your website performs at its best, whether you’re running an online store or a personal blog.
3. Scalability and Flexibility
As your business grows, your website needs to keep up.
Custom nameservers make scaling seamless.
For example, if you’re a Durban-based startup adding a new product line, you can create subdomains (e.g., products.yourdomain.co.za) or adjust DNS settings without hassle.
Truehost’s VPS plans offer scalable resources—upgrade CPU, RAM, or storage as traffic grows, all while keeping your custom nameservers intact.
Their flexibility ensures you only pay for what you need, with the option to scale up during busy periods like holiday sales.
Prerequisites for Setting Up Custom Nameservers
What You’ll Need Before You Start
Setting up custom nameservers is straightforward if you’re prepared. Here’s what you need:
- A registered domain: Get one through Truehost’s domain registration or registrars like GoDaddy or Namecheap. Popular South African domains include .co.za, .org.za, or .africa.
- A VPS hosting plan: Truehost offers plans tailored for South African users, with local support and payment options in ZAR.
 3")
- Access to your domain registrar’s control panel: This is where you’ll update nameserver settings.
- Access to your VPS control panel: Truehost provides cPanel, Plesk, or other tools to manage your server and DNS.
- Your VPS’s IP address: Find this in your Truehost dashboard under your VPS service details.
Choosing the Right VPS Plan
Truehost’s VPS hosting plans suit various needs.
For small businesses or bloggers, the “Silver” plan (30GB SSD, 1024MB RAM) is ideal for low-to-moderate traffic.
E-commerce sites or developers might opt for the “Gold” or “Platinum” plans with more resources for handling high traffic.
All plans support custom nameservers, so you can choose based on your budget and website demands.
Unsure which plan fits?
Truehost’s South African support team can recommend the best option.
Their 30-day money-back guarantee lets you try risk-free.
Pro Tip
Before starting, note your VPS’s primary and secondary IP addresses (if available).

You’ll need these to configure custom nameservers and glue records.
Check your Truehost dashboard or contact support if you’re unsure.
Step-by-Step Guide to Setting Up Custom Nameservers
Step 1: Accessing Your Truehost VPS Control Panel
Start by logging into your Truehost account at truehost.co.za.
Click “Client Area” to access your dashboard, designed with South African users in mind for easy navigation.
Under “Services,” find your VPS hosting plan.
Click “Manage” to enter the control panel (e.g., cPanel or Plesk). Here, you’ll configure your custom nameservers.
Step 2: Setting Up Nameservers on Your VPS
Now, configure your custom nameservers on your VPS.
Most Truehost VPS plans include cPanel, which simplifies DNS management.
Here’s how to set it up:
- Access the DNS Zone Editor:
- In cPanel, search for “Zone Editor” or “Advanced DNS Zone Editor.”
- This tool lets you create DNS records for your domain.
 4")
- Create A Records for Nameservers:
- Add two A records for your custom nameservers (e.g., ns1.yourdomain.co.za and ns2.yourdomain.co.za).
- Example:
- Name: ns1.yourdomain.co.za
- Type: A
- Address: 192.168.1.1 (your VPS’s primary IP)
- Name: ns2.yourdomain.co.za
- Type: A
- Address: 192.168.1.2 (secondary IP, or use primary IP if only one is available).
- Save the changes.
- Set Up NS Records:
- In the Zone Editor, add NS (nameserver) records to declare your custom nameservers.
- Example:
- Name: yourdomain.co.za
- Type: NS
- Nameserver: ns1.yourdomain.co.za
- Repeat for ns2.yourdomain.co.za.
- Advanced Option: Manual DNS Setup with BIND:
For developers, you can configure a DNS server like BIND.
a) Connect to your VPS via SSH and run:
sudo apt-get install bind9
sudo nano /etc/bind/named.conf.local
b) Add a zone for your domain:
zone “yourdomain.co.za” {
type master;
file “/etc/bind/db.yourdomain.co.za”;
};
c) Create the zone file (/etc/bind/db.yourdomain.co.za) with your NS and A records:
$TTL 86400
@ IN SOA ns1.yourdomain.co.za. admin.yourdomain.co.za. (
2025072001 ; Serial
3600 ; Refresh
1800 ; Retry
604800 ; Expire
86400 ; Minimum TTL
)
@ IN NS ns1.yourdomain.co.za.
@ IN NS ns2.yourdomain.co.za.
ns1 IN A 192.168.1.1
ns2 IN A 192.168.1.2
d) Restart BIND: sudo systemctl restart bind9.
If this feels overwhelming, Truehost’s cPanel option is beginner-friendly, and their support team can guide you.
Step 3: Updating Nameservers at Your Domain Registrar
Next, update your domain’s nameservers at your registrar.
If your domain is with Truehost, use their domain management portal.
Otherwise, log into your registrar (e.g., GoDaddy, Namecheap).
Follow these steps:
- Locate Nameserver Settings:
- Find “DNS Management” or “Nameservers” in your registrar’s dashboard.
- Enter Custom Nameservers:
- Replace default nameservers with your custom ones (e.g., ns1.yourdomain.co.za, ns2.yourdomain.co.za).
- Add Glue Records:
- Glue records map your custom nameservers to your VPS IP at the registry level.
- Example:
- Hostname: ns1
- IP Address: 192.168.1.1
- Hostname: ns2
- IP Address: 192.168.1.2 (or same IP if only one is available).
- Save Changes:
- Submit and allow 24–48 hours for DNS propagation.
Step 4: Verifying the Configuration
Verify your custom nameservers are working:
DNS Lookup: Use dnschecker.org or run:
dig ns yourdomain.co.za
- Ensure ns1.yourdomain.co.za and ns2.yourdomain.co.za point to your VPS IP.
- Test Your Website: Visit your domain in a browser. It should load your VPS-hosted site.
- Monitor Propagation: Check global DNS propagation with whatsmydns.net.
Common Challenges and Troubleshooting
DNS Propagation Delays
DNS changes, including custom nameservers, can take 24–48 hours to propagate worldwide.
During this time, your website may be temporarily inaccessible.
Use whatsmydns.net to track progress.
 5")
For South African users, Truehost’s local servers often speed up propagation locally.
If delays exceed 48 hours, verify your settings or reach out to Truehost’s support.
Incorrect Nameserver Configuration
Common mistakes include:
- Wrong IP Addresses: Ensure ns1 and ns2 point to your VPS’s correct IP(s) in both A records and glue records.
- Missing Glue Records: Without glue records, your custom nameservers won’t resolve. Double-check at your registrar.
- Typographical Errors: Verify spellings (e.g., ns1.yourdomain.co.za, not ns1.yourdomian.co.za).
Fix these in your VPS control panel or registrar.
Pro Tip
If your website doesn’t load after setting custom nameservers, clear your browser cache or try a different device.
Local ISPs in South Africa may cache old DNS settings, causing temporary issues.
Why Choose Truehost for VPS Hosting in South Africa
Local Expertise and Reliability
Truehost is a ZADNA-accredited registrar, trusted by South African businesses for reliable hosting.
Their VPS hosting offers 99.9% uptime, ensuring your website is always available for customers in Cape Town, Johannesburg, or beyond.
With local data centers, Truehost minimizes latency, delivering fast load times critical for user satisfaction and SEO.
Affordable VPS Plans with Custom Nameserver Support
Truehost’s VPS hosting plans start at budget-friendly prices, like the Silver plan (30GB SSD, 1024MB RAM) for small businesses.
All plans support custom nameservers, letting you manage DNS with ease.
Their 30-day money-back guarantee means you can try VPS hosting risk-free.
For growing businesses, Truehost offers scalable plans to match your needs.
24/7 Customer Support
Truehost’s support team is available round-the-clock via live chat, phone (+27 228800022), WhatsApp (+1 972 674 3814), or email ([email protected]).
Truehost’s team understands local needs, making them a top choice for SMEs and developers.
Conclusion
Setting up custom nameservers is a powerful way to connect your domain to a VPS, giving you control, speed, and a professional edge.
For South African businesses, custom nameservers paired with Truehost’s VPS hosting ensure your website performs flawlessly, wherever you are in the country.
This guide has shown you how to set up custom nameservers step-by-step, avoid common pitfalls, and leverage Truehost’s local expertise.
Now, are you ready to get started?
Sign up for Truehost’s VPS hosting today and set up your custom nameservers to power your website.
Take control of your online presence now and watch your business thrive!