 Web Hosting
 Windows HostingBuilt for Windows apps and websites – stability, speed and flexibility
 Reseller HostingLaunch a hosting business without technical skills or expensive infrastructure
 Affiliate ProgramRefer customers and earn commissions from sales across our platform
 Domain SearchFind and secure a domain name in seconds with our quick lookup tool
 All DomainsExplore domain names from over 324 TLDs globally – all in one place
 Free Whois Lookup Tool South Africa
 VPS
VPS SSLs
SSLsRunning an AI assistant from your laptop sounds convenient until the laptop closes, the power goes out, or you need to leave the house.
OpenClaw fixes that. You run on your own server, and it answers you on the channels you already use: WhatsApp, Telegram, Slack, Discord, and more.
It connects to LLM providers like OpenAI, Anthropic, and Groq, then delivers responses directly through your messaging apps.
A VPS changes everything about how that works. Your assistant runs 24/7 in the cloud not tied to your laptop, not dependent on your home electricity.

For anyone in South Africa dealing with load shedding, that last point alone is worth the setup.
This guide covers two deployment paths for deploying OpenClaw on a VPS: the one-click route through Truehost SA and the manual setup route for anyone who wants full control.
By the end, you’ll have a fully functional AI assistant running on your own server.

Prerequisites
Before you start, make sure you have the following:
- An API key from a supported LLM provider, such as OpenAI, Anthropic, Groq, or another compatible service
- A domain name optional, but recommended for a clean URL and SSL
- A Truehost account for one-click deployment, or SSH access to any VPS for manual installation
- Basic terminal comfort, you don’t need to be a developer, but you should be able to follow command-line instructions
- A VPS running Ubuntu 22.04 or 24.04 LTS with at least 1–2 vCPUs and 2 GB RAM (4 GB recommended for heavier workloads)
RAM guidance: For simple Telegram use, 2 GB is enough. If you want to run local models with Ollama, go with 4 vCPUs and 16 GB RAM. For most users on cloud API keys, 2–4 GB covers everything.
Table of Contents
One-Click Deployment on Truehost
The fastest way to get OpenClaw on a VPS is through Truehost SA’s managed hosting. You skip the manual configuration and go straight to using your assistant.
Here’s what you get with Truehost OpenClaw hosting:
- Managed infrastructure: less maintenance on your end
- Fast provisioning: often under a minute
- ZAR-denominated billing: no surprise USD charges on your card
- Local support and SA-optimised servers
- Load shedding-proof: your server runs in the cloud while your home power is out
- Pre-loaded OpenClaw with room to scale
Don’t have a VPS yet? Check Truehost OpenClaw hosting plans to get started.
1) Go to the OpenClaw hosting page
Visit Truehost SA’s OpenClaw hosting page. Sign up or log in if you don’t have an account yet.
2) Select and configure your plan
Choose the plan that fits your workload:
- Cloud Pro / OpenClaw KVM plans, Managed VPS. Truehost handles the server. Best for beginners and small businesses.
- VPS 2 (unmanaged) Full root access. Ideal for developers who want complete control.
Recommendation: Most users starting with OpenClaw do well with the Cloud Pro plan. It’s the best balance of performance and ease of use.
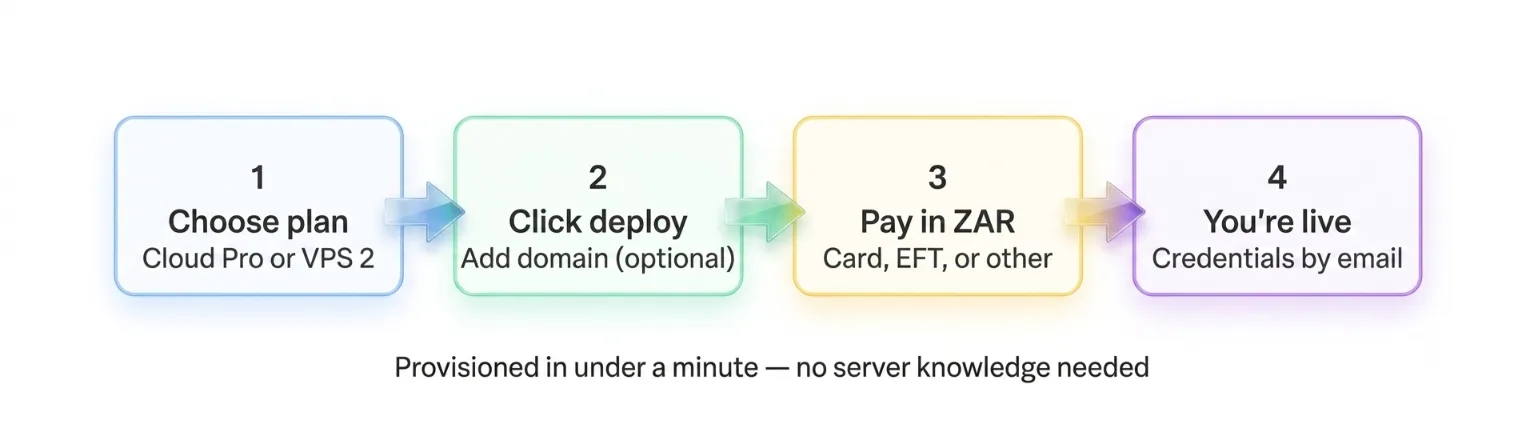
3) Deploy your instance
- Click Deploy and add a custom domain if you want a clean URL and HTTPS
- Complete payment via card, EFT, or other SA-available payment methods
- The system provisions the VPS, installs OpenClaw, and configures basic settings automatically
- You’ll receive an email with server login credentials and dashboard details within minutes
4) Connect and go
- Log into the OpenClaw dashboard
- Enter your LLM API key (OpenAI, Anthropic, Groq, etc.)
- Connect your first messaging platform Telegram is the easiest starting point
- Your private AI assistant is now live and running 24/7
Manual Setup on Any VPS
Prefer full control or using another VPS provider? Follow these steps on a fresh Ubuntu server.
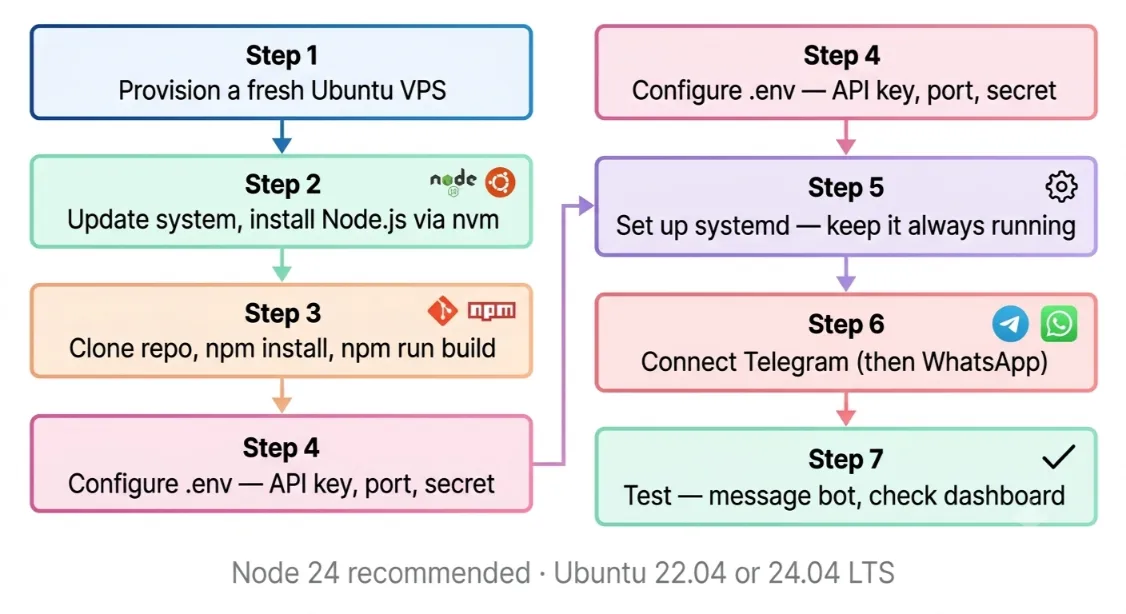
Step 1: Provision a Fresh VPS
- Choose Ubuntu 22.04 or 24.04 LTS
- Minimum: 1 vCPU / 1 GB RAM; recommended: 2 GB RAM or more
- Make sure you have SSH access and your server IP ready
Step 2: Update Your System and Install Dependencies
SSH into your server. Run the following:
sudo apt update && sudo apt upgrade -y
sudo apt install curl git build-essential -y
Next, install Node.js via nvm. This gives you the latest version and easier version management, better than installing via apt directly.
curl -o- https://raw.githubusercontent.com/nvm-sh/nvm/v0.39.7/install.sh | bash
nvm install 24
Node 24 is the recommended runtime for OpenClaw. Node 22.19+ also works.
Read also: 9 Best VPS Providers for OpenClaw
Step 3: Install OpenClaw
Clone the official repository and move into the project directory:
git clone https://github.com/openclaw/openclaw.git
cd openclaw
npm install
npm run build
What each command does:
git clone: downloads the OpenClaw source code to your servercd openclaw: moves you into the project foldernpm install: installs all required dependenciesnpm run build: compiles the project into a runnable format
Step 4: Configure Environment Variables
Copy the example environment file:
cp .env.example .env
Open .env and set the following:
- Your LLM API key (OpenAI, Anthropic, or Groq)
- Port number
- App secret / session key
Security callout: Never commit your
.envfile to Git or share it publicly. It contains your API keys. Add.envto your.gitignoreimmediately.
Read also: VPS Monitoring Tools You Should Use
Step 5: Set Up as a systemd Service
Without a process manager, OpenClaw stops the moment you close your SSH session. A systemd service keeps it running in the background and restarts it automatically on reboot.
Create a systemd service file for OpenClaw, then enable and start it:
systemctl enable openclaw
systemctl start openclaw
Verify it’s running:
systemctl status openclaw
You should see active (running) in the output.
Step 6: Connect to Messaging Platforms
Telegram (easiest recommended first):
- Create a bot using BotFather on Telegram
- Copy the bot token into your
.envfile under the Telegram token variable - Restart the OpenClaw service
- Message your bot to confirm it’s responding
WhatsApp:
- Create a Meta Developer account
- Set up a WhatsApp Business API app and get your credentials
- Add credentials to
.envand restart the service - For the full WhatsApp setup, refer to the official OpenClaw documentation
WhatsApp requires more steps than Telegram. If you’re new to OpenClaw, start with Telegram and add WhatsApp once the assistant is stable.
Step 7: Test Your Setup
- Message your Telegram bot and confirm it replies
- Visit
http://YOUR_SERVER_IP:3000for the dashboard - Check that the dashboard loads and shows your connected platform
- If something isn’t working, move to the troubleshooting section below
Post-Installation: Configuration & Optimisation
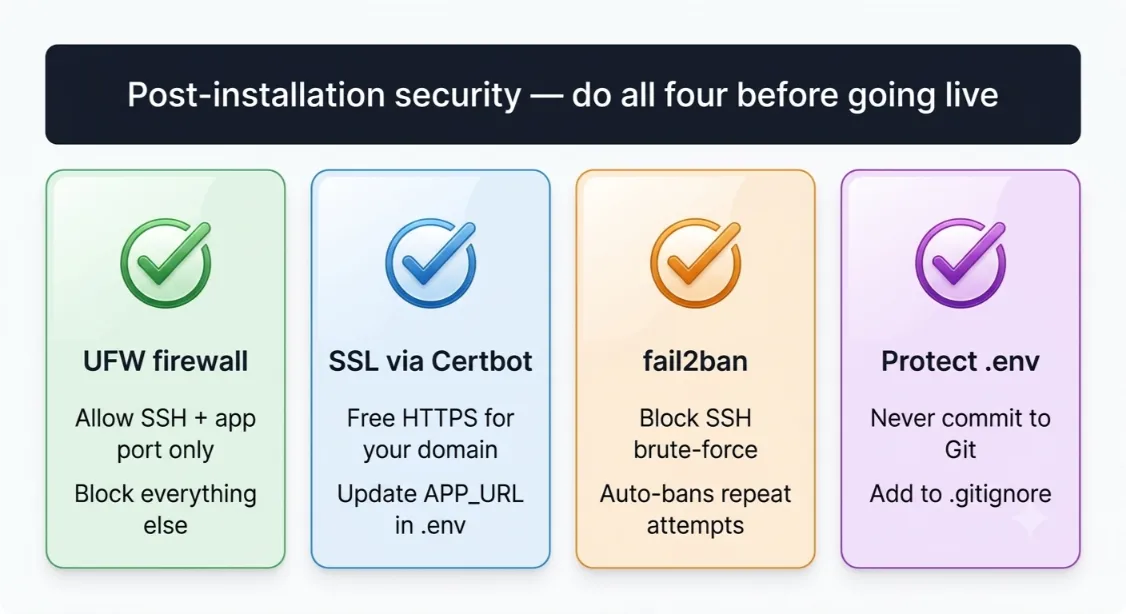
Security
Getting OpenClaw on a VPS is only half the job. Securing it properly is the other half.

- Set up UFW firewall: allow only your SSH port and OpenClaw port; block everything else
- Install SSL with Certbot (free HTTPS), update
APP_URLin.envto use HTTPS after setup - Install fail2ban: blocks brute-force login attempts on SSH
A .co.za domain adds local credibility if you’re building an SA-facing project or sharing the assistant with clients.
Check our guide on buying .co.za domains in South Africa
Storage & Memory
- Default in-memory storage resets on reboot fine for testing, not for production
- Switch to SQLite for simple persistence
- Use PostgreSQL or MongoDB for heavier workloads or multi-user setups
- Update the
DATABASE_URLvariable in.envafter switching
Connecting Multiple Platforms
- Add credentials for each platform (Telegram, WhatsApp) in
.env - Restart the service after any
.envchanges - OpenClaw handles multiple platforms simultaneously once credentials are set one gateway, all your channels.
Dashboard & Monitoring
Use the built-in dashboard for live status and logs. Key commands:
- Check service status:
systemctl status openclaw - View live logs:
journalctl -u openclaw - View last 100 log lines:
journalctl -u openclaw -n 100
Performance Tips
- Monitor resource usage with
htop - Limit concurrent browser automation sessions to avoid RAM spikes
- Use lighter, faster models for simple tasks; reserve larger models for complex queries
Staying Updated
Run this regularly to keep OpenClaw current with the latest fixes and features:
git pull
npm install
npm run build
systemctl restart openclaw
Common Issues & Troubleshooting
| Problem | Fix |
|---|---|
npm install fails | Verify Node.js installation; re-run nvm steps |
| Port already in use | Change PORT in .env to an unused port |
| Service won’t start | Run journalctl -u openclaw -n 100 to diagnose |
| API key errors | Check for stray spaces or quotes in .env; restart after fixing |
| Can’t reach the dashboard | Confirm UFW allows the configured port |
| Telegram bot not responding | Verify token and that a conversation has been started with the bot |
| High memory usage | Switch to database-backed storage or upgrade your RAM |
For anything not listed here, check the official OpenClaw GitHub issues page.
Set Up OpenClaw on a VPS With Truehost
You’ve now seen both paths to running OpenClaw on a VPS: the managed one-click route through Truehost SA, and the manual route for those who prefer hands-on control.
Either way, the result is the same: a private, always-on AI assistant that works whether your home power is up or not.
You’re not renting access to someone else’s AI. You’re running your own, on your own terms.
If you took the Truehost path, your assistant is likely already live. If you did the manual setup, you now have full control over every layer of the stack.
The next step is simple: open Telegram, message your bot, and see what it can do.
Ready to get started? Visit the Truehost OpenClaw hosting page and have your assistant running in under five minutes.
Set Up OpenClaw on a VPS FAQs
What should I do if OpenClaw stops running after I close my SSH session?
Set it up as a systemd service using the steps in Step 5. This keeps OpenClaw running as a background process and restarts it automatically after any reboot.
What storage option should I use for a production setup?
Move away from default in-memory storage. SQLite works well for single users. PostgreSQL or MongoDB is the better choice for heavier workloads or multi-user environments.
How do I update OpenClaw after installation?
Run git pull, then npm install, npm run build, and systemctl restart openclaw. Do this regularly to stay current with the latest fixes and features.
How do I keep my API keys secure?
Never commit your .env file to Git. Add it to .gitignore immediately after creation. Use environment variables and avoid sharing the file with anyone.
Can I connect OpenClaw to both Telegram and WhatsApp at the same time?
Yes. Add credentials for both platforms in your .env file and restart the service. OpenClaw handles multiple channels simultaneously from a single gateway.
How do I connect OpenClaw to Telegram?
Create a bot through Telegram’s BotFather, copy the bot token into your .env file, and restart the OpenClaw service. Then message the bot to confirm it’s working.
Why should I run OpenClaw on a VPS instead of my personal computer?
A VPS runs 24/7 without depending on your laptop or home electricity. In South Africa especially, load shedding makes a cloud-hosted setup far more reliable than anything running at home.
Which LLM providers does OpenClaw support?
Supported providers include OpenAI, Anthropic, and Groq, among others. OpenClaw uses a bring-your-own-key model, so you’re never locked into one provider.
What are the minimum server requirements to run OpenClaw?
Minimum is 1 vCPU and 1 GB RAM. For practical daily use, 2 GB RAM is the recommended starting point. Go to 4 GB if you’re using browser automation or multiple integrations.
Do I need coding experience to set up OpenClaw?
Not for the Truehost one-click path. For manual setup, basic comfort with terminal commands is enough. You don’t need to be a developer.