 Web Hosting
 Windows HostingBuilt for Windows apps and websites – stability, speed and flexibility
 Reseller HostingLaunch a hosting business without technical skills or expensive infrastructure
 Affiliate ProgramRefer customers and earn commissions from sales across our platform
 Domain SearchFind and secure a domain name in seconds with our quick lookup tool
 All DomainsExplore domain names from over 324 TLDs globally – all in one place
 Free Whois Lookup Tool South Africa
 VPS
VPS SSLs
SSLsRunning n8n on a VPS is one of the smartest moves you can make for your automation stack. It simply means your workflows, your data, and the engine that runs everything all live on a server you control.
Learning how to run n8n on a VPS gives you real advantages, such as:
- Data ownership: Your workflows and data stay on your server
- Cost control: You pay a fixed VPS price, not per workflow
- No usage limits: Run as many automations as your server allows
- Better performance: Dedicated resources just for you
You also pay a single flat monthly fee instead of watching per-task charges pile up, and you can scale freely as your needs grow.
If you are a business owner, freelancer, or developer wondering how to run n8n on a VPS, we have got you covered. Today, we cover a step-by-step guide on how to run n8n on a VPS, from the first click to your first live workflow.

Before you start, make sure you have
- A VPS with a Linux operating system
- Basic Linux command knowledge
- SSH access
- A registered domain or subdomain (recommended)
Now let us get straight into it.
Table of Contents
Step 1: Provision Your VPS

Head over to your VPS provider’s n8n hosting plans and pick the one that fits your needs. A smaller KVM plan suits solo builders and side projects, while a larger plan suits production workloads.
If you do not have an n8n VPS provider yet, here are a few popular options:
| Provider | Free Tier | Paid Starting Price | Watch Out For |
| Truehost | No free tier | From R120/mo (billed triannually); ~R650/mo(billed trieannually) | The R120–650/mo rate only applies triennially, which is a longer commitment. Truehost bills in ZAR directly, so no forex surprises, but check the renewal rate before signing up |
| Oracle Cloud | Free Tier + $300 free credits for 30 days. 4 OCPU / 24GB RAM Ampere A1, 200GB storage. | Customizable plans starting at $4/month | Enforcement is inconsistent right now (some existing users still show 4/24), and ARM capacity in popular regions is often “out of host capacity”. Oracle quietly began cutting new Always Free accounts to 2 OCPU / 12GB in mid‑2026 |
| Google Cloud | $300 in free credit for new customers: 1 e2-micro VM (2 shared vCPU, 1GB RAM), 30GB storage Always-free, not time-limited | ~R100/mo (e2-micro on-demand, ≈$6/mo) | Google Cloud’s free virtual machine tier is restricted strictly to the us-west1, us-central1, and us-east1 regions, and exceeding its small internet data limits can quickly result in high unexpected egress charges |
| Railway | No more ongoing free hours. Now just a one-time $5 trial credit (30 days), then mandatory paid plan | R82/mo (Hobby plan, $5/mo, includes $5 of usage credit) | The $5/mo subscription is charged even if you use $0; it’s no longer a real “free tier,” and usage-based overages beyond the credit stack on top |
| DigitalOcean | No permanent free tier. $200 credit for 60 days (any new user, not just students) | R66/mo (Basic Droplet, $4/mo) | Great UI, easy Docker deploy, but no forever-free plan, and dedicated-CPU tiers cost noticeably more than Hetzner |
| Render | 750 free instance-hours/mo + free Postgres (auto-deleted after 30 days) | R115/mo (Starter, $7/mo) | Free web services spin down after 15 min idle (30–60s cold start on wake); still a solid pick for beginners once you’re on Starter |
| AWS EC2 | Only accounts created before July 2025 get 750 hrs/mo free for 12 months. New accounts instead get a $200 credit valid for 6 months. | R124/mo (t3.micro on-demand, ~$7.59/mo) | Good if you already use AWS, but the “12 months free” advice you’ll see online is outdated for new signups |
Whichever provider you choose, make sure your plan gives you
- Ubuntu 22.04 or 24.04 LTS as the operating system.
- Minimum 2GB RAM, though 4GB or more is recommended for comfortable use.
- Root access.
- A domain name, optional but recommended for production use.
- Basic comfort working in the terminal
If you are in South Africa, look for a provider that bills in ZAR and offers EFT payment, avoiding forex conversion and international card fees.
Select Ubuntu 22.04 or 24.04 LTS at checkout, since this guide is built around them. Once ready, you will receive your server IP, root username, and root password by email.
Step 2: Connect to Your Server
With your VPS live, the next step in how to run n8n on a VPS is getting into it.
Open your terminal if you are on Linux or macOS. On Windows, use the built-in Command Prompt or a tool like PuTTY or PowerShell.
Then run:
ssh root@your_server_ipReplace your_server_ip with the IP address from your welcome email, for example:
ssh [email protected]The first time you connect, confirm the server’s fingerprint by typing yes and hitting Enter. You will then be asked for your root password, also in the welcome email.
Step 3: Update Your System and Install Docker and Docker Compose
Before installing n8n, the next move in how to run n8n on a VPS is updating your packages to avoid dependency conflicts:
sudo apt update && sudo apt upgrade -yOnce done, install Docker using the official script, which pulls the latest stable release:
curl -fsSL https://get.docker.com -o get-docker.sh sudo sh get-docker.shConfirm Docker is working:
docker --versionYou should see something like Docker version 26.x.x. Enable it to start automatically on reboot:
sudo systemctl enable docker; sudo systemctl start dockerCheck whether Docker Compose is available:
docker-compose versionIf missing, install it:
sudo apt install docker-compose -yYour VPS is now ready to run Docker containers, including n8n.
Step 4: Set Up the n8n Directory
Before spinning up the n8n container, create a dedicated directory for it. This is where n8n stores your workflows, credentials, and settings, so your data stays intact even if the container restarts.
Run:
mkdir -p ~/.n8n cd ~/.n8nWith that folder in place, you are ready for the next part of how to run n8n on a VPS, configuring and launching it.
Step 5: Create the Docker Compose File
Now for one of the more important parts of how to run n8n on a VPS is creating the configuration file that will actually run your n8n container.
Still inside your ~/.n8n directory, open a new file called docker-compose.yml:
nano docker-compose.ymlPaste the following configuration into the file:
version: '3.8'

services:

  n8n:

    container_name: n8n

    image: n8nio/n8n:latest

    restart: always

    ports:

      - "5678:5678"

    environment:

      - N8N_BASIC_AUTH_ACTIVE=true

      - N8N_BASIC_AUTH_USER=admin

      - N8N_BASIC_AUTH_PASSWORD=YOUR_STRONG_PASSWORD

      - GENERIC_TIMEZONE=Africa/Johannesburg

      - N8N_HOST=yourdomain.com

      - N8N_PROTOCOL=http

      - WEBHOOK_URL=http://yourdomain.com/

    volumes:

      - ~/.n8n:/home/node/.n8n

    networks:

      - n8n-network

networks:

  n8n-network:

    driver: bridge
Before saving, replace YOUR_STRONG_PASSWORD with a secure password combining uppercase, lowercase, numbers, and special characters to protect your dashboard.
The GENERIC_TIMEZONE=Africa/Johannesburg line keeps your workflow timestamps accurate for South African time.
When done, save and exit: press Ctrl + O, hit Enter to confirm, then Ctrl + X to close the editor.
Step 6: Launch n8n

With the configuration file ready, it is time for the next move in how to run n8n on a VPS. Star the n8n container:
docker-compose up -dThe -d flag runs it in the background, so it keeps going even after you close your terminal. Give it a few seconds, then confirm the container is running:
docker psYou should see n8n listed with a status of Up. To view startup logs or troubleshoot later, run:
docker-compose logs -fOr pull up the n8n logs directly:
docker logs -f n8nOnce everything looks clean, n8n is live on port 5678.
Step 7: Access Your n8n Instance
At this point in how to run n8n on a VPS, n8n is already running, so the next step is opening it in your browser.
Go to:
http://your_server_ip:5678
Replace your_server_ip with the IP address from your setup email.
You will see the login page. Use the username admin and the secure password you created earlier.
Once you log in, the n8n dashboard opens, and you can start building workflows right away.
Step 8: Secure Your n8n Deployment
Running n8n on port 5678 is fine for testing, but for anything serious or production use, a bit more security work is needed.
First, set up a firewall with UFW. Install and configure it:

apt install ufw -y ufw allow OpenSSH ufw allow 5678 ufw --force enableOnce your domain is pointed at your server, tighten this further:
sudo ufw allow 22 sudo ufw allow 80 sudo ufw allow 443 sudo ufw enablePort 22 keeps SSH open, 80 and 443 handle web traffic, and everything else gets blocked.
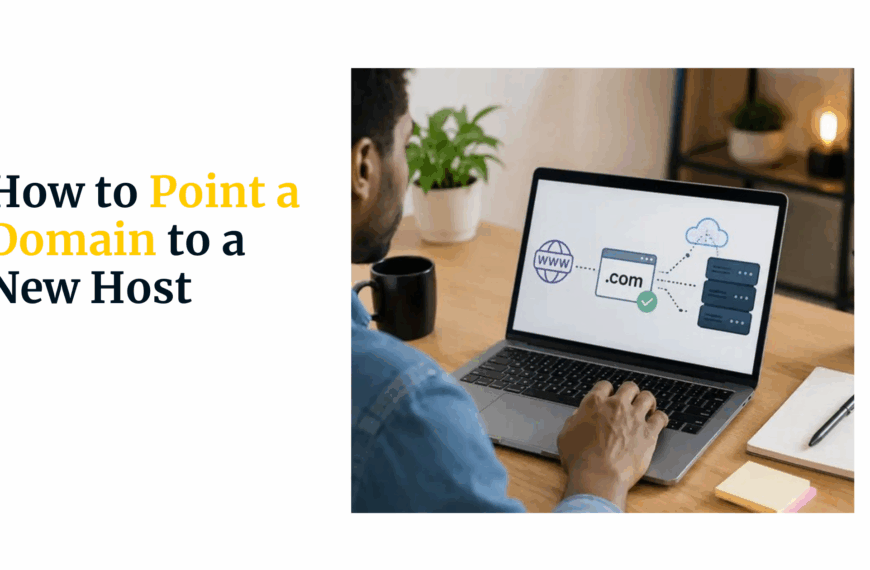
Next, point a domain to your VPS, for example automation.yourdomain.co.za, by creating an A record with your registrar. DNS changes can take minutes to hours to propagate.
After that, set up Nginx as a reverse proxy to route traffic to port 5678:
sudo apt install nginx -y sudo nano /etc/nginx/sites-available/n8nPaste this in, replacing n8n.yourdomain.co.za with your domain:
server {

    listen 80;

    server_name n8n.yourdomain.co.za;

    location / {

        proxy_pass http://127.0.0.1:5678;

        proxy_http_version 1.1;

        proxy_set_header Upgrade $http_upgrade;

        proxy_set_header Connection 'upgrade';

        proxy_set_header Host $host;

        proxy_set_header X-Real-IP $remote_addr;

        proxy_set_header X-Forwarded-For $proxy_add_x_forwarded_for;

        proxy_set_header X-Forwarded-Proto $scheme;

        proxy_cache_bypass $http_upgrade;

    }

}
Enable the config and restart Nginx:
sudo ln -s /etc/nginx/sites-available/n8n /etc/nginx/sites-enabled/ sudo nginx -t sudo systemctl restart nginxThen add a free SSL certificate with Certbot:
sudo apt install certbot python3-certbot-nginx -y sudo certbot --nginx -d n8n.yourdomain.co.zaCertbot handles the certificate, updates Nginx for HTTPS, and sets up auto-renewal.
Finally, update these lines in docker-compose.yml:
N8N_HOST=yourdomain.co.za

N8N_PROTOCOL=https

WEBHOOK_URL=https://yourdomain.co.za/
Then restart n8n:
docker-compose down docker-compose up -dYour n8n instance is now accessible at https://n8n.yourdomain.co.za, encrypted and production-ready.
A few extra security habits worth keeping:
- Change your basic auth password regularly
- Consider adding fail2ban for extra protection against brute force attacks
- If your data needs to stay within South Africa for POPIA compliance, confirm your VPS provider’s data centre location before you commit.
Step 9: Maintain and Scale Your n8n Setup

Once you know how to run n8n on a VPS, keeping it healthy is mostly about updates and backups.
To update, pull the latest image and restart:
docker-compose pull docker-compose up -dDocker grabs the newest n8n release while keeping your data intact in the ~/.n8n volume.
Back up your workflows, credentials, and settings regularly:
cp -r ~/.n8n ~/n8n-backup-$(date +%Y%m%d)As your automations grow, switching from SQLite to PostgreSQL gives n8n a more robust database for high-volume workflows. Enabling queue mode with Redis lets you run multiple worker processes in parallel, improving throughput. At this point, move up to a plan with more RAM and vCPU.
Keep an eye on resource usage with:
docker stats n8nIf you are hitting the ceiling, that is your cue to upgrade.
Troubleshoot Common n8n on a VPS Issues
Even with a clean setup on how to run n8n on a VPS, things occasionally go sideways. Most issues are easy to fix once you know where to look.
a) Container not starting? Pull up the logs:
docker logs n8nLook for error messages near the bottom of the output. Missing environment variables and volume permission issues are the usual culprits.
b) Port 5678 already in use; Docker won’t be able to bind to it? Check what is using it:
sudo netstat -tuln | grep 5678c) If there’s a conflict, either stop the competing process or change the port mapping in your docker-compose.yml (for example, 5679:5678) and restart the container.
d) n8n cannot write to its data folder? Fix the ownership:
sudo chown -R 1000:1000 ~/.n8ne) Container crashing or feels slow? n8n gets memory hungry as workflows grow, especially with parallel executions. Upgrading your plan is the fix.
f) Webhook not receiving data? Confirm your firewall allows port 443 or 80, and check Nginx is running:
sudo systemctl status nginxAlso verify the WEBHOOK_URL variable matches your domain.
g) Dashboard not loading? Confirm two things: the container is running (docker ps), and the firewall allows the required ports (22, 80, 443, and 5678 if it’s still exposed).
Run n8n on a VPS Like a Pro
By now, you have n8n installed and running, a secure HTTPS setup, a persistent service, and a scalable database option.
A few extra tips can take things further:
- Enable queue mode for heavy workloads
- Scale using multiple workers
- Add community nodes as your needs grow
If you are in South Africa, your VPS choice affects both cost and speed, so use a provider with:
- Stable uptime
- Fair local pricing
- Easy scaling
Truehost gives you n8n VPS plans that fit this exact setup. You can start small and grow, making it a comfortable place to practice how to run n8n on a VPS without overcommitting from day one.
Running n8n on a VPS FAQs
You cannot run n8n on shared hosting instead of a VPS, since it needs server-level access that shared hosting does not give.
The cost to run n8n on a VPS monthly depends on your provider, but entry plans usually range from $5 to $10, cheaper than tools charging per task.
Coding is not required to use n8n after setup, since it uses a visual workflow builder, though basic logic still helps.
You can run multiple n8n instances on one VPS using different ports or containers, as long as your server has enough resources.
If your VPS goes down, your automations stop running, which is why uptime monitoring and backups are worth having.
You can migrate your n8n setup to another server later, and using Docker with PostgreSQL makes it even easier.
You can connect n8n to local apps or internal systems since it runs on your own server, reaching tools cloud platforms cannot.
To scale n8n when workflows grow, move to queue mode with multiple workers, use a dedicated database, and deploy on scalable infrastructure like Docker or Kubernetes to handle higher loads reliably.
To fully set up n8n on a VPS takes about 30 to 90 minutes, a little longer with a domain, SSL, and database setup added.