 Web Hosting
 Windows HostingBuilt for Windows apps and websites – stability, speed and flexibility
 Reseller HostingLaunch a hosting business without technical skills or expensive infrastructure
 Affiliate ProgramRefer customers and earn commissions from sales across our platform
 Domain SearchFind and secure a domain name in seconds with our quick lookup tool
 All DomainsExplore domain names from over 324 TLDs globally – all in one place
 Free Whois Lookup Tool South Africa
 VPS
VPS SSLs
SSLsAre you a WordPress user looking to customize your website and stand out from the crowd?
If so, this article is for you!
With WordPress’s intuitive interface, it’s easy to take your website design to the next level.
From choosing a theme with creative features and widgets, to adding plugins that add extra functionality and style, there are lots of ways to get started.

We’ll walk you through each step in the customization process so that you can create a unique website that stands out from others.
Table of Contents
Why Customize Your WordPress Theme
Millions of people use WordPress to power their online businesses.
And even with thousands of themes, there bound to be some similarities between you and the next WP site you meet.
Customizing your WordPress website is a great way to differentiate it from other websites and stand out.
And one of the best ways to customize your WordPress website is by customizing its theme.
Themes give you control over the look and feel of your website, from the fonts and colors used to the layout of pages.

Custom themes allow you to make extensive changes, such as adding custom widgets or creating a unique navigation menu for an easy user experience.
Only through this customization can you create an amazing website that truly reflects your brand’s identity and stands out from the competition.
Preparing to Customize Your Website Theme
We need to take care of some things before we start making that site your own!
a. Backup Your Website
It’s important to have regular backups of all the content, files, media, and databases associated with your WordPress site.
This ensures that if anything happens to your site, you can restore it quickly without any data loss or disruption in service.
Now, there are several ways to backup your WordPress website.
You can use an automated plugin such as UpdraftPlus or WP-DB-Backup that allows you to schedule backups on an ongoing basis easily.
That said, here are the steps to backup a WordPress site using UpdraftPlus:
- Install and activate the UpdraftPlus plugin: In the WordPress admin dashboard, go to “Plugins” and click on “Add New”. Search for “UpdraftPlus” and install and activate the plugin.
- Configure UpdraftPlus: Once the plugin is activated, go to “Settings” and then “UpdraftPlus Backups”. Here you can configure your backup settings, such as how often you want to backup your site, where you want to store your backups, and which files and database tables you want to backup.
- Start a backup: Once you have configured your settings, click on the “Backup Now” button to start the backup process. This may take a few minutes, depending on the size of your site.
- Verify backup: After the backup is complete, you can verify that the backup was successful by going to the “Existing Backups” tab in UpdraftPlus and checking that the backup you just created is listed there.
Later if you want to download the backup file to your computer, you can do so by clicking the “Download” button next to the backup in the “Existing Backups” tab.
If you ever need to restore your site from a backup, you can do so by clicking the “Restore” button next to the backup.
You can also manually back up your folders via FTP software like FileZilla.
For larger sites with multiple databases, programs are available for backing up MySQL databases and other types of content management systems for websites.
b. Install a Child Theme
Besides the backups, a Child Theme is a great way to work on your site.
It makes customization easier, faster, and safer than directly modifying the code of the main theme.
This is where it gets a bit technical.
To create a child theme from any theme on WordPress, you need to follow these basic steps:
- Create a new folder in the wp-content/themes directory: In your WordPress installation, navigate to the wp-content/themes directory and create a new folder. The name of the folder should be the name of your child theme. For example, if your parent theme is called “Twenty Twenty-One,” your child theme could be called “Twenty Twenty-One Child.”
- Create a style.css file: Inside your child theme folder, create a style.css file. In this file, you need to add a header that defines the name and information of your child theme. You also need to specify the Template parameter in the header, which should be the parent theme’s name.
- Create a functions.php file: Inside your child theme folder, create a functions.php file. In this file, you can add any custom functions or modifications that you want to make to your site’s functionality. You can also use this file to enqueue custom stylesheets or scripts.
- Activate your child theme: Once you have created your child theme, you can activate it in your WordPress admin dashboard by going to “Appearance” and then “Themes.” Your child theme should now appear as an option, and you can activate it by clicking the “Activate” button.
That’s it!
Once you have created your child theme, you can modify your site’s appearance and functionality by adding custom CSS or PHP code to the style.css and functions.php files.
BUT you won’t have to do this if your customization doesn’t involve any coding.
Steps to Customize Your WordPress Theme
a. Choose a Theme Suitable for Your Needs

- Choose a theme: You can browse for free and premium themes in the WordPress theme repository or on third-party theme marketplaces. Once you find a theme you like, ensure it is compatible with your version of WordPress.
- Download the theme: Click the download button for the theme you want to use. It will download as a .zip file to your computer.
- Log in to your WordPress site: Go to your WordPress site and log in as an administrator.
- Navigate to the Theme section: From the WordPress dashboard, go to Appearance > Themes.
- Upload the theme: Click the “Add New” button at the top of the screen and then click “Upload Theme”. Select the .zip file that you downloaded earlier and click “Install Now”.
- Activate the theme: Once the theme is installed, you will see a message indicating the successful installation. Click the “Activate” button to activate the theme.
There are thousands of themes available, and it can be difficult to know which one will suit your needs best.
Here are some tips on selecting the perfect theme for your website:
First, decide what type of website you’re creating.
Are you starting an online store, writing a blog, or creating a corporate website?
Different websites require different functionality and feature so select a theme that provides them.
If you’re unsure which features to look for, plenty of resources are available to help guide your decision-making process.
Once you have identified the type of website and the features needed, narrow down your selection by focusing on aesthetics.
Look for themes that fit with the style and tone of your website.
Finally, don’t forget to check if the theme is compatible with your content management system (CMS).
Most themes are compatible with popular CMSs like WordPress and Joomla, but be sure to double check before committing to a purchase.
b. Customize the Header and Navigation Menus

An important part of customizing a WordPress website is to customize the header and navigation menus.
But before you do anything, first create one.
- Log in to your WordPress site as an administrator.
- From the WordPress dashboard, go to Appearance > Menus.
- If you haven’t created any menus yet, click the “create a new menu” link. Otherwise, select the menu you want to edit.
- Give the menu a name and click the “Create Menu” button.
- You will see a list of available menu items on the left-hand side. You can add pages, posts, custom links, categories, and tags to the menu by selecting the checkbox next to each item and then clicking “Add to Menu”.
- Once you’ve added the items you want to the menu, you can rearrange them by dragging them and dropping them into your preferred order.
- You can also create sub-menus by dragging a menu item slightly to the right to create a nested menu.
- After organizing your menu, select the location where the menu will appear on your site. This will vary depending on your theme, but typically you can select the location in the “Menu Settings” section.
- Finally, click the “Save Menu” button to save your changes.
Now that you have a MENU we can start tinkling with it.
A great way to start customizing is by changing the appearance of your header image, which will be seen at the top of each page on your website.
This can be done easily by going into Appearance > Header in your WordPress dashboard.
There you can upload a new image or logo or use an online tool like Canva to design one yourself.
You may also want to add a description and title so that visitors know what kind of site they are looking at right away.
The navigation menu can also be customized in the same way so that visitors can easily find their way around the site.
You can add pages, categories, tags and more!
c. Change the Colors and Fonts
When customizing your WordPress website, you can really make it stand out by changing the colors and fonts.
This is an easy way to create a unique look that will draw attention.
You can find many free color palettes online, or use a tool such as Adobe Color to create your own palette.

To change WordPress colors, look for Theme Options or Customization Settings in the Appearance menu.
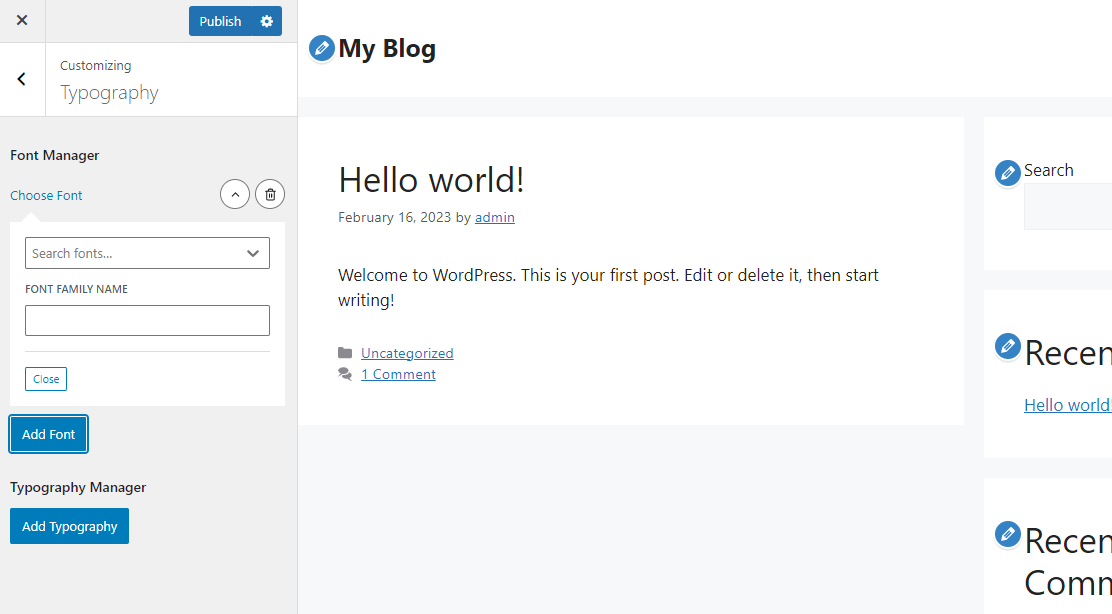
For fonts, there are many high-quality options available with most themes; however, you can also upload additional fonts if desired.
Fonts should be chosen carefully to be easy to read, eye-catching, and visually appealing.
Be sure to experiment until you find the right combination of colors and fonts that complements your website design perfectly!
What if your theme doesn’t have the option to change fonts?
In that case, we go the hard way. The code way?.
Here’s how you can use custom CSS to change the font and color of your website’s text:
Go to your WordPress dashboard and navigate to Appearance > Customize.
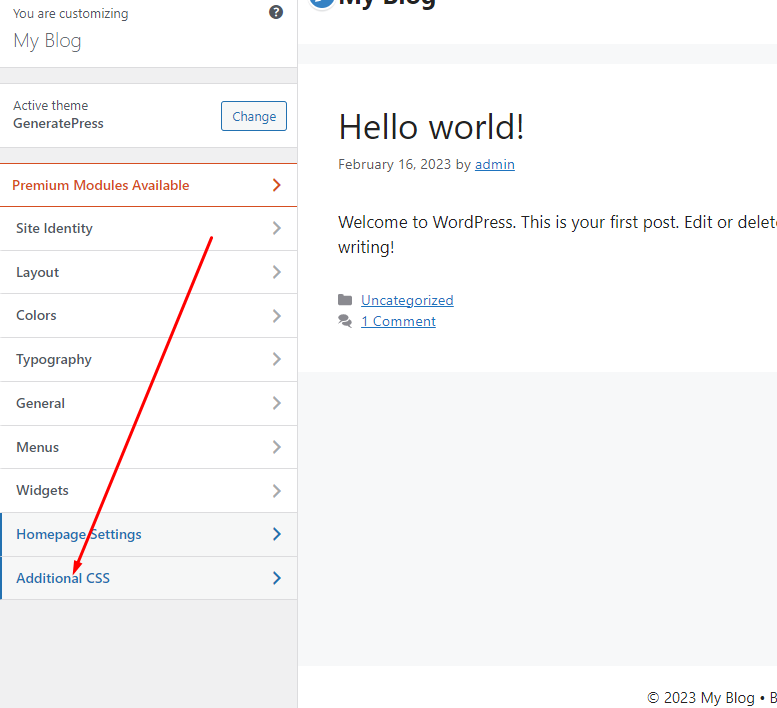
Click on the Additional CSS option in the left-hand menu.
In the CSS editor, you can add CSS code to make changes to the appearance of your website.
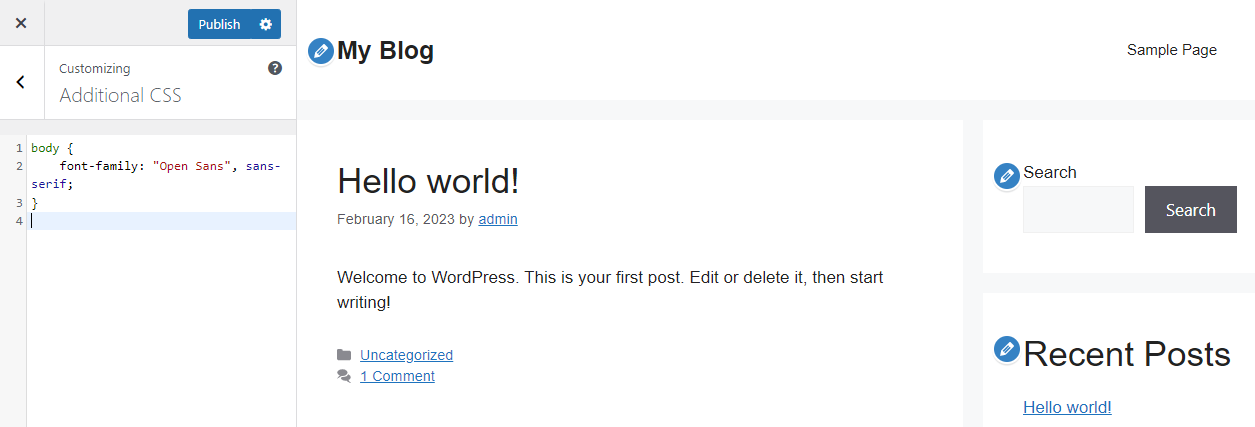
For example, to change the font of your website’s body text, you can add the following CSS code:
body {
font-family: “Open Sans”, sans-serif;
}
In this example, we’re changing the font family to “Open Sans”, a popular sans-serif font. You can replace “Open Sans” with any other font family you prefer.
To change the color of your website’s body text, you can add the following CSS code:
body {
color: #333333;
}
In this example, we’re changing the text color to a dark gray color (#333333).
You can replace “#333333” with any other hex code for the color you want.
To change the font size of your website’s headings:
h1, h2, h3, h4, h5, h6 {
font-size: 24px;
}
Click the “Publish” button to save your changes.
d. Add Widgets and Plugins
One way to make your WordPress website stand out is by adding widgets and plugins.
Widgets are small, useful applications that can be added to sidebars, footers, or other areas of a website.
They can provide additional functionality or content such as calendars, social media feeds, and comment forms.
On the other hand, plugins add a wide range of features to WordPress websites including contact forms, image galleries, and e-commerce shopping carts.
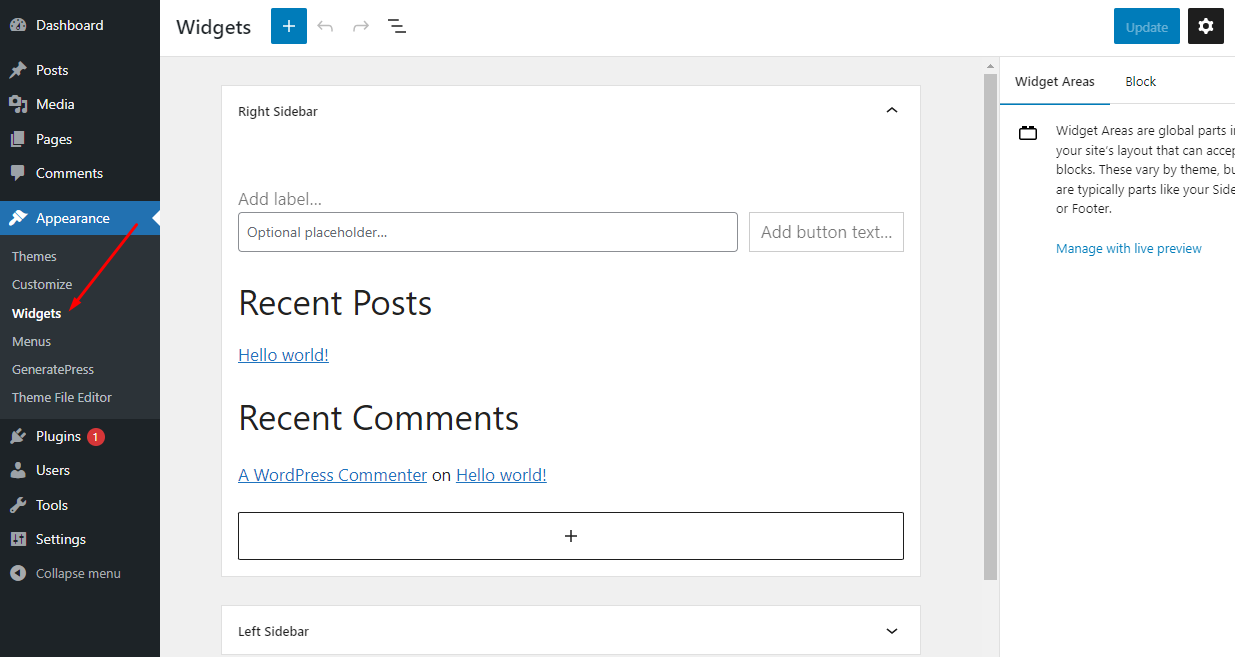
That said, here are the exact steps to install a plugin on WordPress:
- Log in to your WordPress site as an administrator.
- From the WordPress dashboard, go to Plugins > Add New.
- In the “Search Plugins” field, enter the name of the plugin you want to install, or enter a keyword related to the type of plugin you need.
- WordPress will display a list of relevant plugins. Browse through the list and select the plugin you want to install.
- Click the “Install Now” button next to the plugin you want to install.
- WordPress will begin installing the plugin. Once the installation is complete, click the “Activate” button to activate the plugin.
- Some plugins may require additional setup or configuration. If so, you’ll see a notification or a message guiding you through the setup process.
- If you have a plugin file that you downloaded from a third-party source, you can upload the plugin manually by clicking the “Upload Plugin” button at the top of the “Add Plugins” screen. Then select the plugin file you want to upload and click “Install Now.
Not only do widgets and plugins help customize the look of your site but they also enhance its usability by making it easier for users to find information or complete tasks on the site.
When choosing which ones to use, consider what content you want displayed on each page and how users will interact with the site itself.
e. Save and Test the Changes
Once you have made all the necessary changes to your WordPress website, save and test them out.
In fact, i’d recommend you save everything time you change something!
This step will ensure that your website looks and functions as intended.
To save the changes, begin by navigating to Appearance > Customize in the sidebar of your WordPress dashboard.
Once there, select the “Publish” button on the top right corner of the page. This will publish any unpublished changes you have made on your site.
After saving, test out how these changes perform on different devices and browsers.
To do this without switching devices or installing multiple browsers, head over to Google Chrome’s DevTools interface (Ctrl+Shift+I).
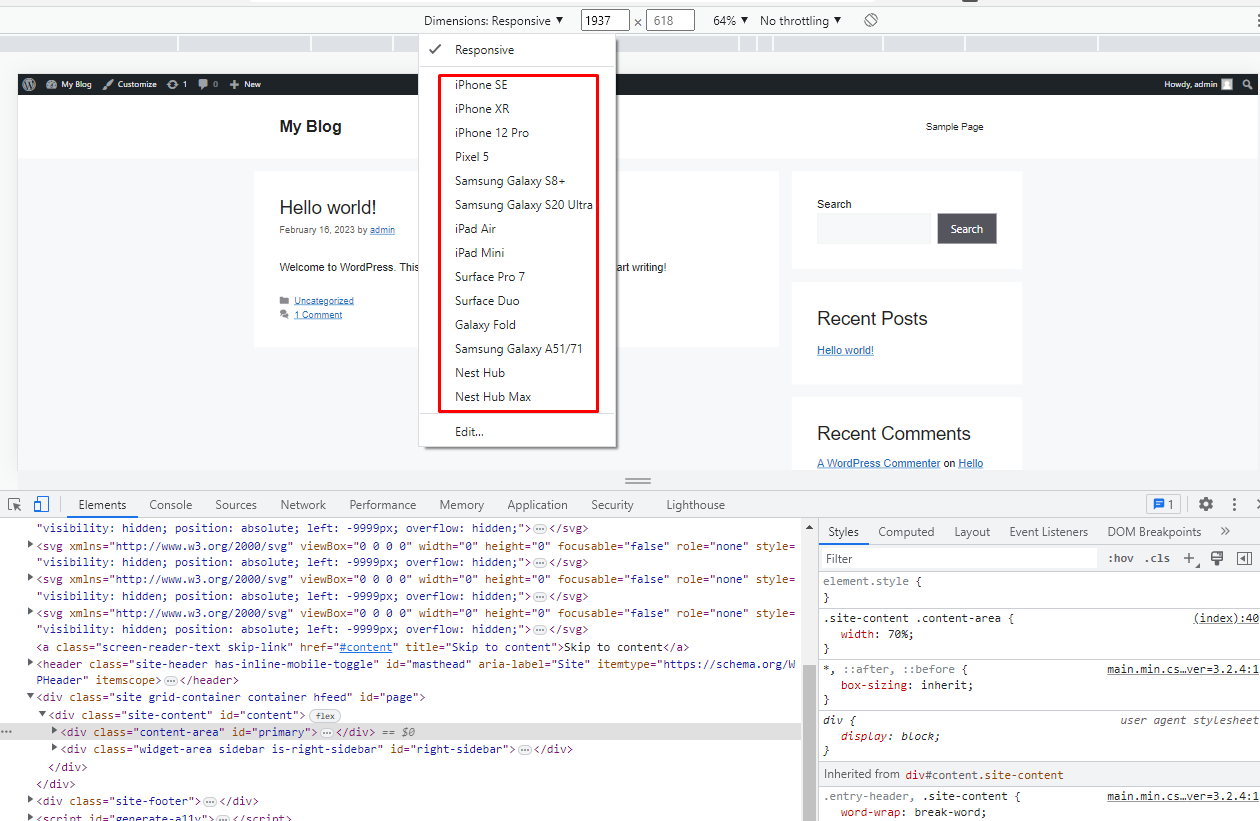
And select “Toggle Device Toolbar” from the three vertical dots menu in its bottom-right corner.
Final Thoughts
To stand tall and be noticed, you need to make the site truly outstanding!
It allows you to create a unique experience that speaks to your target audience and reflects your brand values.
You can take advantage of some of the built-in features, plugins, and themes available.
All of them make it easy to customize your WordPress website without any coding knowledge.
Not to mention, the entire process can also help improve your blog’s overall performance and speed.
Optimizing images and using caching plugins can ensure visitors have a smooth experience regardless of their connection speeds or device type.
And if all else fails, professional developers are always available to help you optimize your site’s performance even further.
Related: